Introduction
In this article, we look at how to perform attribute mapping in Skycloak or Keycloak when a user authenticates through an external Identity Provider (IdP) using Keycloak’s OpenID Connect Identity Broker feature.
For illustration, we use Auth0 as the external IdP.
How it works
I had written previously an article available here, on selecting upfront the Identity Broker by adding additional query string parameter. While this is not mandatory, referring to that article may still be helpful (use auth0 instead of github in the example code).
In this article, we focus purely on the Identity Brokering aspect—specifically, how Keycloak communicates with Auth0, which acts as the OIDC provider. This approach is useful when a client application wants to authenticate users through an external IdP while Keycloak acts as an Identity Broker and maintains its own internal user copy.
Once a user clicks Sign-in with Auth0 at the Keycloak login page (in cases where an upfront IdP selection is not passed), Keycloak redirects the user to Auth0. After successful authentication, Auth0 issues tokens to Keycloak. Keycloak then processes these tokens using its identity brokering flows.
Pre-requisites
- A client application configured with Keycloak
- An OpenID Connect client configured at Auth0
- An Identity Provider configuration for Auth0 in Keycloak
If you just want to test attribute mapping without involving your own client application, you can simply use the Keycloak account-console application that ships with Skycloak or Keycloak.
In this article, we focus on copying the following Auth0 user attributes into Keycloak:
- phone_number
Understanding How Keycloak Creates the User
Near the end of the identity brokering process, Keycloak executes the First Broker Login flow.
This flow ensures that a corresponding Keycloak user is created the first time an external IdP user logs in.
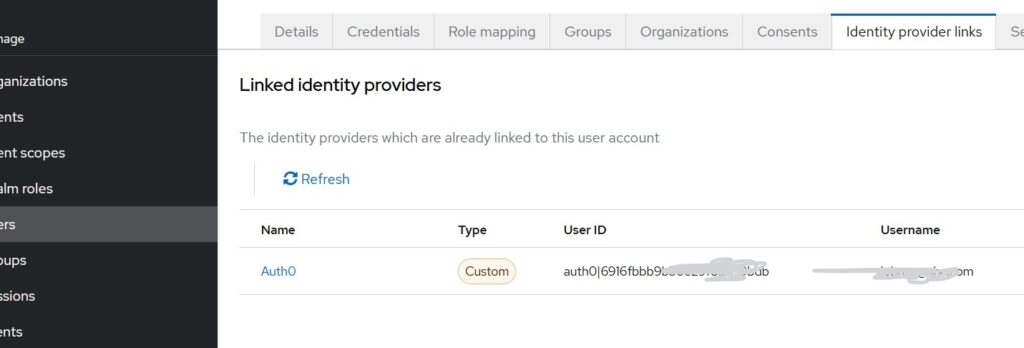
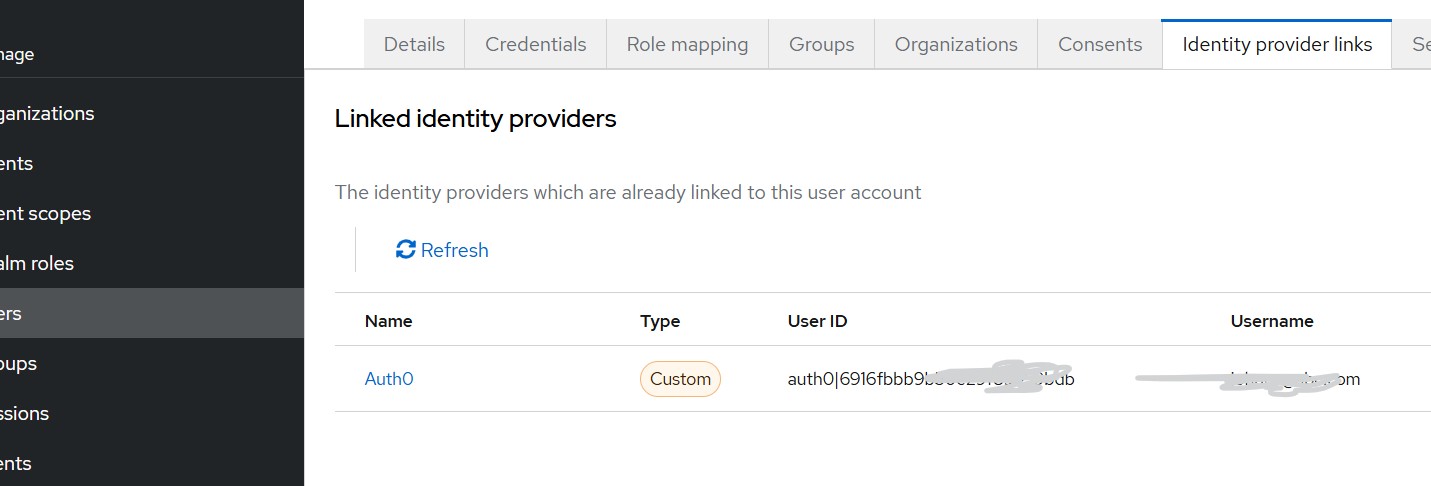
For example, in the Identity Provider Links tab of a user, you will see the Auth0 user ID stored. (as shown in the below diagram)

In my case, I encountered issues in mapping the Auth0 username into Keycloak, so I used the Auth0 email as the Keycloak username. This workaround is acceptable for this demonstration where the focus is attribute mapping.
Configuration Steps
Step 1 – Configuring OIDC client for Keycloak at Auth0
From the Auth0 dashboard:
- Go to Applications
- Click Create Application
- Select Regular Web Application
- Click Create
Make note of the following:
- Allowed Callback URLs https://<your_skycloak_hostname>/realms/<your_realm>/broker/auth0/endpoint (You will get this value from Keycloak while creating Identity Broker for Auth0 at Keycloak)
- Allowed Logout URL https://<your_skycloak_hostname>/realms/broker/auth0/endpoint/logout_response
- Allowed Web origin https://<your_skycloak_hostname>
Finally, copy the Client ID and Client Secret, which will be required in Keycloak.
Step 2 – Configure Auth0 as an Identity Provider in Keycloak
You can create Identity Providers either from:
- Skycloak Console → SSO, or
- Keycloak Admin Console → Identity Providers
For Auth0, choose OpenID Connect v1.0.
Key settings:
- Alias:
auth0 - Redirect URI: It should appear pre-populated and must match the Callback URL configured in Auth0
- Discovery Endpoint: https://<your_Auth0_domain name>/.well-known/openid-configuration Click Show Metadata
- Enter Client ID and Client Secret (the values from Auth0)
Additional Steps for Attribute Mapping
We want to store the Auth0 user’s email and phone number in Keycloak.
a. Create the phone number attribute in Keycloak
Keycloak does not include a phone_number attribute by default.
Create one via:
Realm Settings → User Profile → Attributes → Create Attribute
- Attribute name:
phoneNumber
b. Add scopes to the identity provider
Navigate to:
Identity Providers → auth0 → Expand Advanced
Set Scopes to:
openid profile email phone
This ensures Auth0 includes email and phone number in the token.
Mapping Attributes During First Login
Navigate to:
Identity Providers → auth0 → Mappers → Add Mapper
- For username
- Since Auth0 does not always provide a stable username claim, I chose to set the Keycloak username to the user’s Auth0 email using the
Username Template Importermapper. - Mapper type: Username Template Importer
- Template:
${CLAIM.email}
- Since Auth0 does not always provide a stable username claim, I chose to set the Keycloak username to the user’s Auth0 email using the
- For email
- Mapper Type: Attribute Importer
- Claim: email
- User Attribute: email
- For phone number
- Mapper Type: Attribute Importer
- Claim: phone_number
- User Attribute: phoneNumber
These mappers allow Keycloak to store Auth0’s email and phone number in the local user profile.
Testing the integration
For testing, we can use
- Any client application that selects Auth0 upfront
- A Keycloak-secured application where you choose Sign-in with Auth0
- The built-in account-console application in Keycloak
Before testing:
- Ensure the Auth0 user’s email and phone number are marked as verified in Auth0.
During first login, Keycloak may prompt you to fill missing profile information (e.g., first name, last name). After the first login, the prompts will no longer appear because the user is already linked and mapped.
Note:
If you want to receive the mapped attributes in tokens sent from Keycloak to your application, you must configure additional client mappers. That will be covered in a separate article..
Summary
In this article, we explored how Keycloak (or Skycloak) can copy user attributes from an external OIDC Identity Provider—in this case, Auth0—into its internal user store using the Identity Broker feature.
Skycloak provides managed Keycloak hosting in the cloud, helping organizations overcome the challenges in installing, maintaining, and scaling Keycloak to meet production-grade requirements in a cost-effective way.
If you’re new to Skycloak, visit the Skycloak Getting Started Guide to learn more.

