Let’s break down the process and understand why it’s crucial to setup your app with the PKCE (spelled “pixie”) authorization flow, especially when you envision your app’s security as avoiding the touch of Agent Smith—always attempting to infiltrate your system. We will do this in the context of Keycloak of course. You can do a similar setup with other IAM/IDaaS tools, but we clearly know our favourites ;).
Authorization Flows: A Quick Overview
In the world of OAuth 2.0, authorization flows are methods by which an application requests the authorization needed to access resources. Think of it as gaining the necessary credentials to enter a secure building. For more information about the most common flows for your app, see this blog post.
The Problem with the Authorization Code Flow (without PKCE)
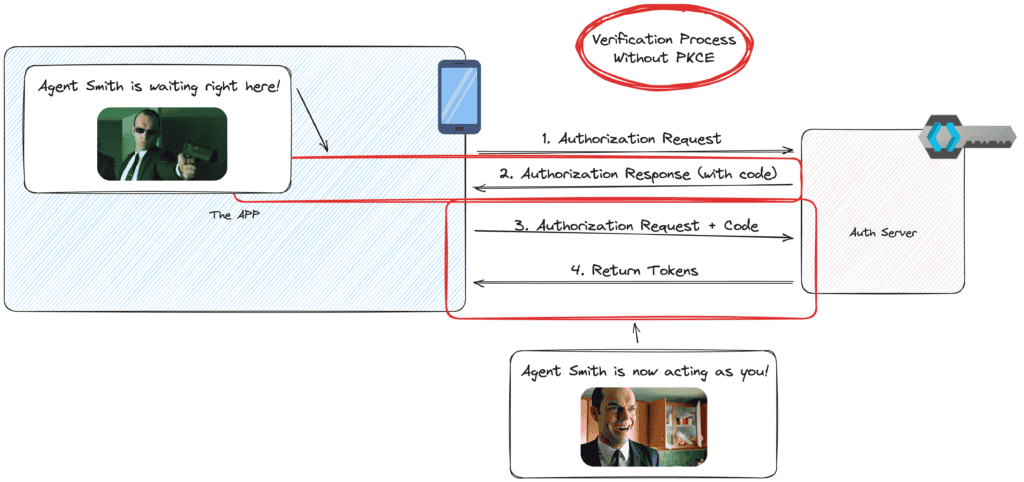
The Authorization Code Flow is a popular method due to its security effectiveness, as it separates the acquisition of the user authorization from the access token by requiring the user to provide the code challenge. However, it has a weakness when used by applications that cannot securely maintain secrets, such as native applications or single-page applications (because their are hosted in the public internet). It’s like leaving the key under the mat; if Agent Smith knows where to look, he might just find it.
As you can see below, when the code is sent back to us after requesting authorization, it is possible for an agent to intercept the information. Afterwards, the code can be re-used to request a token from the auth server. No Bueno.
The Solution: PKCE Authorization Flow
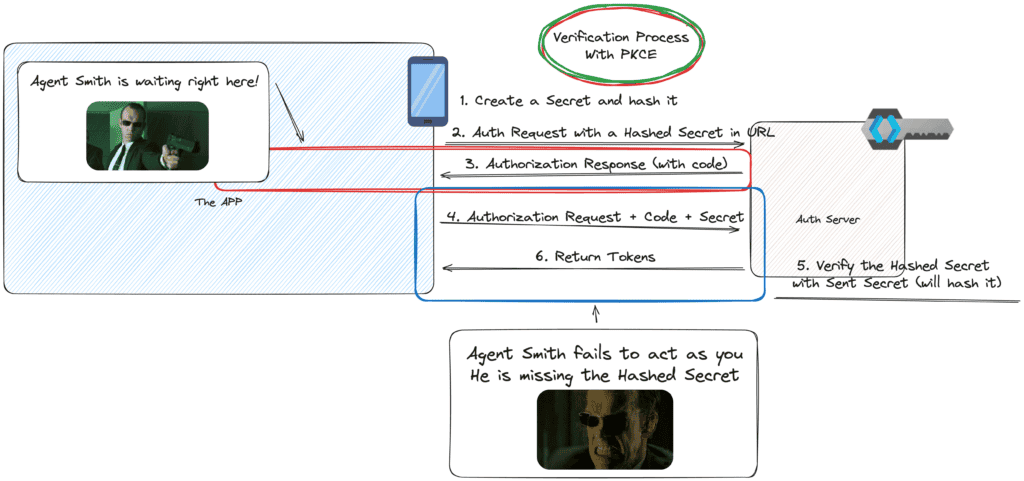
PKCE steps in to add an extra layer of security, ensuring that even if an interceptor (like Agent Smith) gets the authorization code, they cannot exchange it for an access token. It’s like adding a security check to verify whether the person trying to enter the building is really the key’s owner.
How PKCE Works?
- PKCE works by having the client create a secret string, known as the Code Verifier, before it starts the authorization process.
- This verifier is transformed into a Code Challenge by using a hashing function. This is sent as a request parameter. Remember that.
- When the authorization code is sent by the auth server to be used for an access token, the original verifier is sent back to the auth server (step 3 and 4 in the picture above). The verifier (secret string) is sent in the body of the request. Remember that as well.
- The auth server will now hash the secret with the same hashing function as the client. It will then verify If the verifier matches the challenge. If so, the token is granted. If not, the request is denied, thwarting any fake Agents trying to gain access.
Why PKCE Works?
If you looked at the section above, you will notice a few steps are crucial for this to work:
- The client and the auth server need to use the same hashing function. For example, S256 is commonly used for PKCE.
- The hashing function is a one way function. Meaning it cannot be de-hashed. It also means even if agent Smith got a hold of the hashed secret, he cannot do much with it.
- The secret is in the body, not the URL. Which makes it hard for Smith to intercept.
- The body of the request should be using HTTPS! Otherwise, Smith might be able to sniff the network and gain access to the challenge and the verifier. By using HTTPS, you make sure the body of the request is encrypted.
This is effective because it ensures that only the application that made the initial authorization request can retrieve the access token, locking out any agent who might have intercepted the authorization code (or even the hashed secret – aKa the verifier).
Setting Up Keycloak for PKCE
To configure a PKCE client in Keycloak (v23), follow these steps:
- Login to your admin console and access your desired Realm

- Access your client page
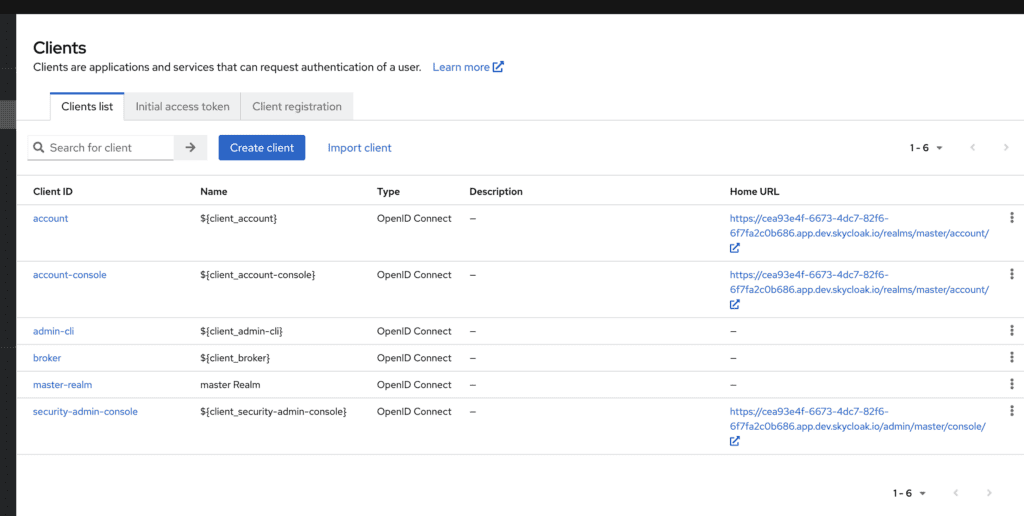
- Create a new client (or edit an existing one)
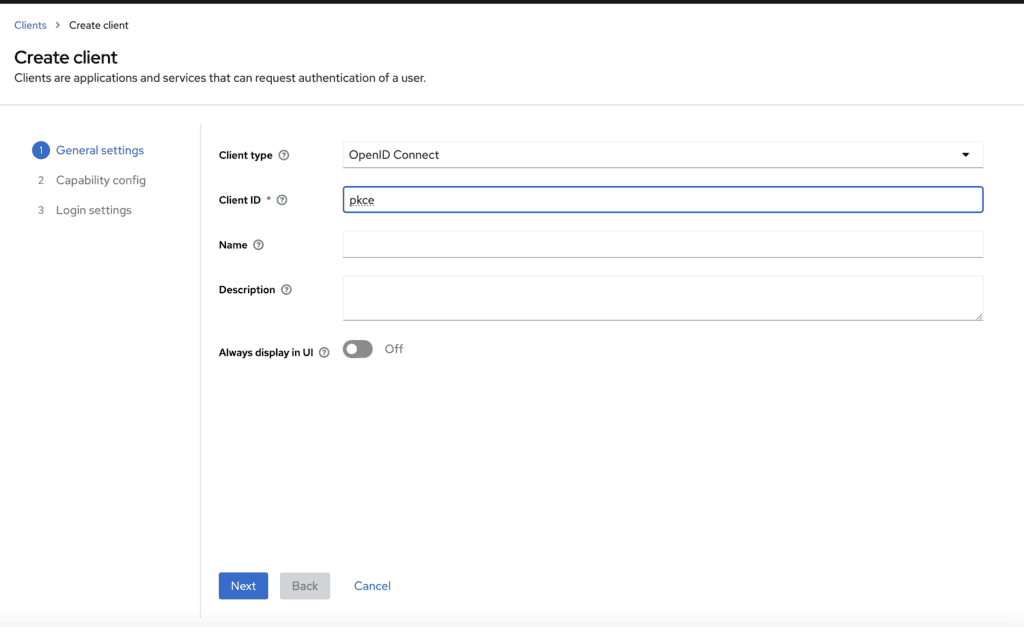
- Make sure to set client Authentication to Off and Authentication flow to Standard flow
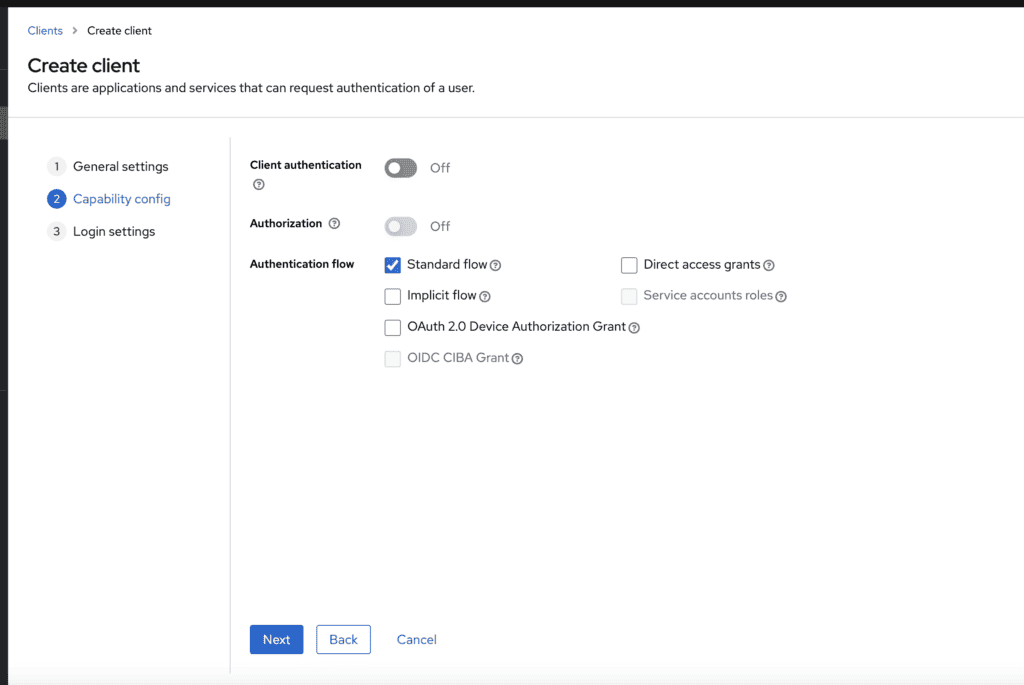
PKCE is now active by default! This settings will allow a client to use both Authorization Code Flow & Authorization Code Flow with PKCE. If you want to enforce the use of PKCE, follow the instruction below.
- Add your URL configuration for redirect, root and others then save. then, go to Advanced tab
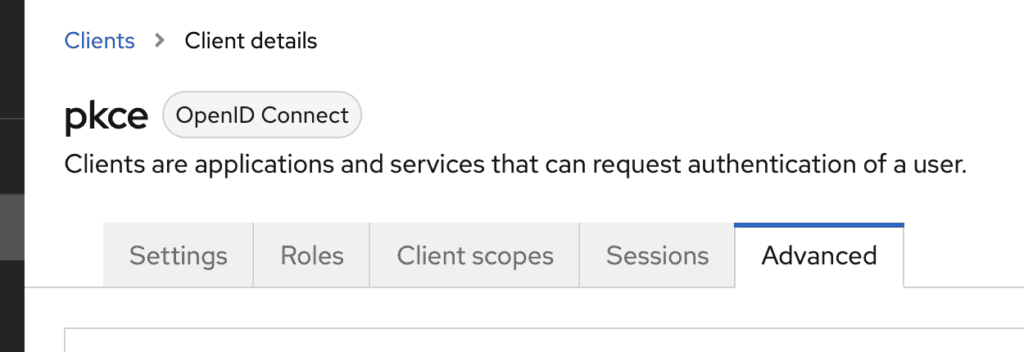
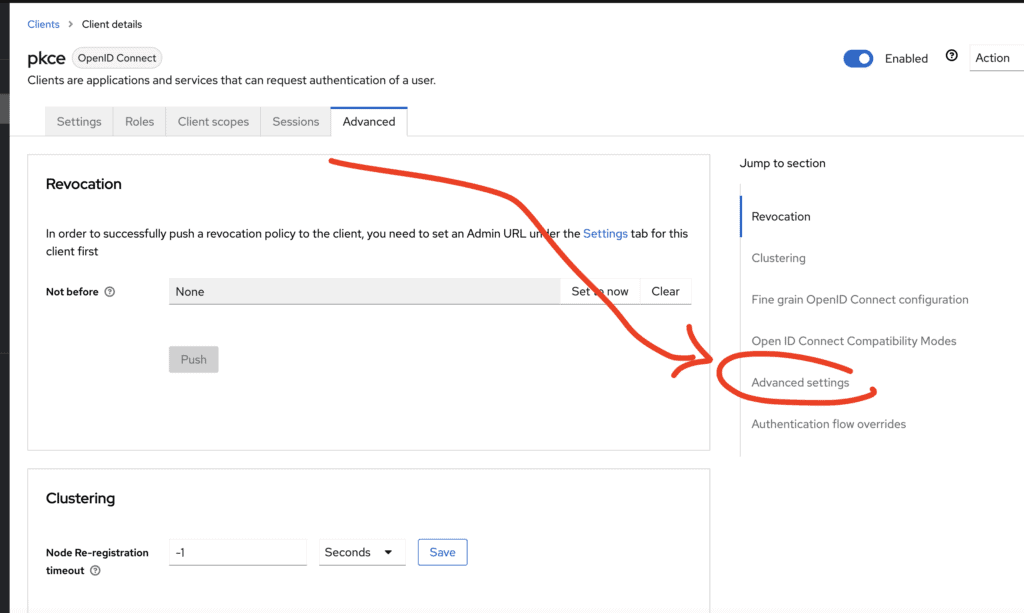
- In the advanced tab, go to the Advanced settings
- Select the challenge method (which is the hashing function). We highly recommend S256
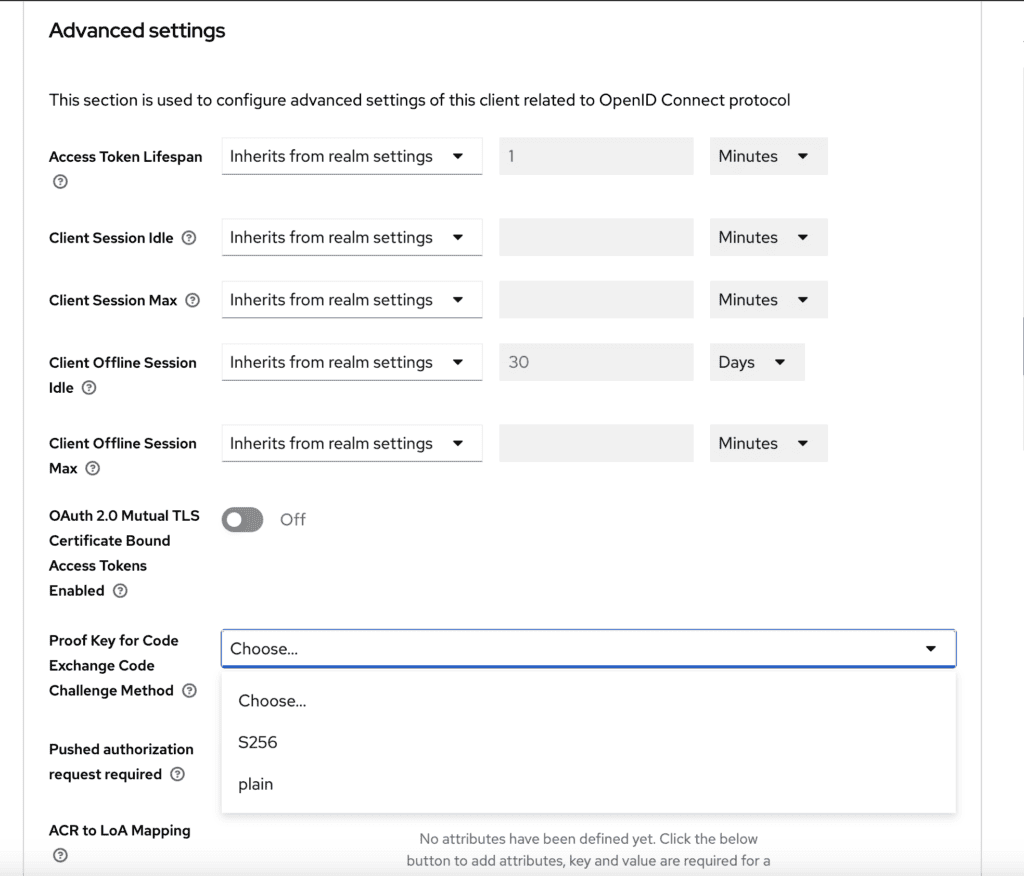
Don’t Forget Your Application
That’s what is required on Keycloak side. You must now ensure your client is sending the challenge and the verifier. For example, if you are using keycloak-js, you have to set the pkceMethod field in the initOptions at init time.

