Introduction
The latest versions of Keycloak support creating multiple Organizations within a single realm. In this article, we explore how this feature can help businesses that have multiple B2B customers or third-party partners. By using Organizations, you can authenticate these users against their own identity source (their single source of truth) while still accessing applications protected by your Keycloak realm.
For this walkthrough, I am using Skycloak, a managed cloud-hosted Keycloak IAM service. Keycloak guide over here has more details on the Organizations feature.
Although Keycloak Organizations support multiple onboarding approaches, this article focuses on using external Identity Providers configured specifically for each organization.
Pre-requisites
- External Identity Providers configured. For configuring external Identity Providers, you can refer the article available here.
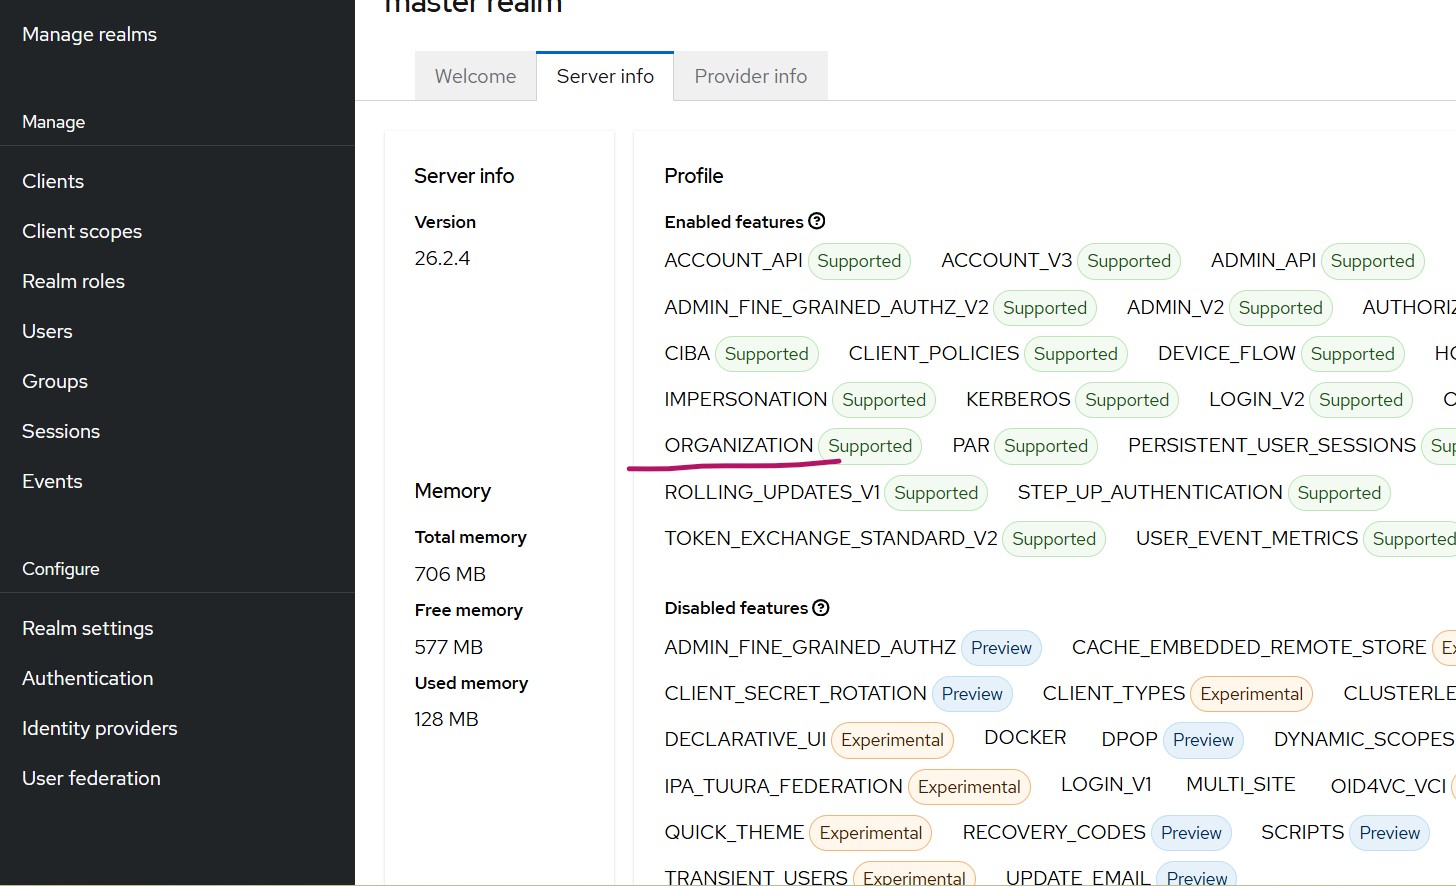
- Keycloak having Organization feature supported. This article uses Keycloak 26.2.4. The Organizations feature was introduced in Keycloak 25. To confirm support, open the master realm → Server Info and verify that the Organizations feature is listed as supported.
- Organization feature enabled for your realm:
- Go to Realm Settings → Turn On Organization
- Once enabled, an Organization option will appear in the left navigation menu.
Organization feature brief overview
Navigate to Authentication in your realm
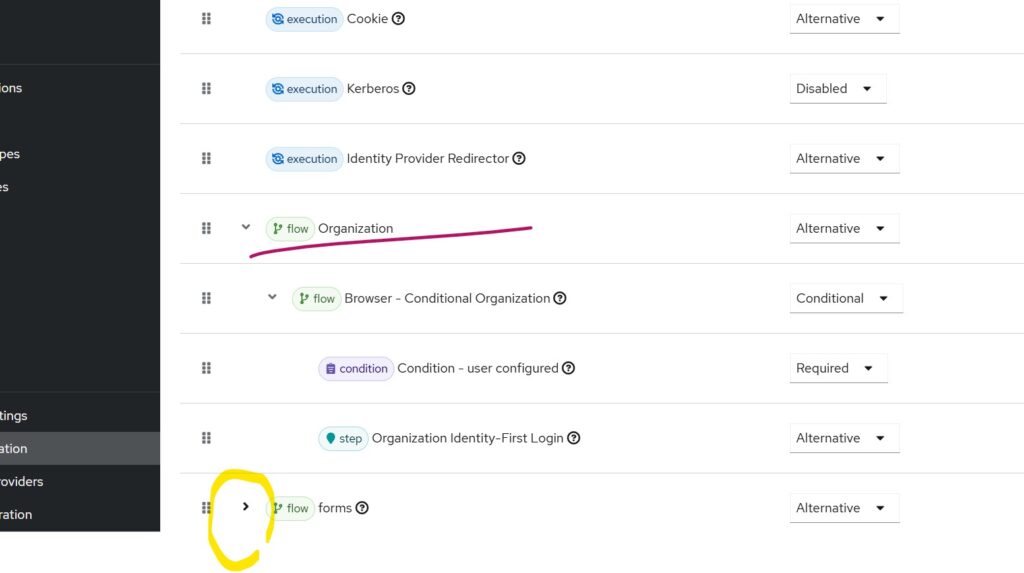
You will notice that the browser and first broker login flows now have additional steps related to Organizations.

When creating an Organization in Keycloak, you must assign it a unique domain name.
For example, if your external IdP authenticates users whose emails end with abc.com, you should specify abc.com as the domain when creating the organization.
Configuration Steps
Step 1- Create the Organization
Navigate to the Organization:
Specify
- Name: Specify a name (for example, abc)
- Alias: Alias value (for example, abc)
- Domain – Add the domain(s) associated with the organization, for example abc.com, and save.
Step 2 – Link the Identity Provider
- Select the organization created in step 1
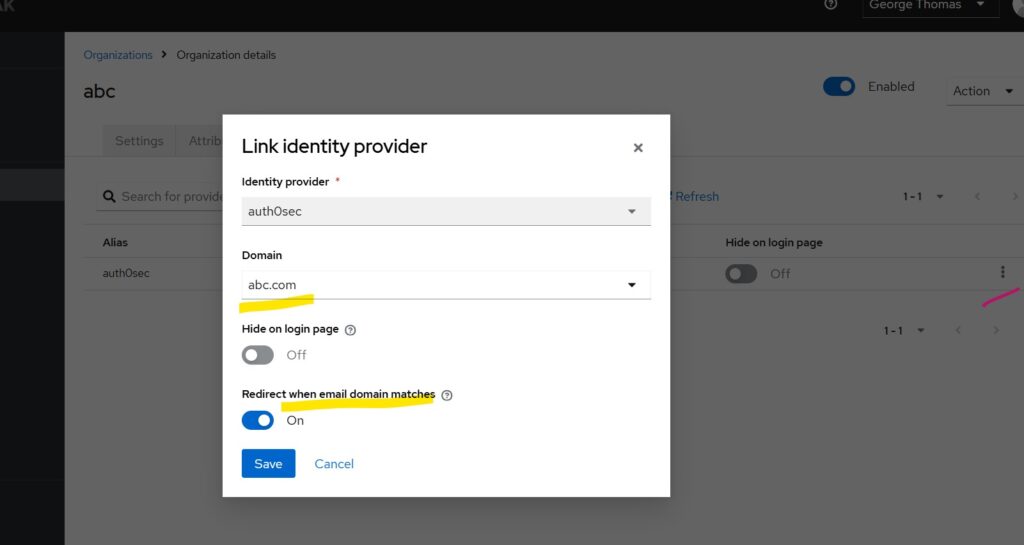
- Go to Identity Providers tab-> Link Identity Provider
- Choose the IdP whose user email domain matches the organization domain.

Keycloak also provides a toggle that enables automatic redirection to the external IdP when the login email matches the organization’s domain. If enabled, when a user enters an email like [email protected] they will be redirected directly to the linked external IdP.

Since we already have an organization configured and if we either launch the built-in console window or access a client application configured with Keycloak, we will get the above prompt to specify user email.
After successful authentication, the First Broker Login flow is triggered, and new users are created in Keycloak. They will appear under the Organization’s Membership tab as Managed members.
Multiple Organizations Example
If you create a second organization (e.g., domain: acme.com) and a user enters [email protected] Keycloak will redirect them to the external IdP linked to that organization.
Important considerations:
- Each organization must be linked to a unique Identity Provider.
- A domain that is already assigned to one organization cannot be reused for another.
Getting Organization Claim in the Client Application
To include the optional Organization scope, your OIDC client application must explicitly add organization to its list of requested scopes. For example, in a Spring Boot OAuth2 client application, this can be configured in application.properties as follows:
spring.security.oauth2.client.registration.keycloak.scope=openid,profile,email,organization
Adding this scope ensures that your client application receives the organization-related claims in the token, allowing it to identify which organization the user belongs to. Keycloak Organizations also support pushing organization attributes and the organization ID into the issued tokens.
Steps to enable organization attributes and ID in the claim
- In the Keycloak Admin Console, navigate to Client Scopes and select Organization.
- Open the Mappers tab and choose the organization mapper.
- Toggle Add organization attributes to ON
- Toggle Add organization id to ON
- From the left pane, navigate to Organizations, and select the specific organization you want to configure.
- Open the Attributes tab and add the attributes you want to associate with this organization.
Summary
In this article, we saw how to configure multiple organizations within a single Keycloak realm to support multi-tenancy. You can also redirect users upfront to a specific Identity Provider using the kc_idp_hint parameter.
Depending on business requirements, organizations can choose between:
- Multi-tenancy within a single realm using the Organizations feature, or
- Traditional multi-tenancy using multiple realms.
Skycloak provides production-ready managed Keycloak hosting, helping teams avoid the complexity of maintaining and scaling Keycloak themselves.
If you’re new to Skycloak, visit the Skycloak Getting Started Guide to learn more.
