
This guide walks you through connecting a Spring Boot application secured with Keycloak to Skycloak in just a few minutes.
We’ll use the todo list application whose complete source code is available on the GitHub repository ivangfr/spring-boot-keycloak-skycloak-todo-app.
The Todo App demonstrates:
- Secure OAuth2/OIDC authentication using Keycloak as the identity provider.
- Built with Spring Boot.
- Features role-based access control:
- Regular users manage their own todos (has the
TODO_USERrole). - Admin users can view and manage all todos (has the
TODO_ADMINrole).
- Regular users manage their own todos (has the
- Uses Spring Data JPA with an H2 in-memory database.
- Uses Thymeleaf for server-side templating.
- Runs locally at
http://localhost:8080 - Connects to Skycloak, which manages the Keycloak cluster and realm.
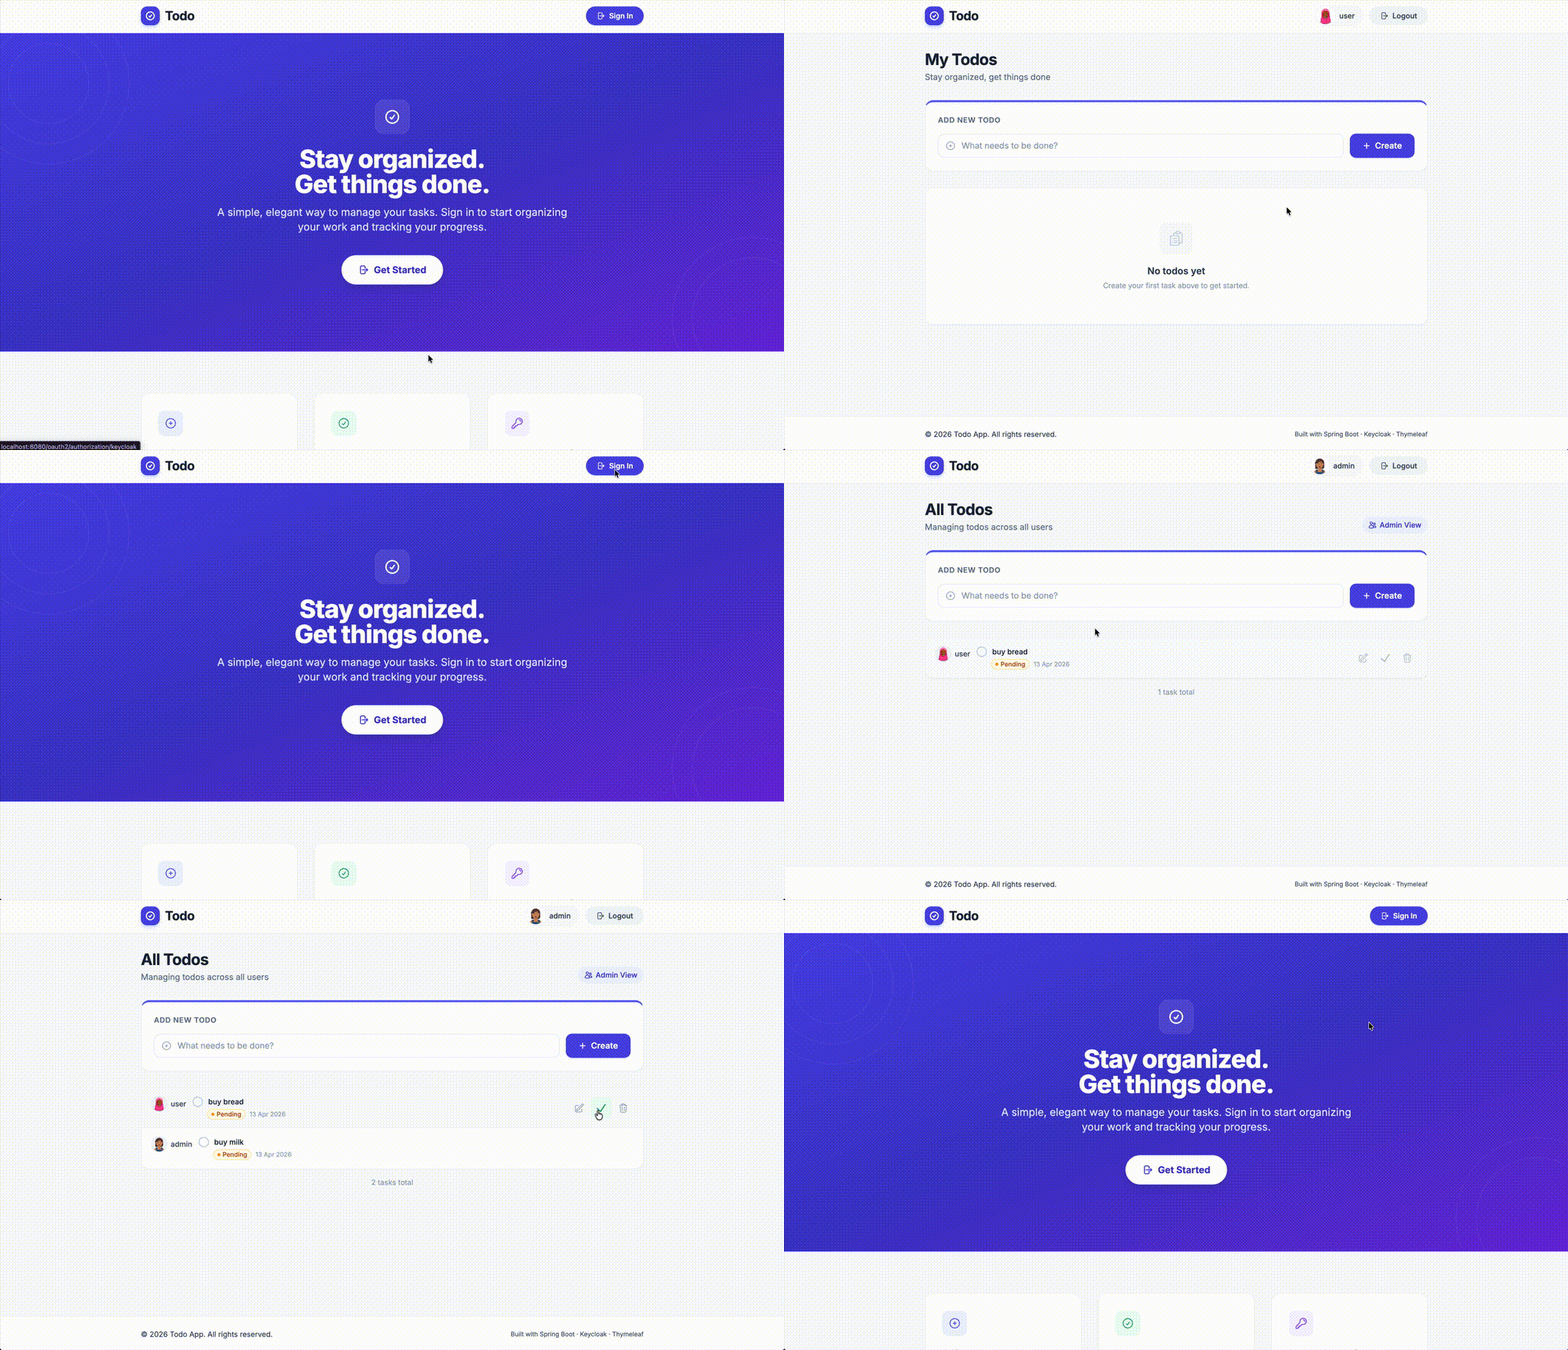
Here is a demo of the application in action:
What is Skycloak?
Skycloak is a managed Keycloak platform that simplifies deploying, scaling, and maintaining Keycloak clusters.
Instead of installing and managing Keycloak manually, Skycloak provides:
- Managed Keycloak clusters
- Automated updates
- Built-in monitoring
- High availability
- Simplified configuration of realms and users
This allows developers to focus on application development rather than infrastructure management.
Why Use Skycloak?
Running Keycloak manually requires managing servers, scaling infrastructure, backups, and upgrades.
Skycloak reduces this operational overhead by providing:
- Automatic cluster management
- Built-in high availability
- Simplified upgrades
- Centralized configuration
- Monitoring and logging features
This makes it easier to run production-grade authentication systems without managing infrastructure manually.
Prerequisites
Before starting, make sure you have:
Java 25or higher;- A containerization tool (e.g.,
Docker,Podman, etc.) Gitinstalled- A Skycloak account
- Basic familiarity with Spring Boot
Running Keycloak in Docker
Before we integrate with Skycloak, we run Keycloak in a Docker container as our local identity provider. This is the setup most Spring Boot developers start with, and it is worth doing first: everything you configure here maps one to one onto the managed instance later.
Clone the repository:
git clone https://github.com/ivangfr/spring-boot-keycloak-skycloak-todo-app.git
cd spring-boot-keycloak-skycloak-todo-app
Start Keycloak on port 8081, leaving 8080 free for the Spring Boot app:
docker run -d --name keycloak-local
  -p 8081:8080
  -e KC_BOOTSTRAP_ADMIN_USERNAME=admin
  -e KC_BOOTSTRAP_ADMIN_PASSWORD=admin
  quay.io/keycloak/keycloak:26.5 start-dev
Two things to note. start-dev runs an in-memory database and disables HTTPS, which is fine locally and never fine in production. And since Keycloak 26, the bootstrap admin variables are KC_BOOTSTRAP_ADMIN_USERNAME and KC_BOOTSTRAP_ADMIN_PASSWORD; the older KEYCLOAK_ADMIN and KEYCLOAK_ADMIN_PASSWORD names are gone, which is the most common reason a copied-from-a-blog Docker command fails to start.
If you prefer Compose, the equivalent:
services:
  keycloak:
    image: quay.io/keycloak/keycloak:26.5
    command: start-dev
    ports:
      - "8081:8080"
    environment:
      KC_BOOTSTRAP_ADMIN_USERNAME: admin
      KC_BOOTSTRAP_ADMIN_PASSWORD: admin
Open http://localhost:8081, sign in with admin / admin, and create a realm named todo-realm with a client named todo-app-client. The README walks through the exact realm, role, and user setup if you want to script it rather than click it.
Your Spring Boot app then points at the container:
ISSUER_URL=http://localhost:8081/realms/todo-realm
CLIENT_ID=todo-app-client
That is the whole local loop. Now the interesting part: moving it to a managed Keycloak changes those two values and nothing else. No code, no dependency, no Spring Security config. The rest of this guide sets up the same realm in Skycloak so you can see that for yourself.
This guide focuses on the platform side. For a deep dive into the Spring Security configuration itself, see Spring Boot + Keycloak OAuth 2.0: The Complete Guide.
Skycloak Setup
Once you have both Keycloak and the Spring Boot application running, we’ll proceed to connect it to Skycloak.
Ready? Let’s get started!
Login
Open a browser and access the “Skycloak website” at https://skycloak.io. Log in to your account using your credentials.
Cluster
Once logged in, make sure you have a cluster created. If you don’t have one, create a new cluster.
Realm
The next step is to create a realm for our todo application.
In the left sidebar, select your cluster. My cluster is called todo-app-cluster.
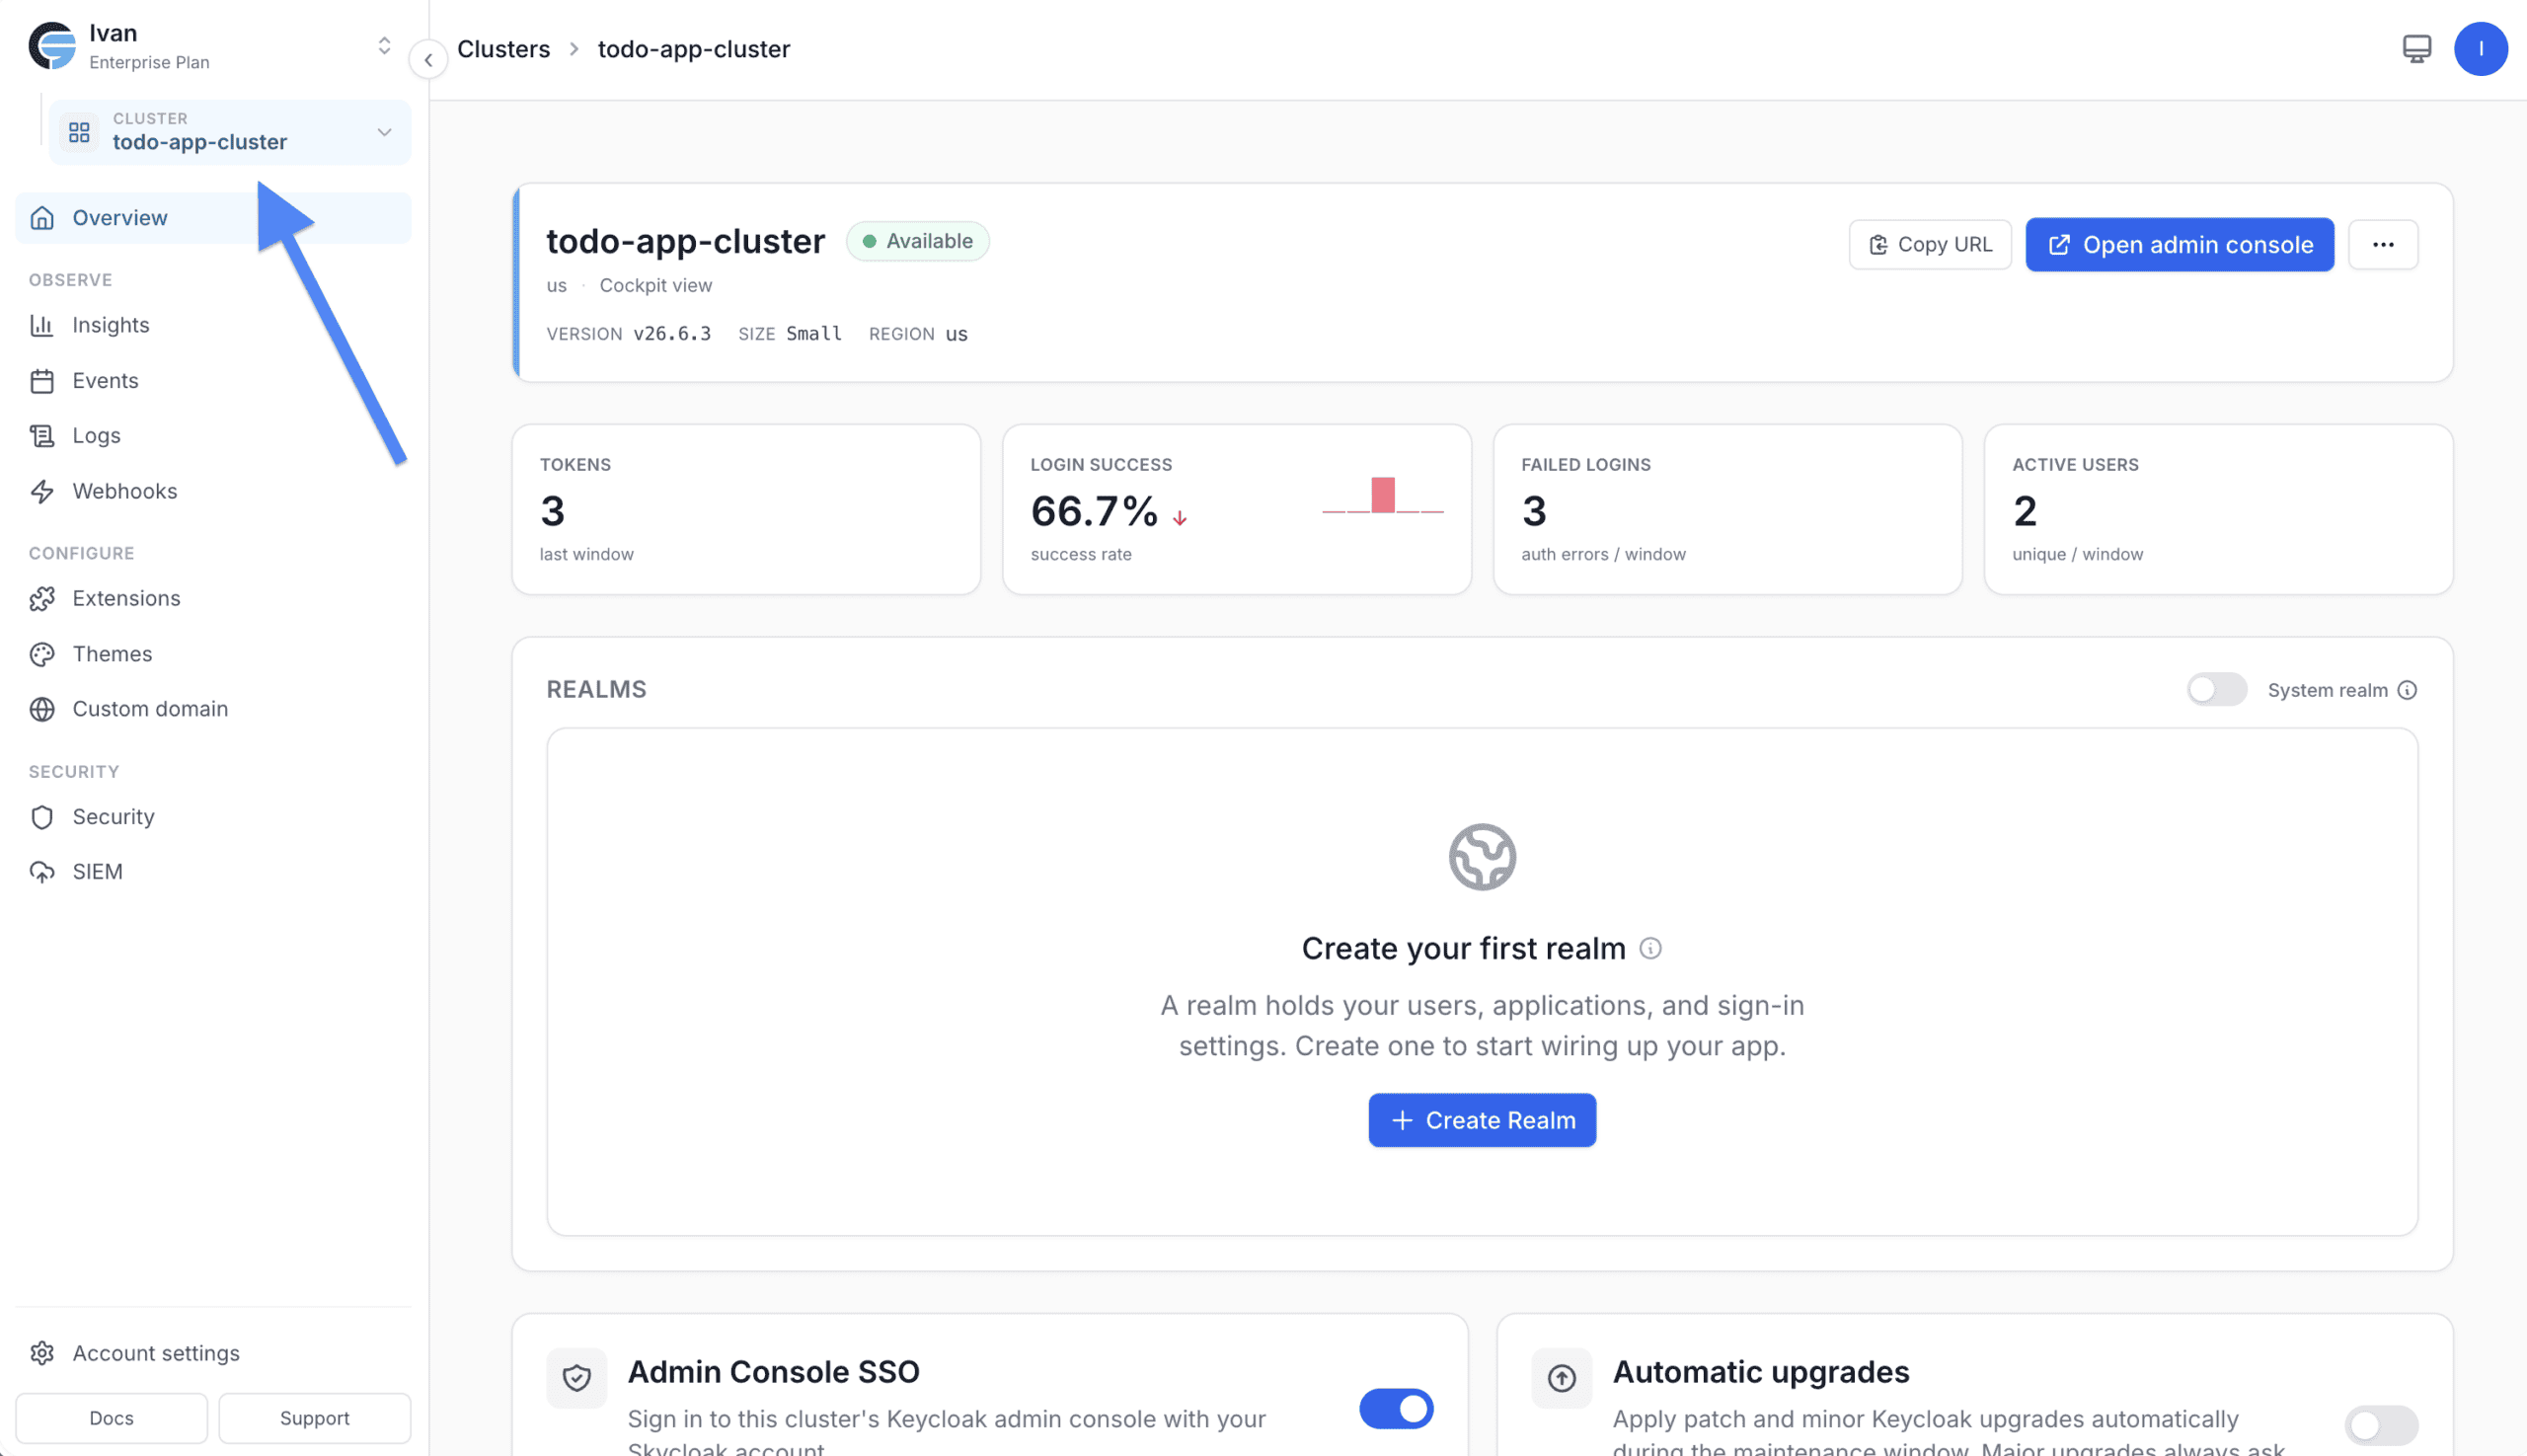
Then, click on the “+ Create Realm” button located at the center of the page.
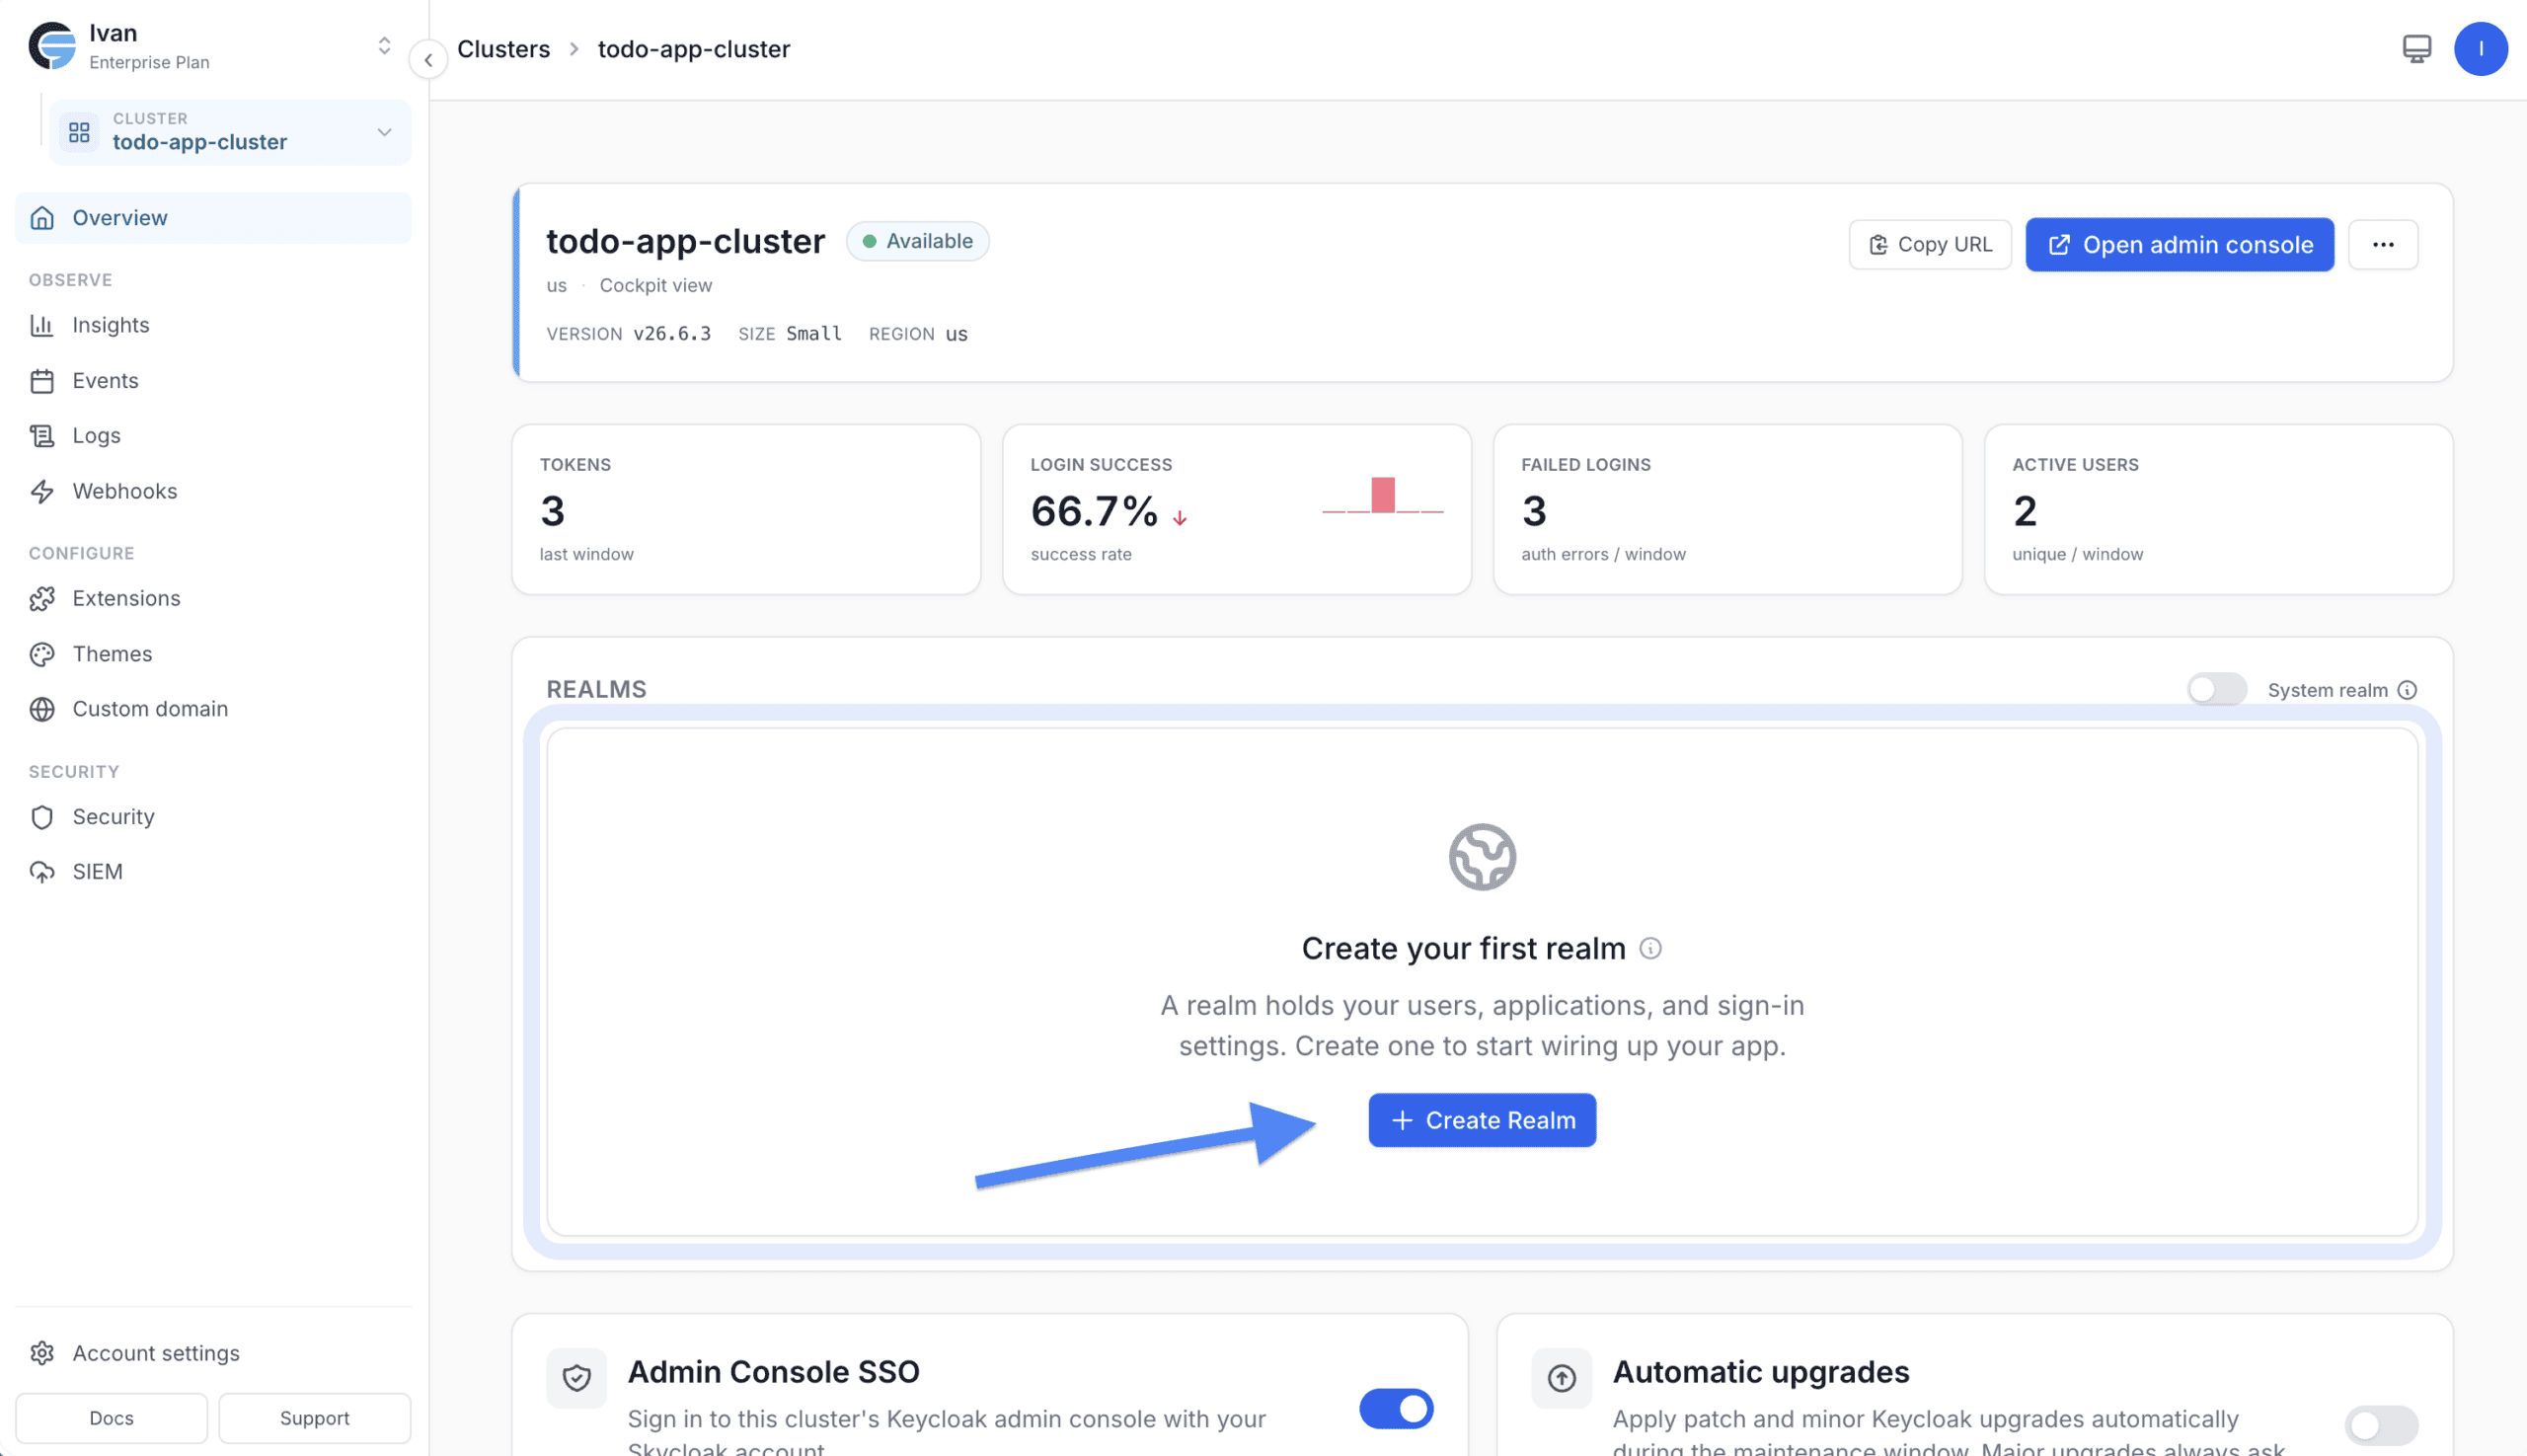
Once the “+ Create Realm” button is clicked, the following page will appear. Fill in the form as follows:
- Realm Name:
todo-app-realm - Display Name:
Todo App Realm
To finalize, click on the “Create Realm” button.
Client
Now, it’s time to create a client for our todo application.
For it, on the left sidebar (“CONNECT” section), click on “Applications” menu item.
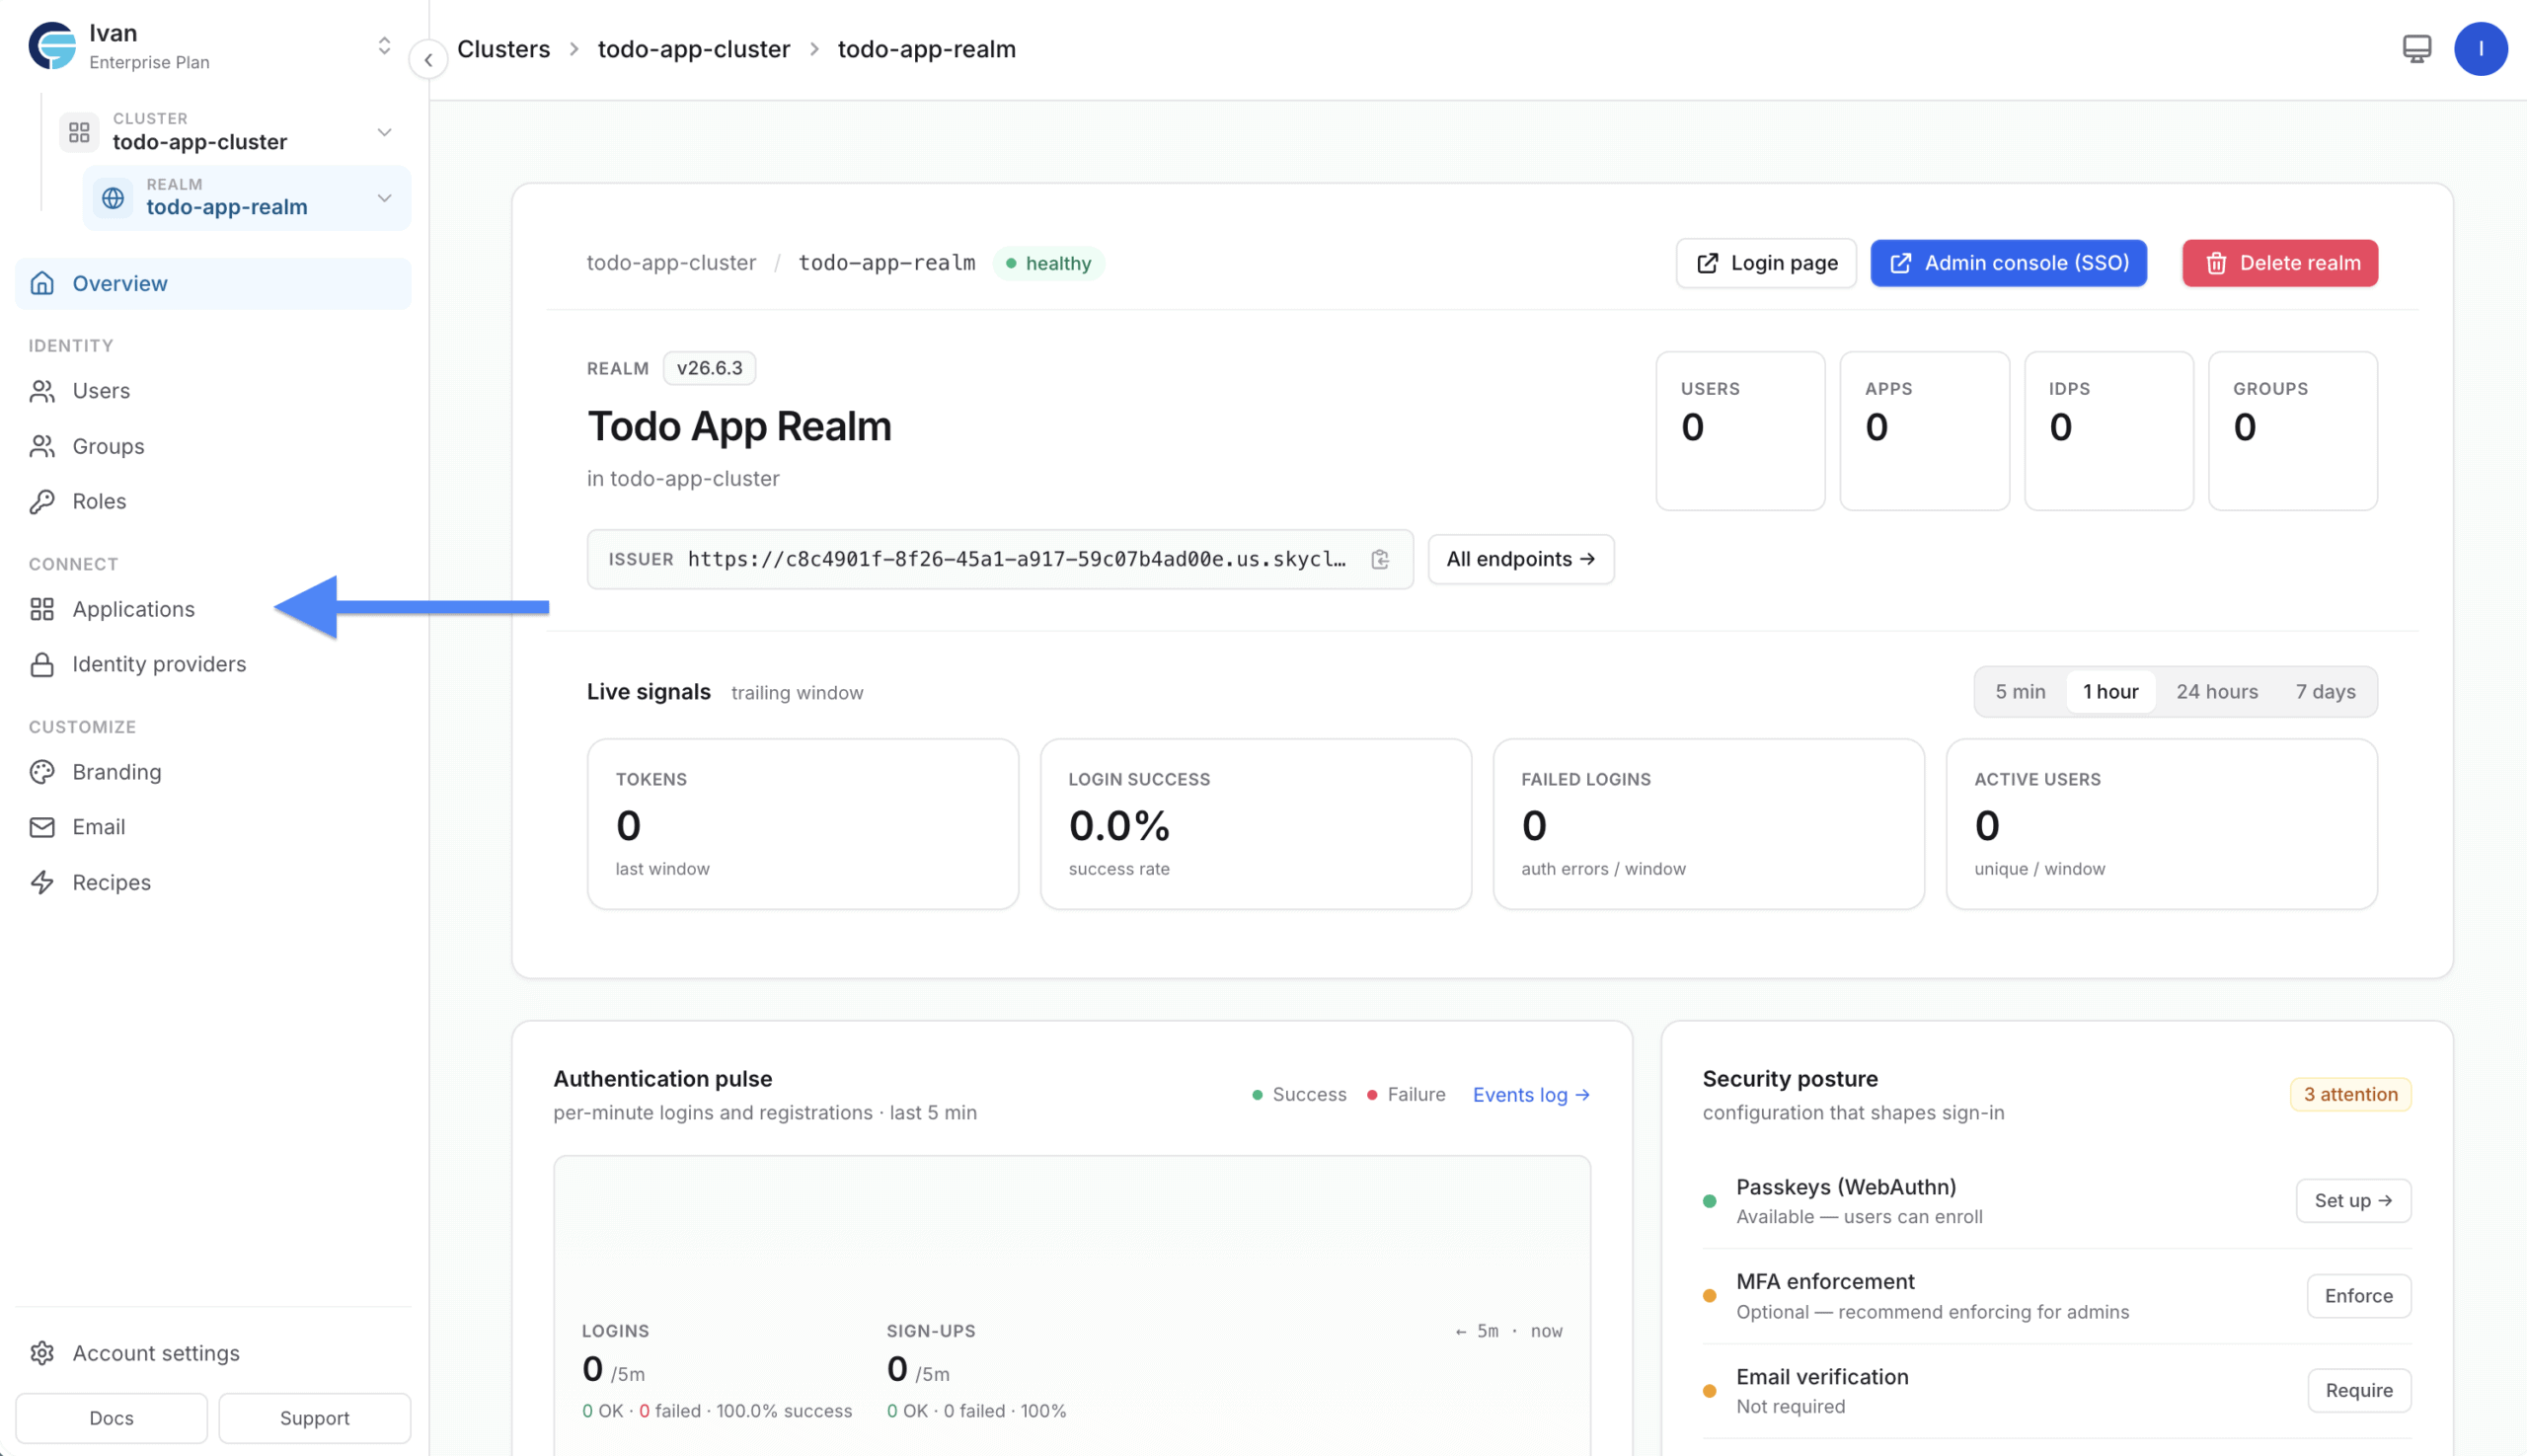
Then click on the “+ Create Application” button located at the top right corner.
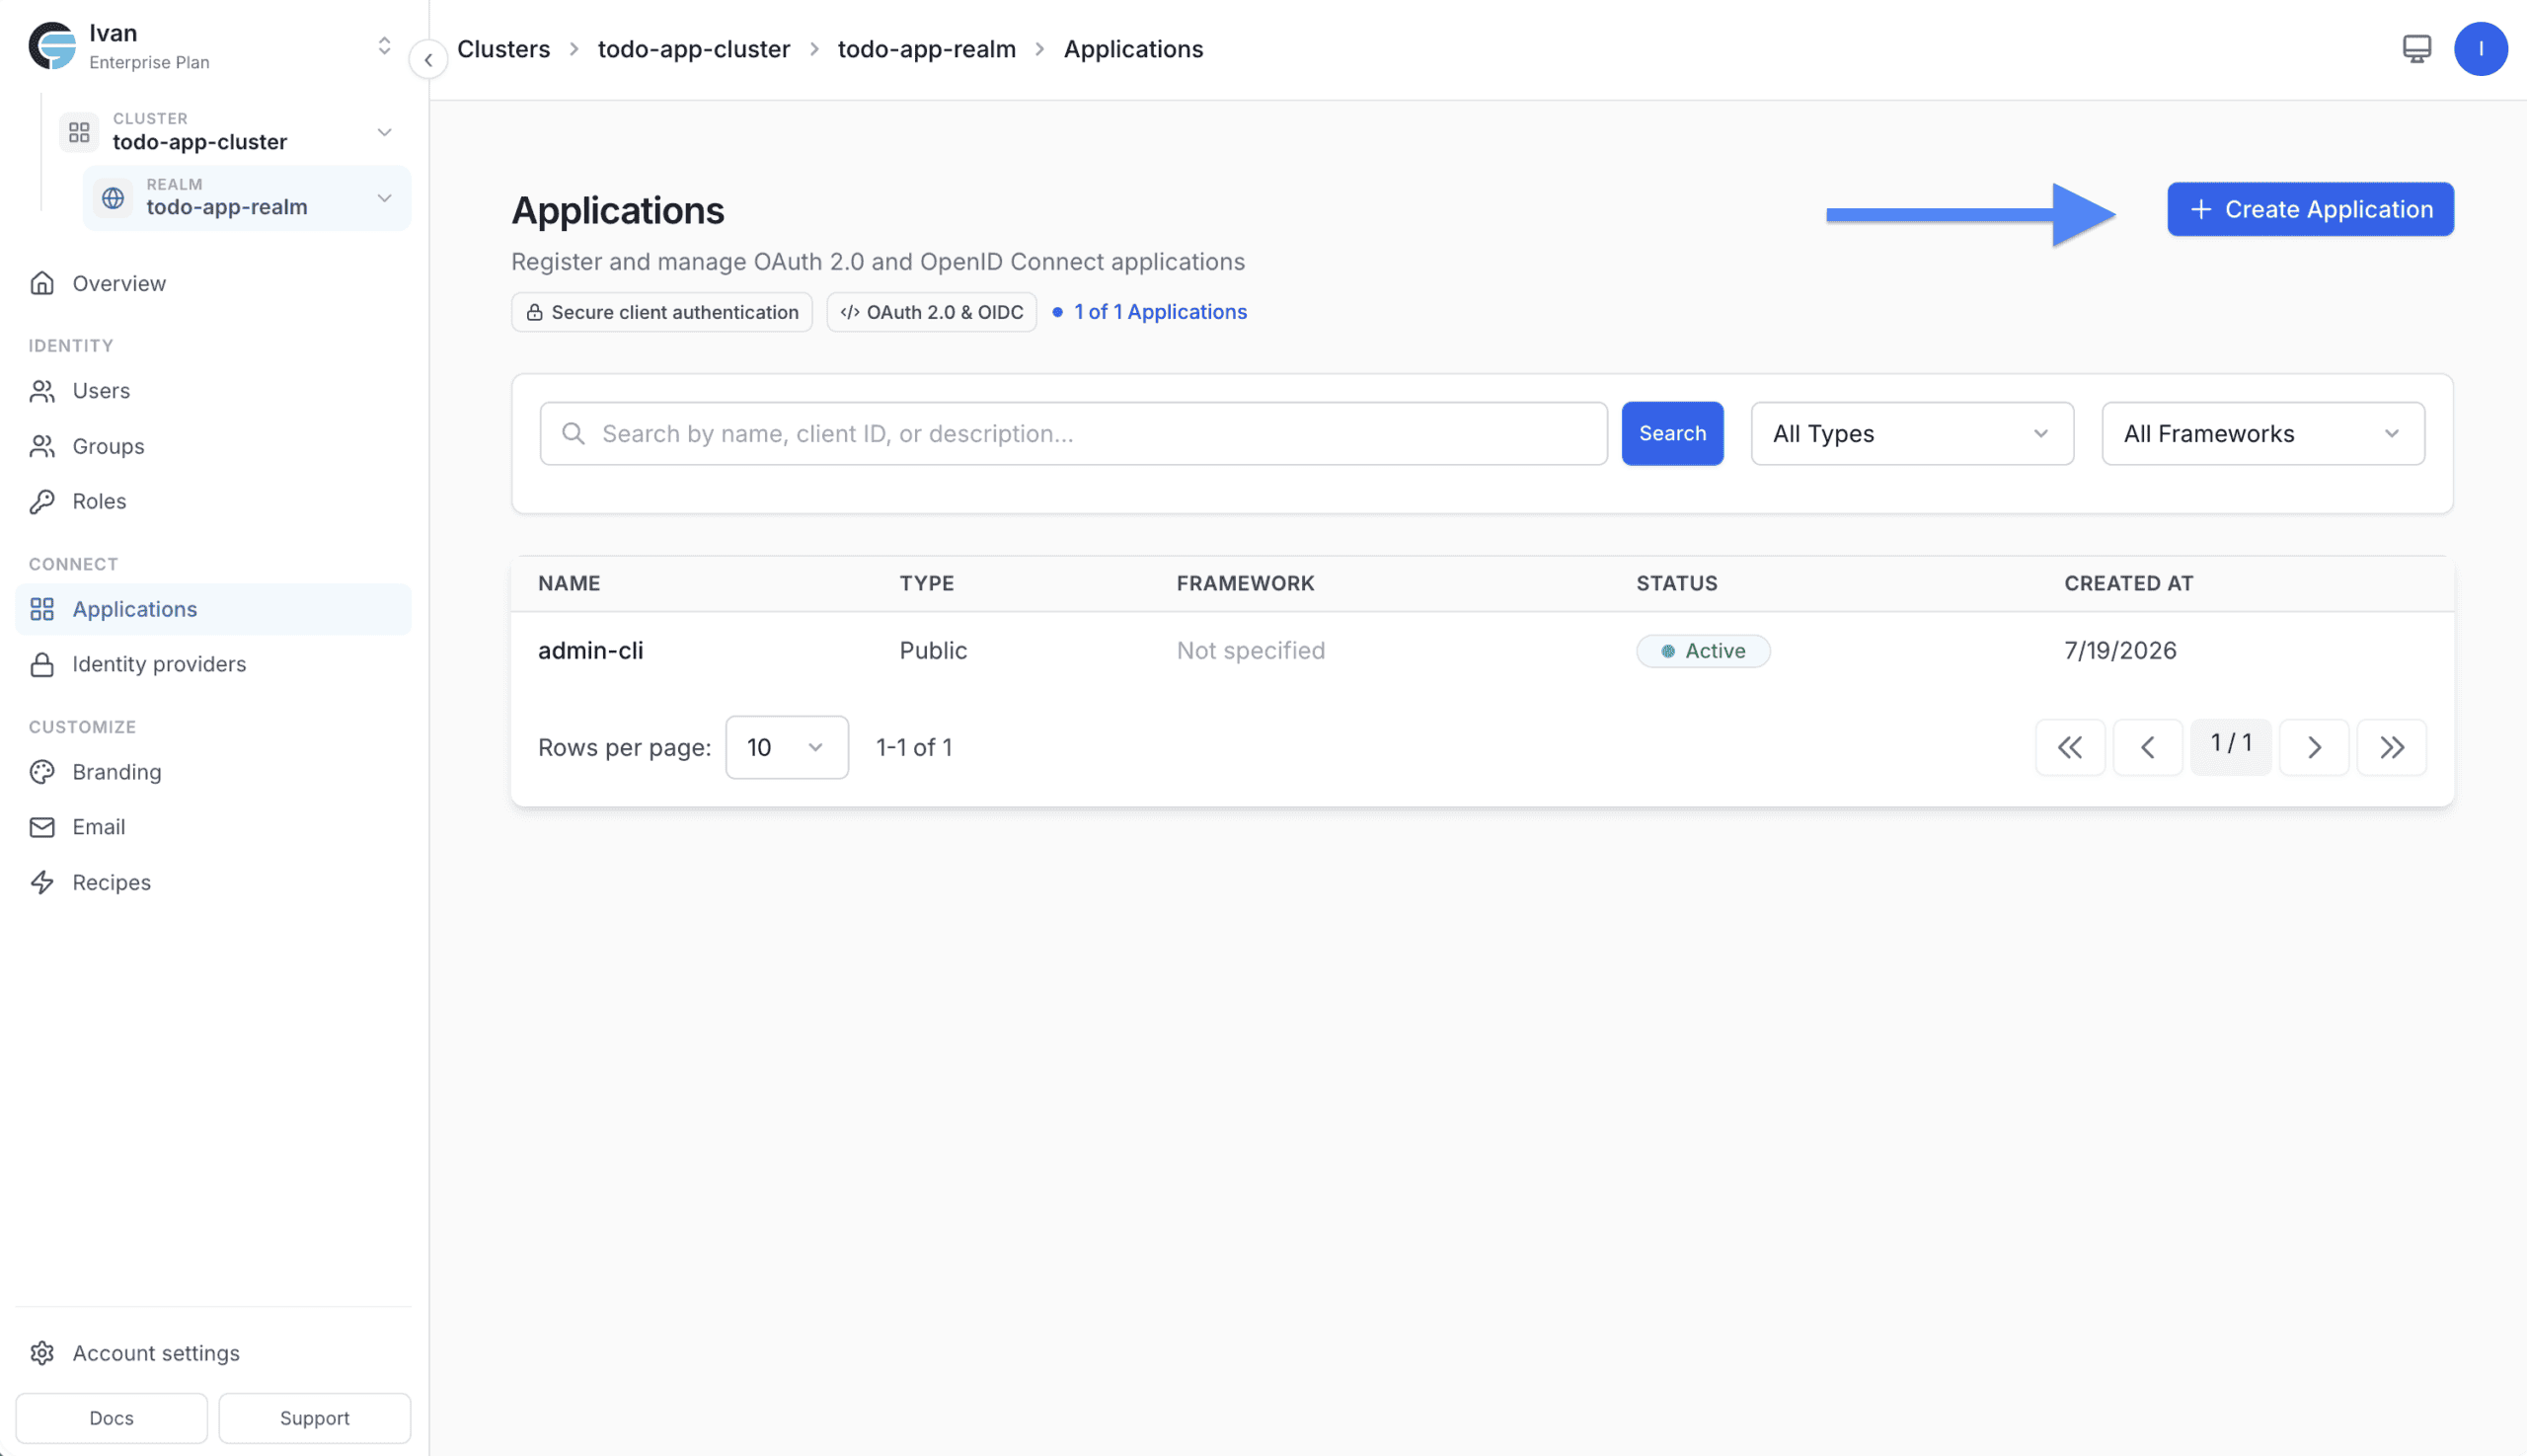
On the “Create Application” page, select “Single Page App” as the application type and fill in the form as follows:
- Application Name:
todo-app-client - Description:
Client for the todo list application
Then, click on the “Continue” button.
On the next page, “Configure & Create”, fill:
- Redirect URIs:
http://localhost:8080/*
Finally, click on the “Create Application” button.
The application created successfully message should appear with the Issuer URL and Client ID values.
Save these credentials, you’ll need them to configure your app. But, don’t worry, you can always access them later in the application settings.
To proceed, click on the “Go to Application” button.
Roles
Next, let’s configure the roles used in the todo application, TODO_ADMIN and TODO_USER. (New to Keycloak roles? See how client roles differ from realm roles and client scopes.)
For it, we will need to access the “Keycloak Admin Console” of our cluster. To access it:
- In the left sidebar, select your cluster.
- Then, on the top right corner, click on the “Open Admin Console” button.
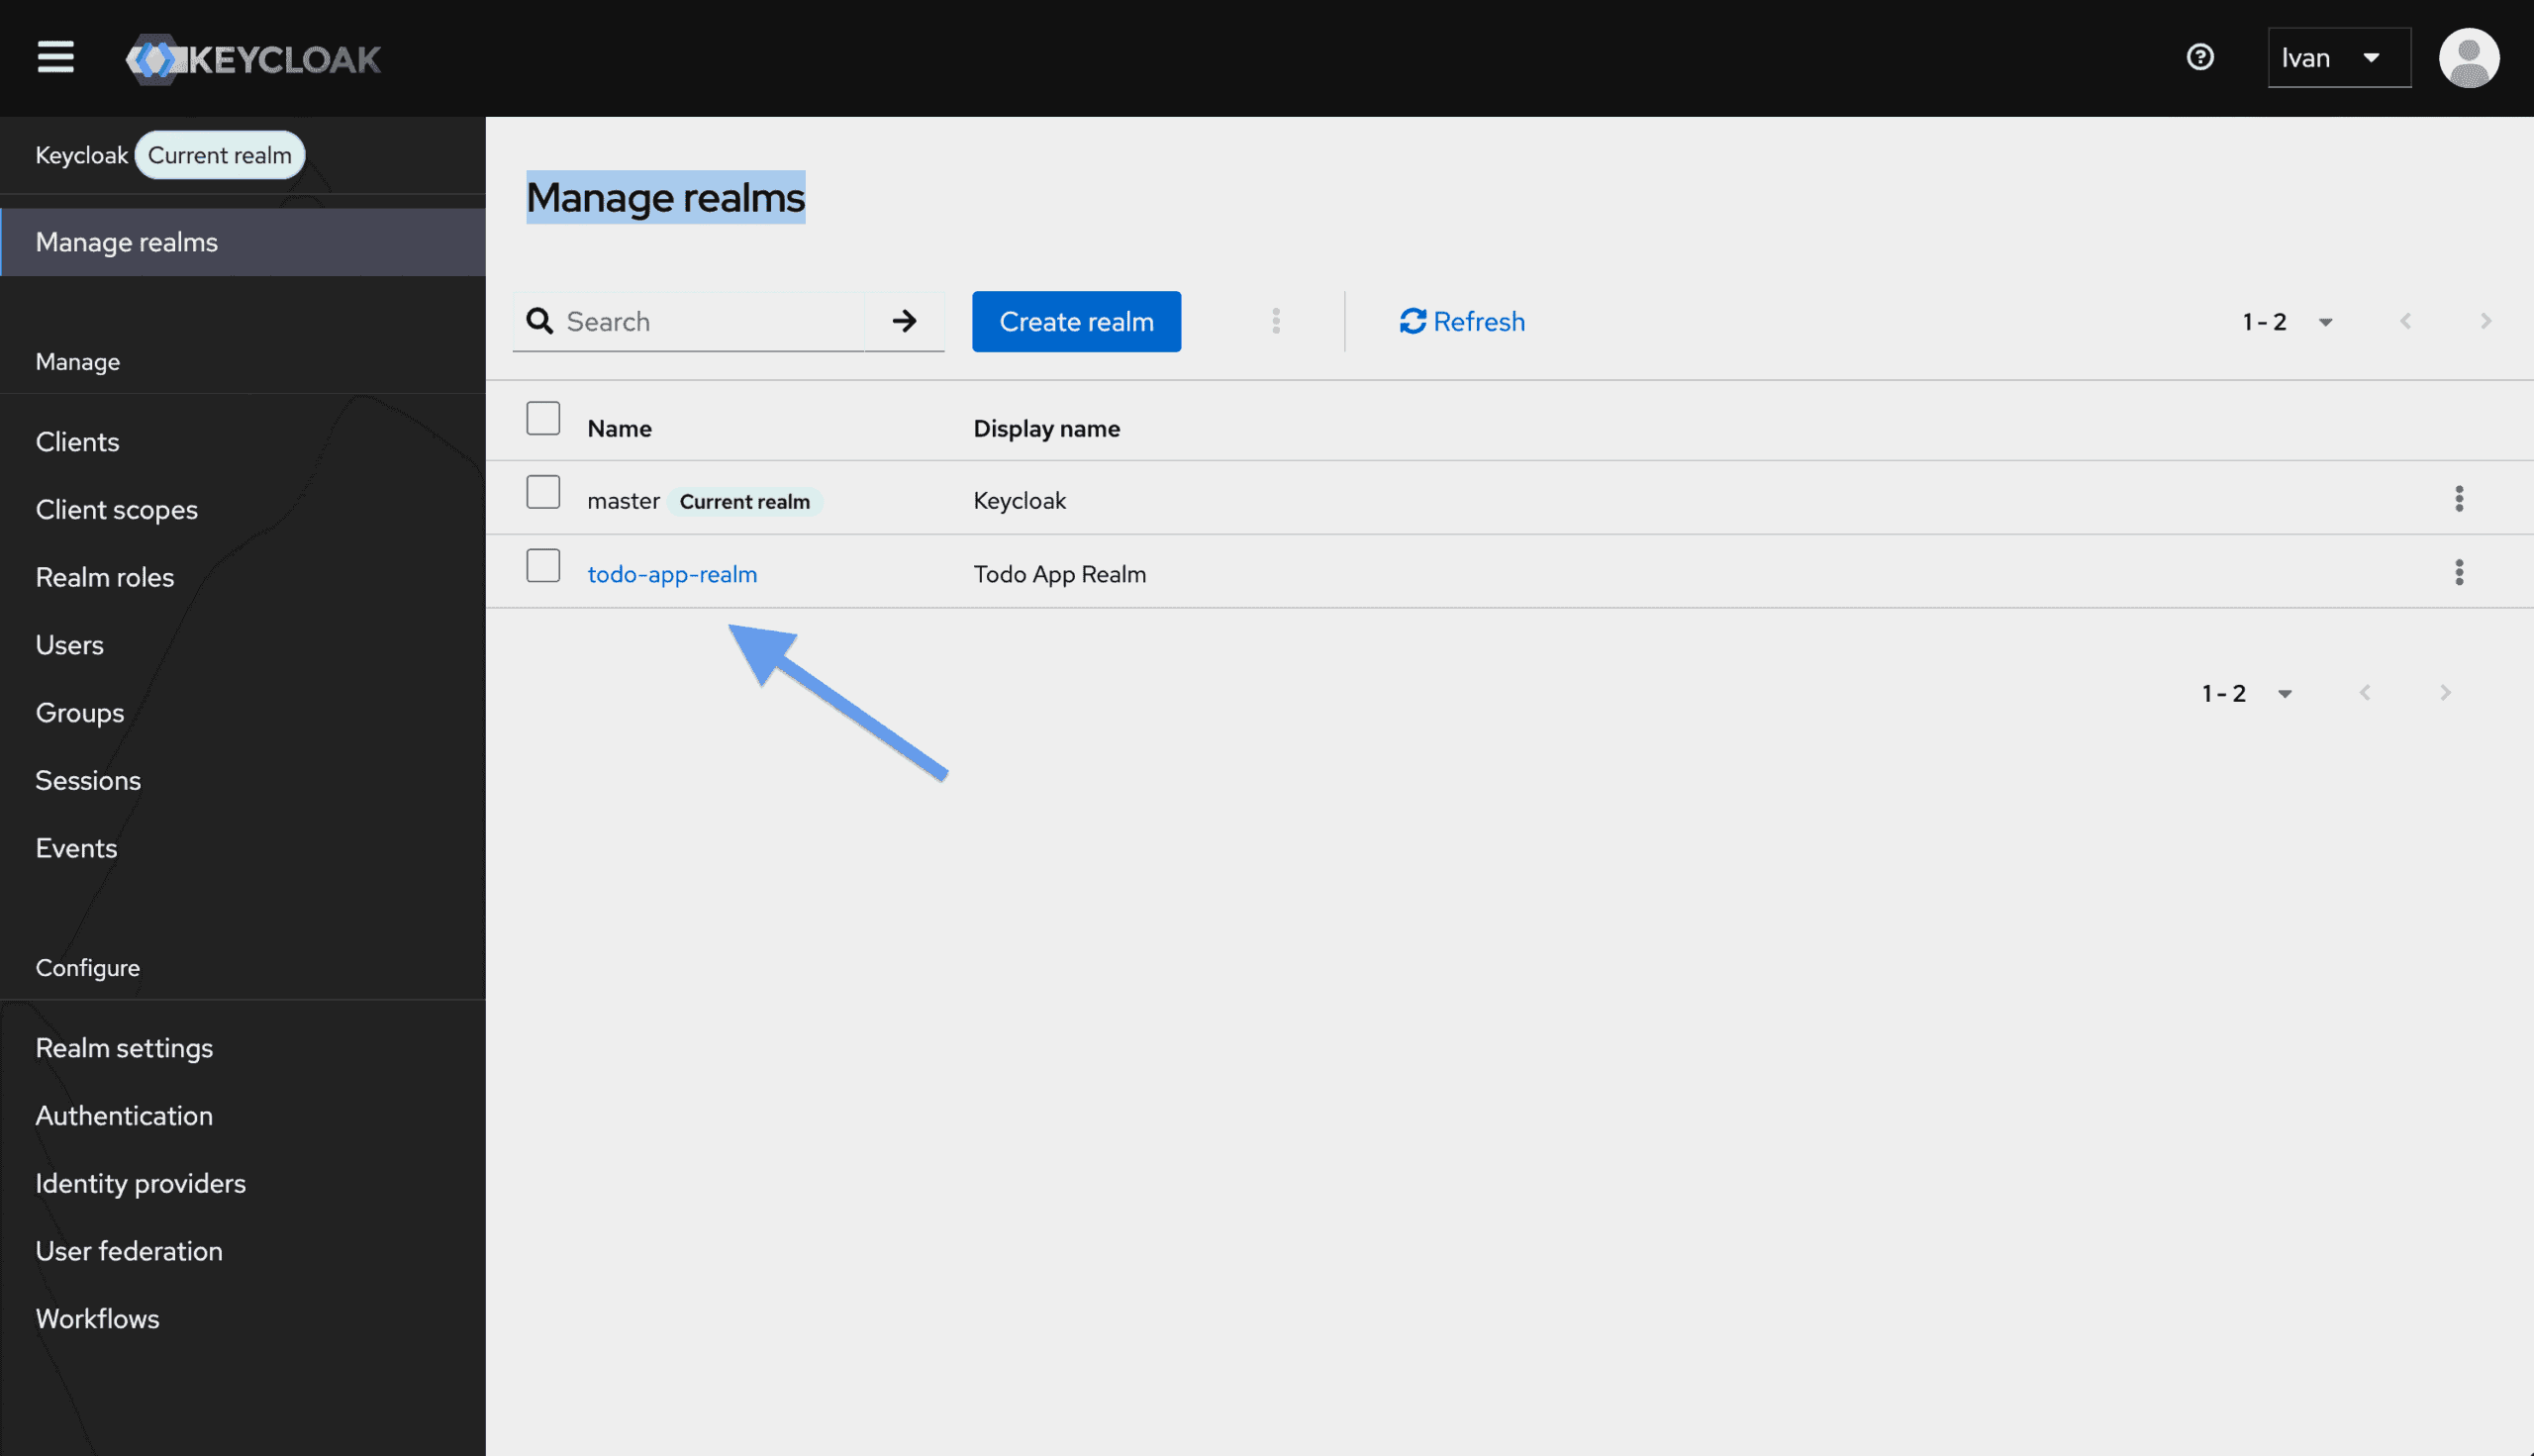
Once you log in to the Keycloak Admin Console, select the todo-app-realm realm.
Click the “Manage Realms” button, and on the “Manage realms” page, click on the todo-app-realm item.
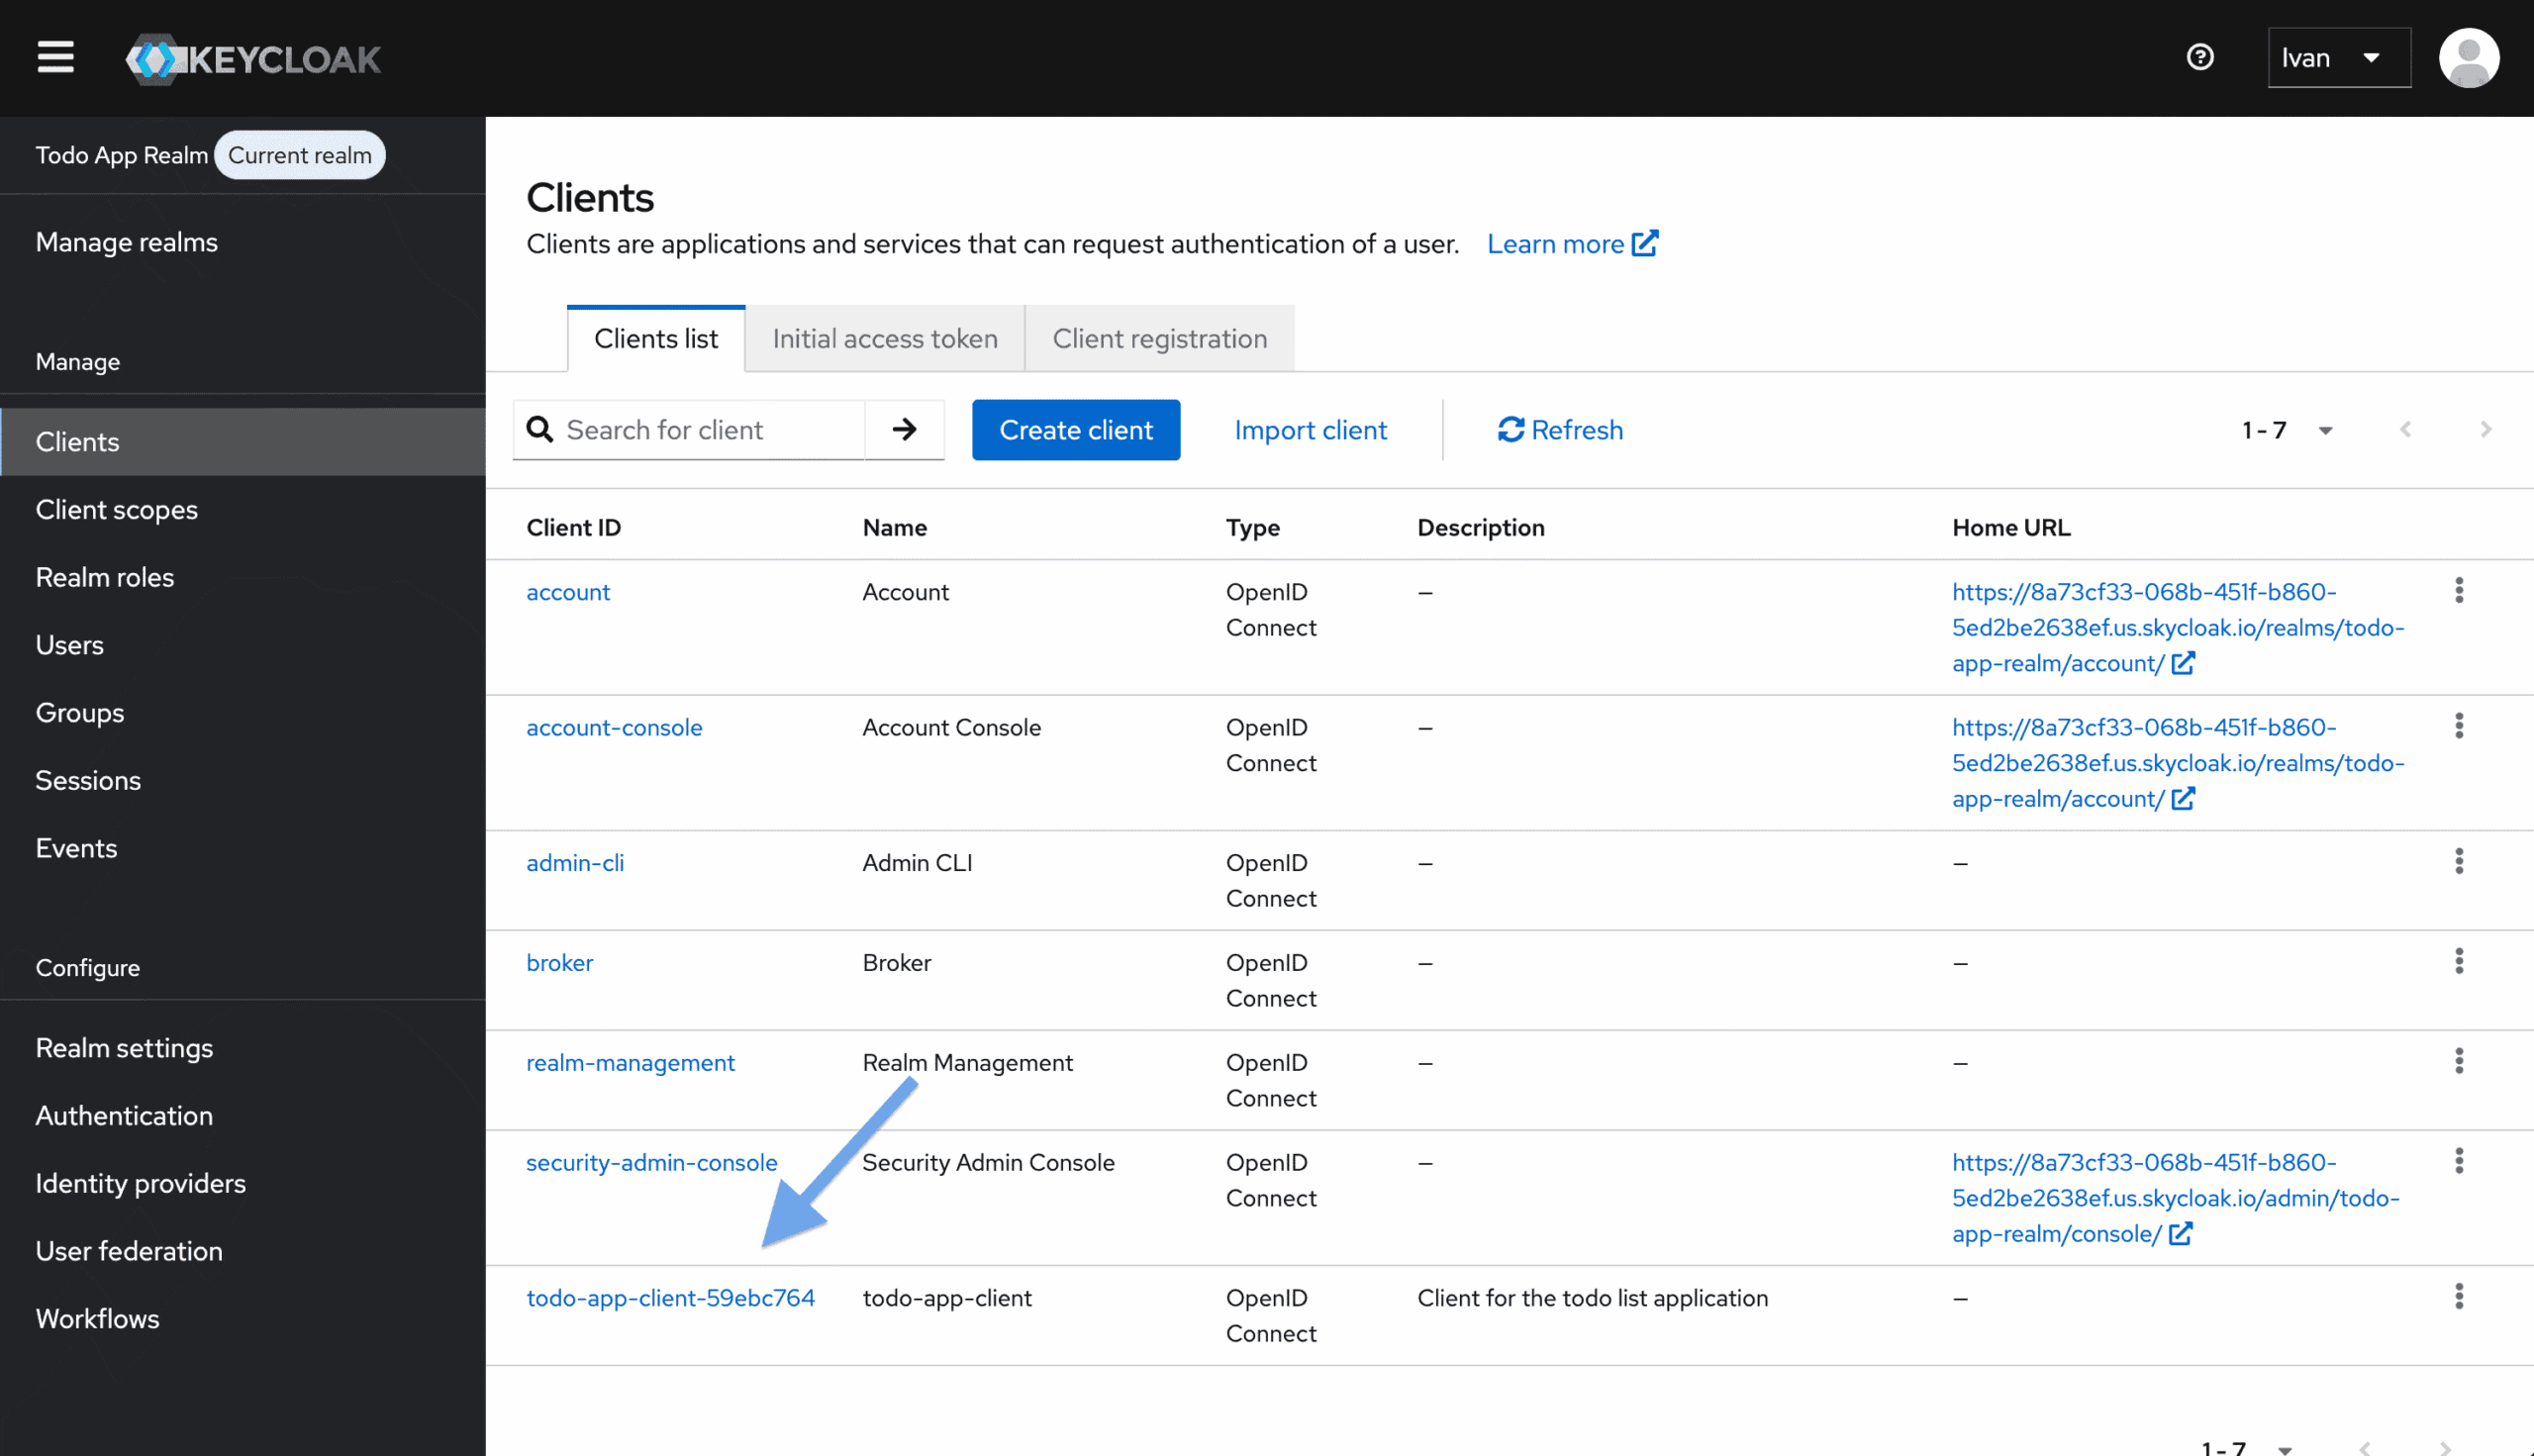
After selecting the realm, click on the “Clients” option located in the left sidebar. Then, on the “Clients” page, click on the “Client ID” of the item whose name is todo-app-client.
On the “Client Details” page, click on the “Roles” tab and then click on the “Create Role” button.
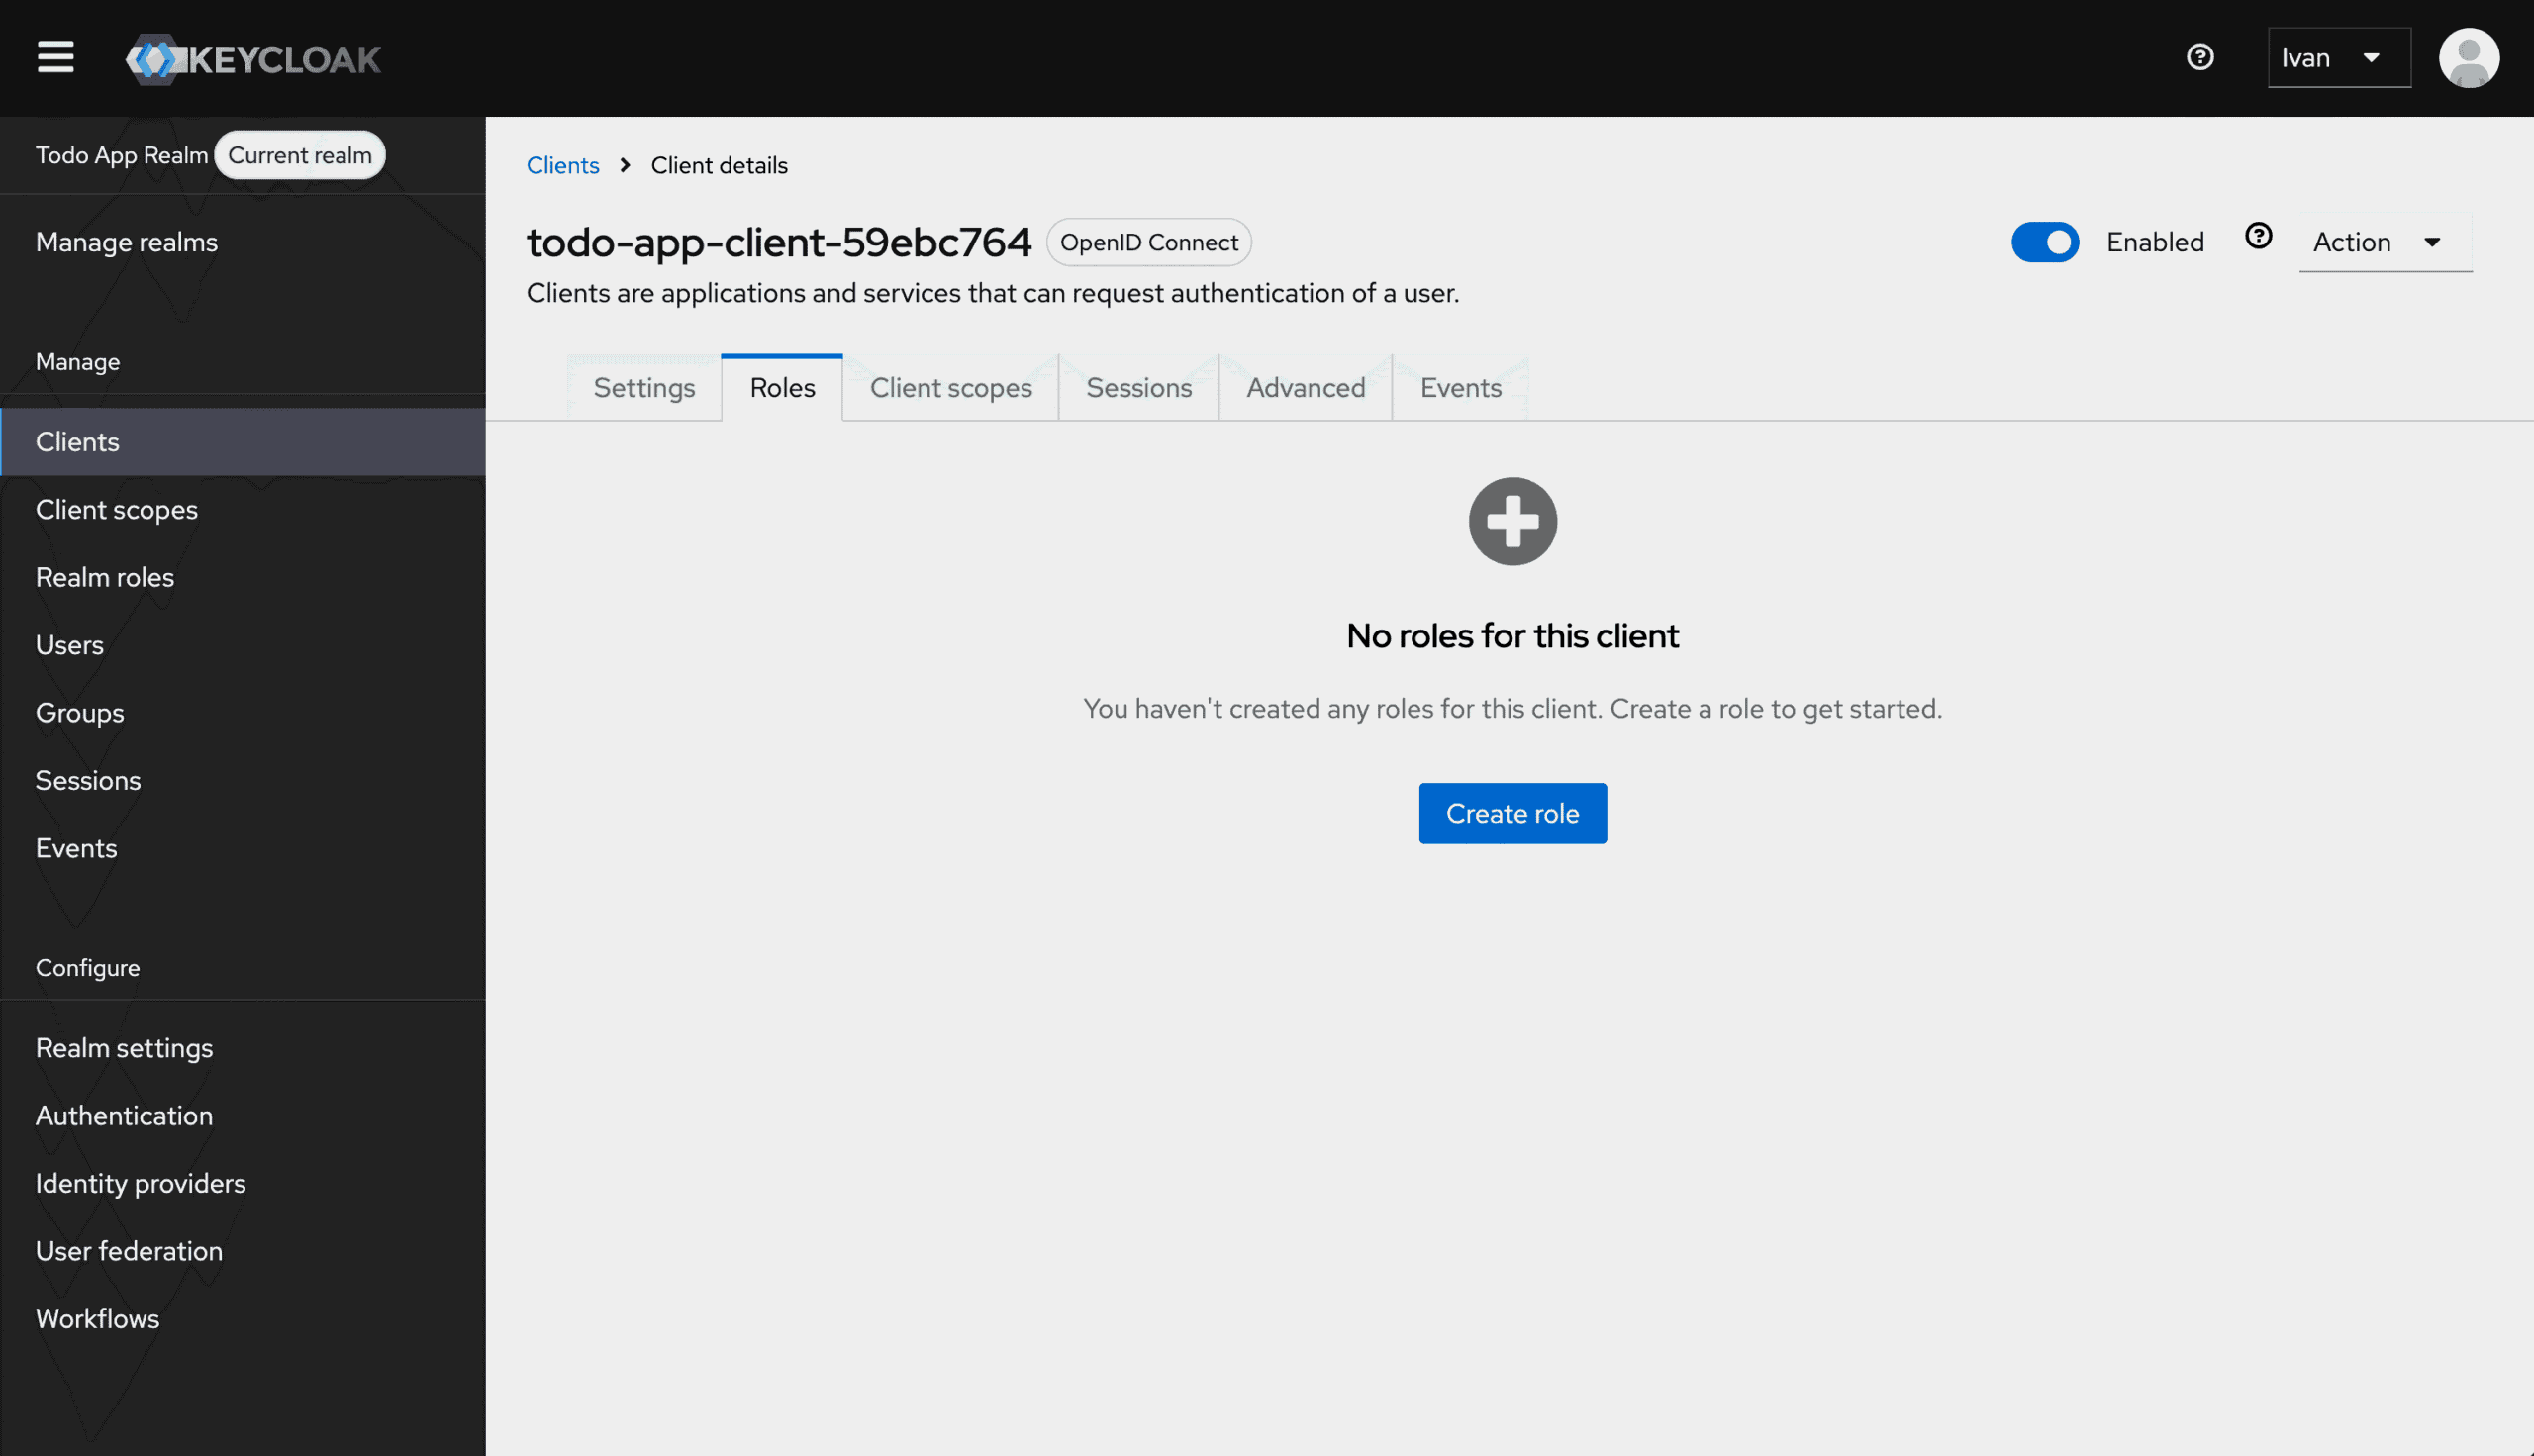
Let’s go ahead and create the TODO_ADMIN role first.
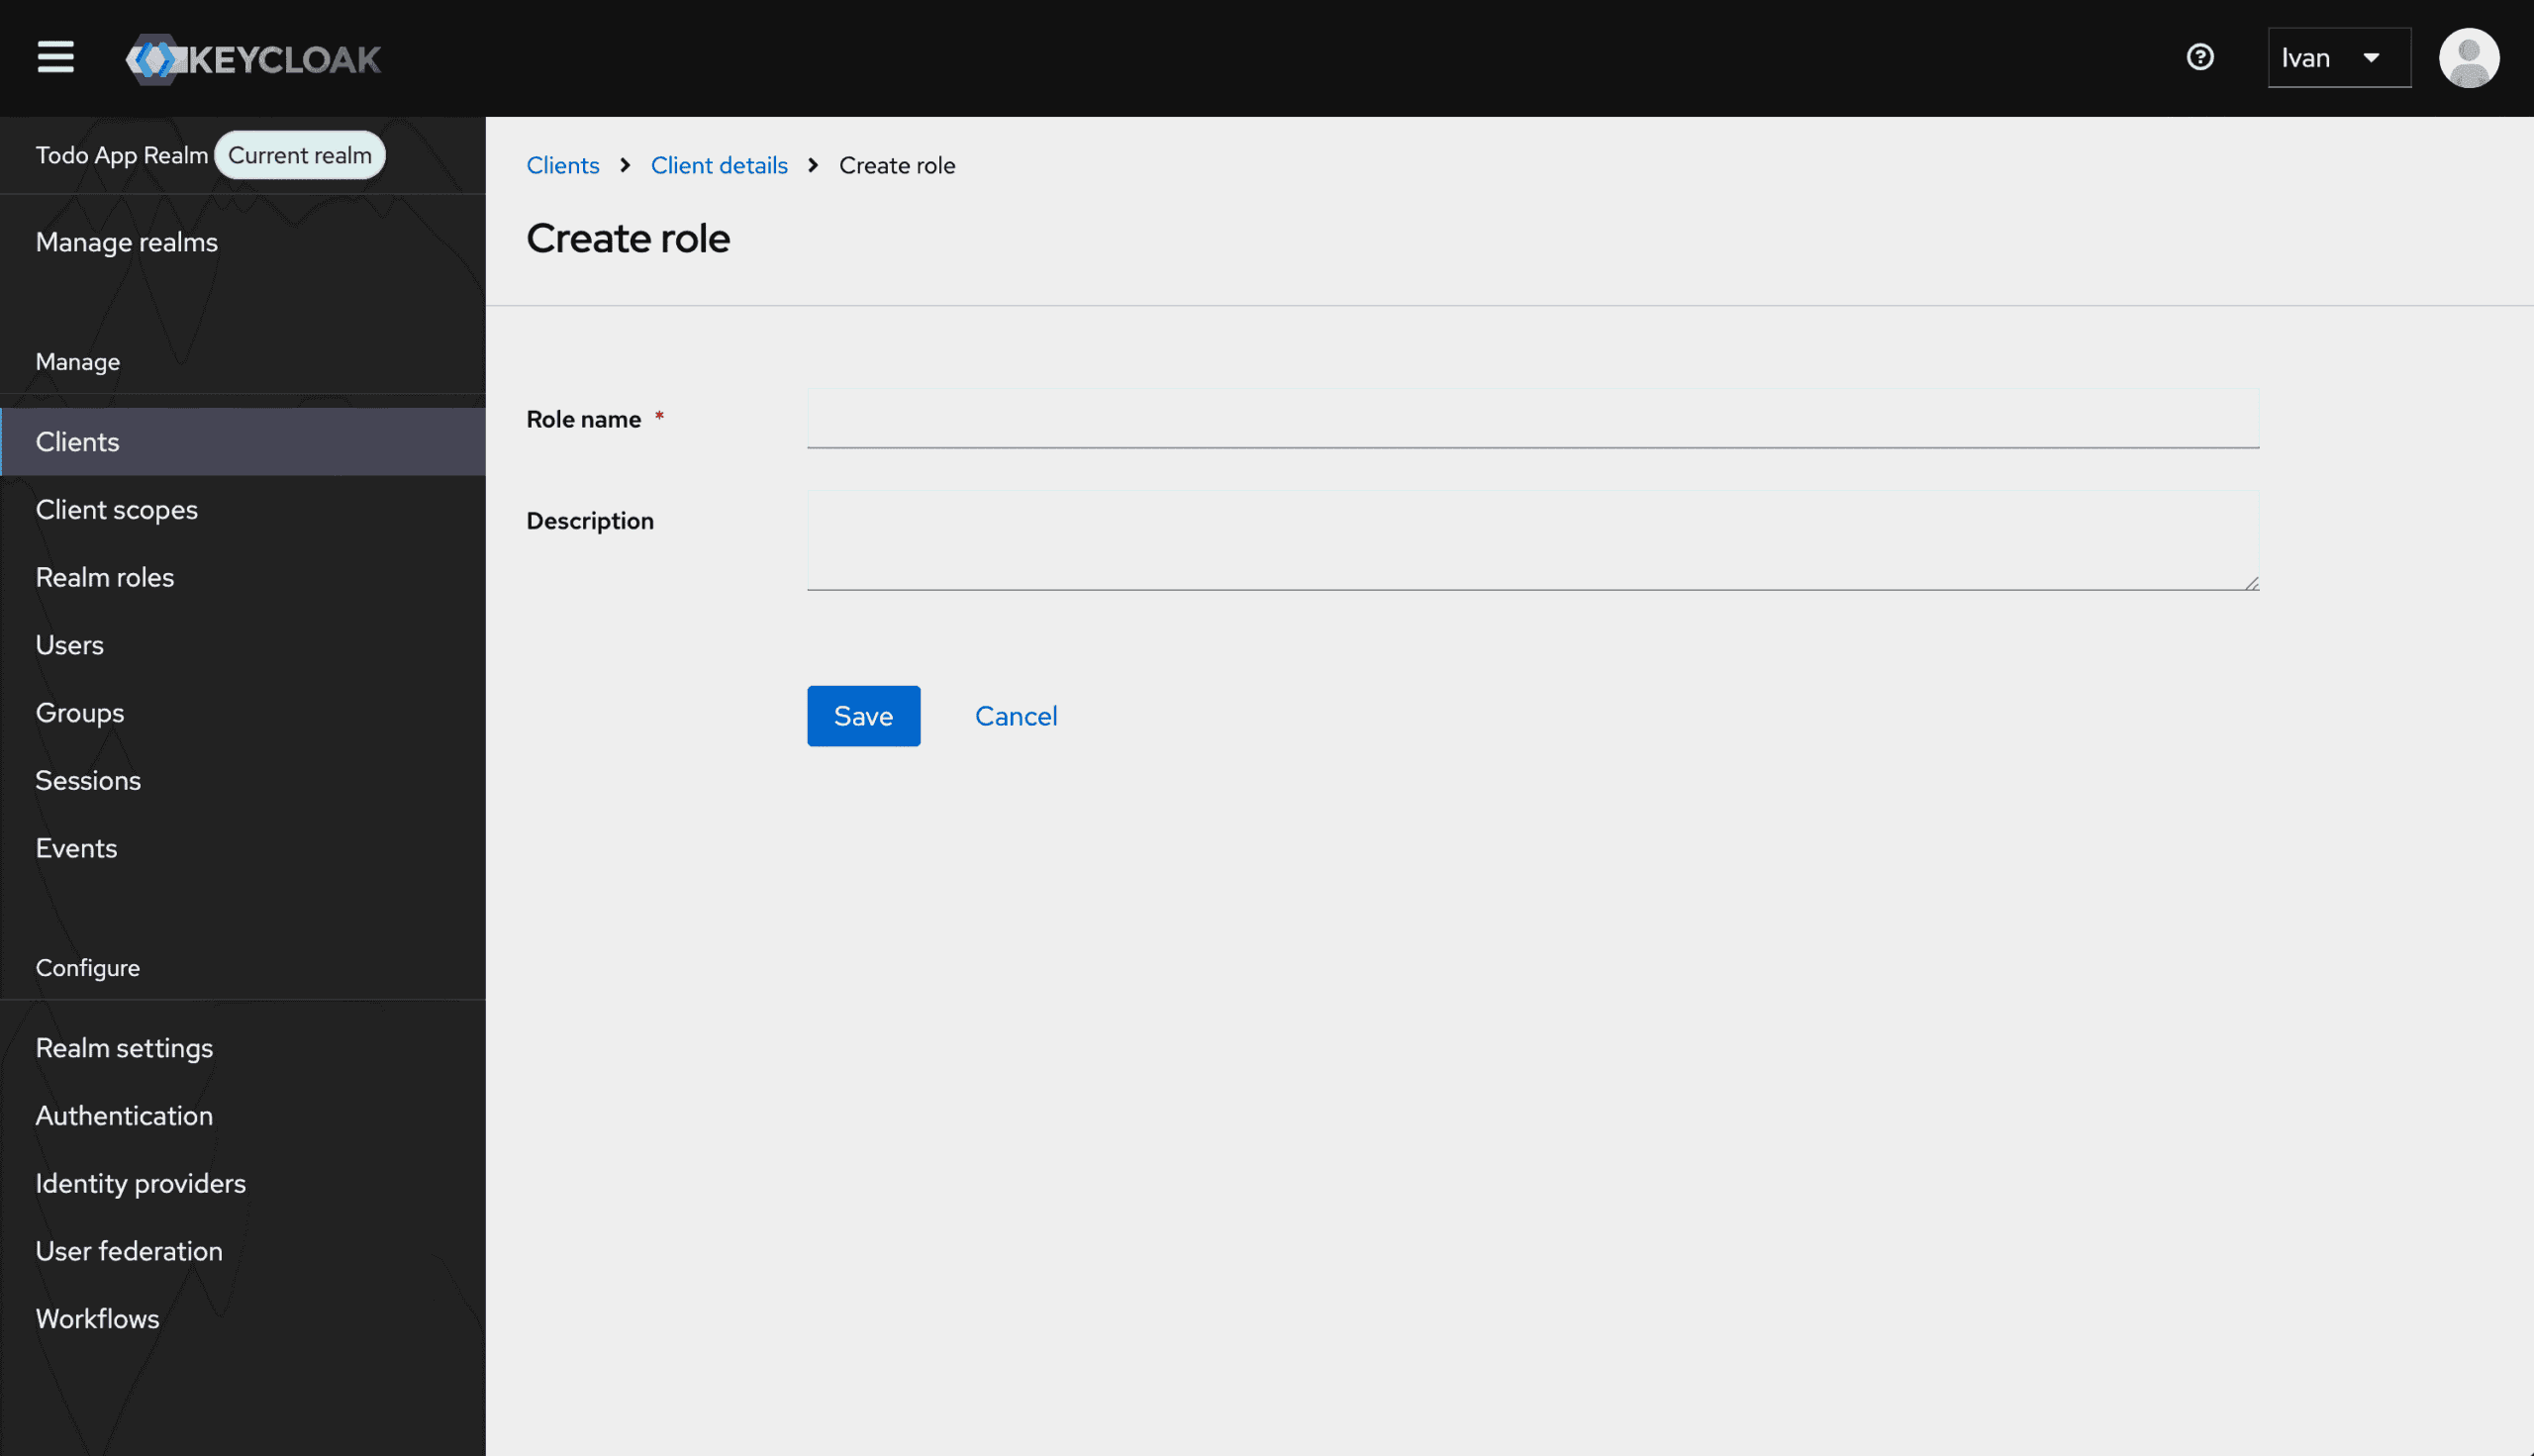
On the “Create Role” page, fill in the form as follows:
- Role Name:
TODO_ADMIN - Click on the “Save” button.
Let’s create the TODO_USER role. Click the “Client details” link on the top of the page.
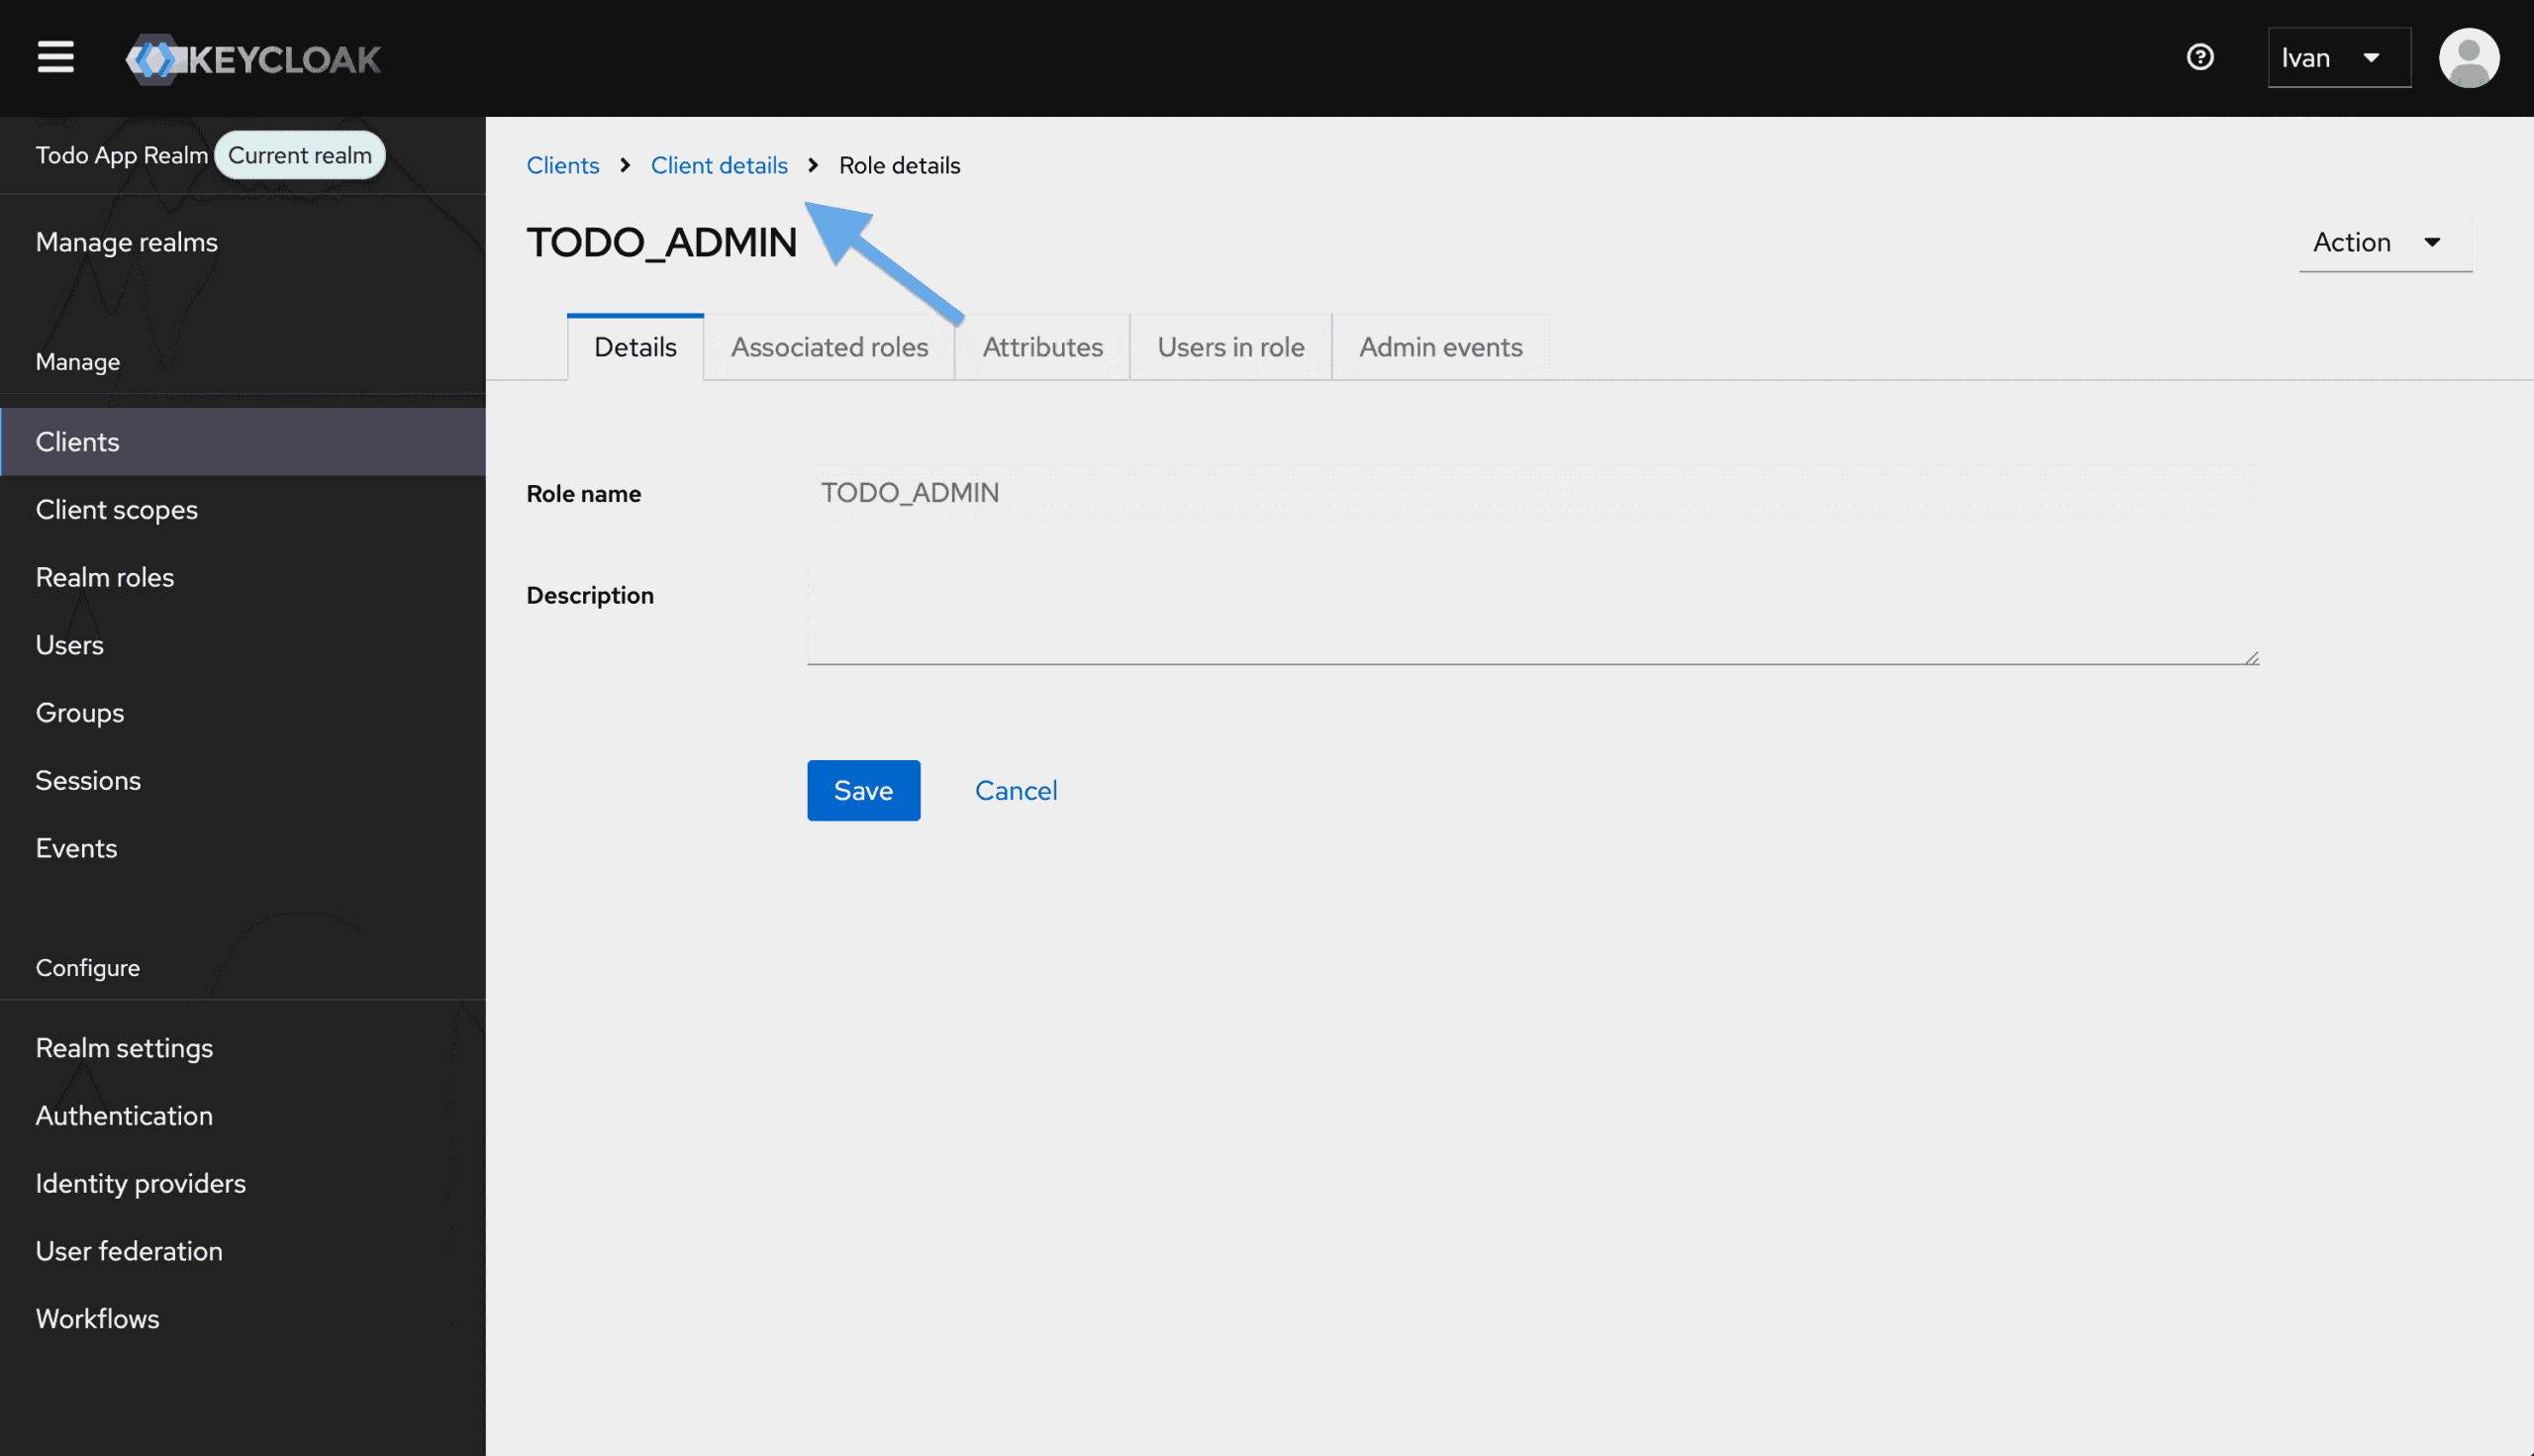
Click on the “Create Role” button again and fill in the form as follows:
- Role Name:
TODO_USER - Click on the “Save” button.
Groups
Next, let’s create groups for the admin and regular users. Click the “Groups” option located in the left sidebar and then click on the “Create Group” button.
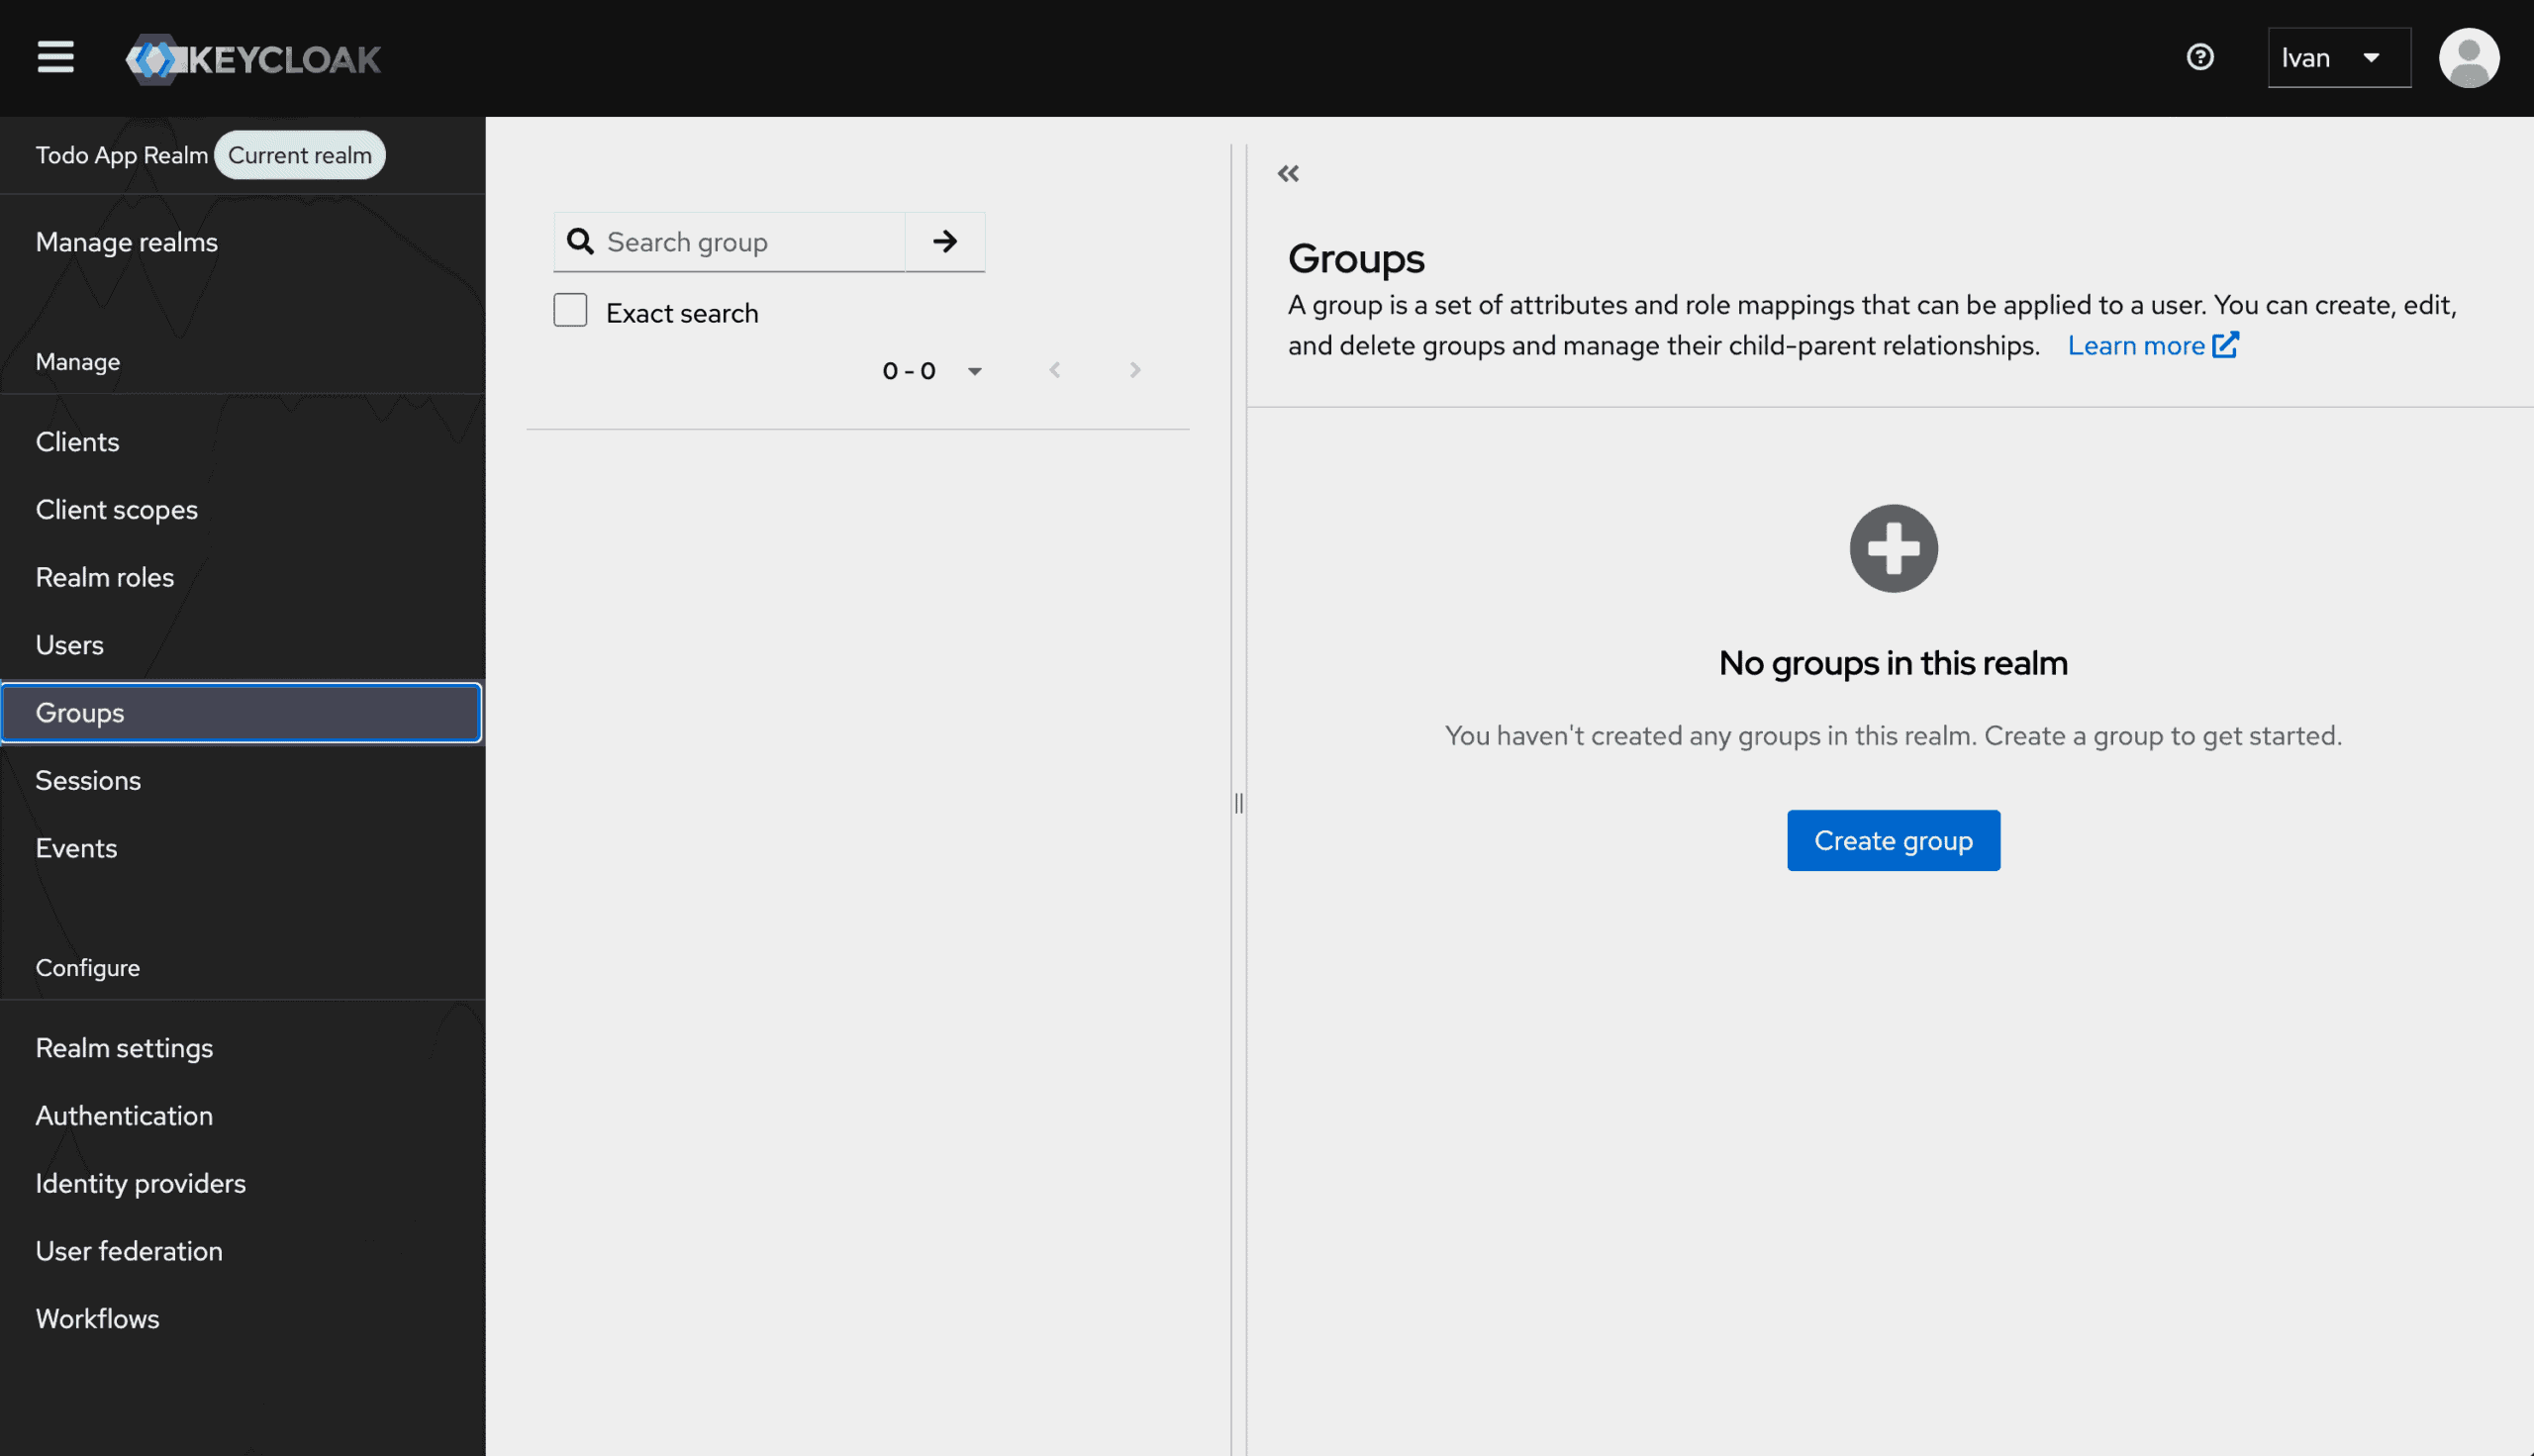
Let’s create the ADMINS group first. On the “Create a group” form, fill in the form as follows:
- Group Name:
ADMINS - Click on the “Create” button.
Let’s create the USERS group. Click on the “Create group” button again and fill in the form as follows:
- Group Name:
USERS - Click on the “Create” button.
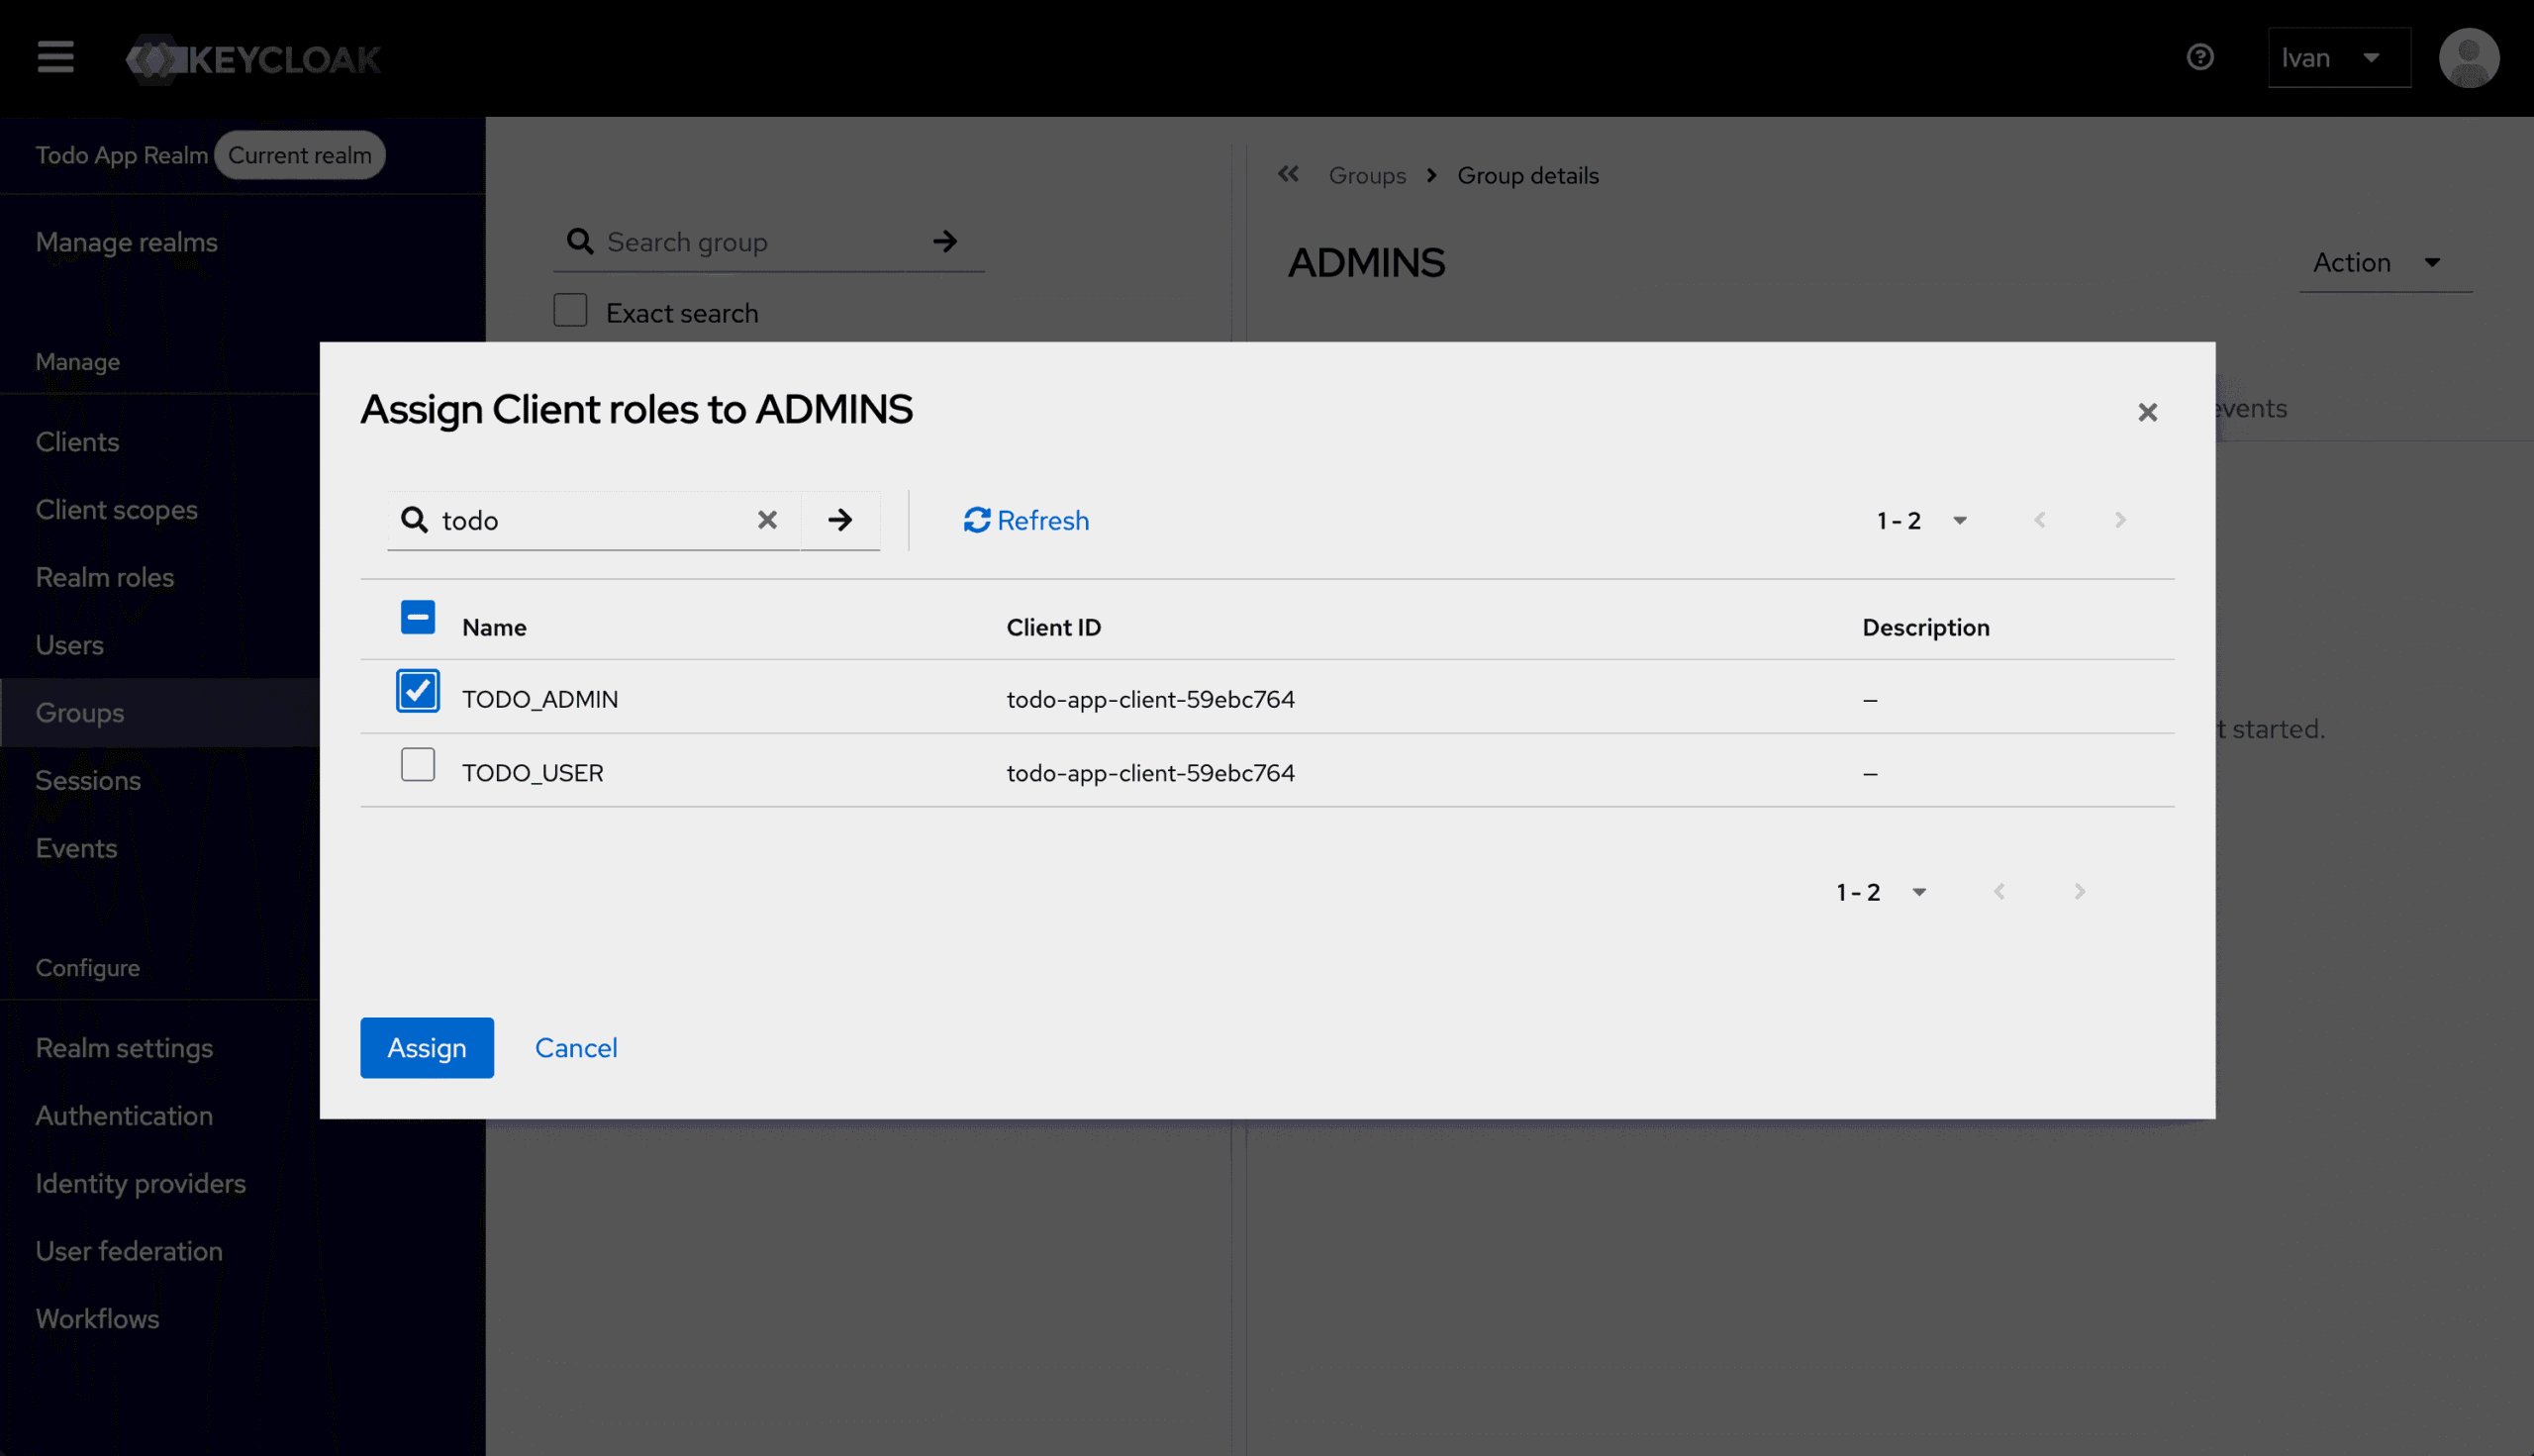
Then, let’s assign the TODO_ADMIN role to the ADMINS group. Click the ADMINS group name to access its details page.
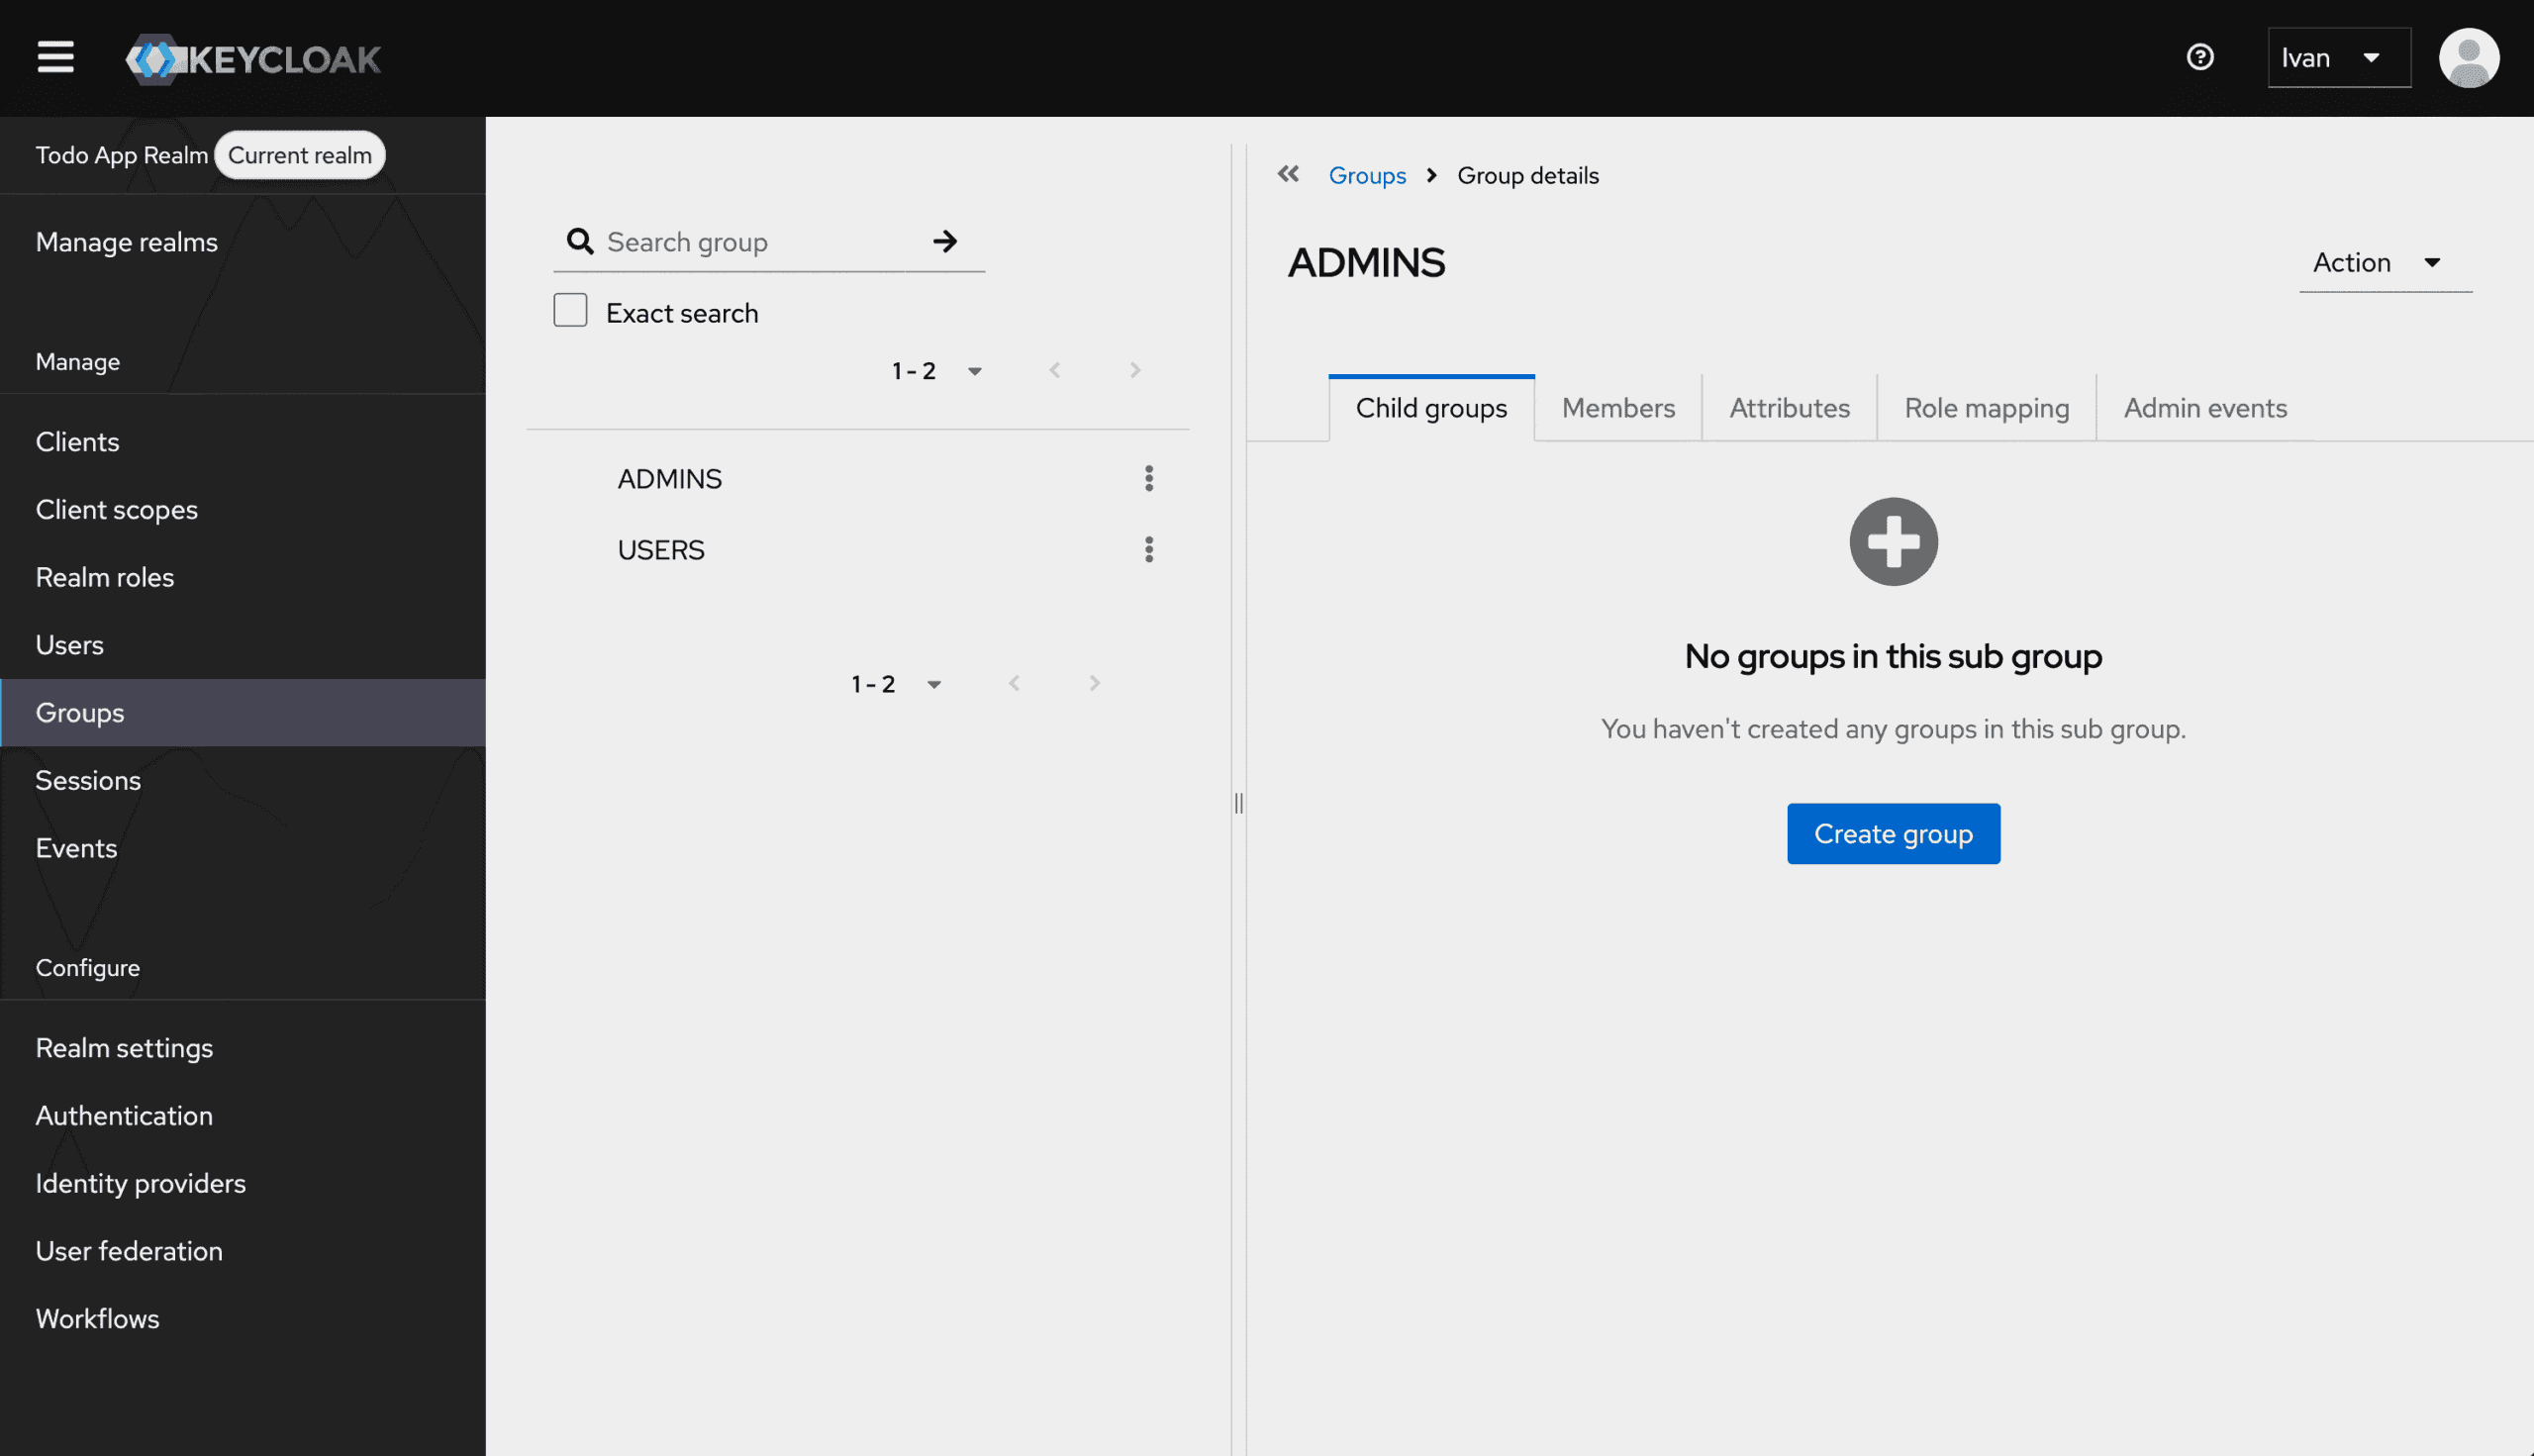
- Select “Role mapping” tab and then, from the “Assign role” dropdown, select “Client Roles”
- On the “Assign Client roles to ADMINS” page, search for “todo” in the search field, select the
TODO_ADMINrole, and then click on the “Assign” button.
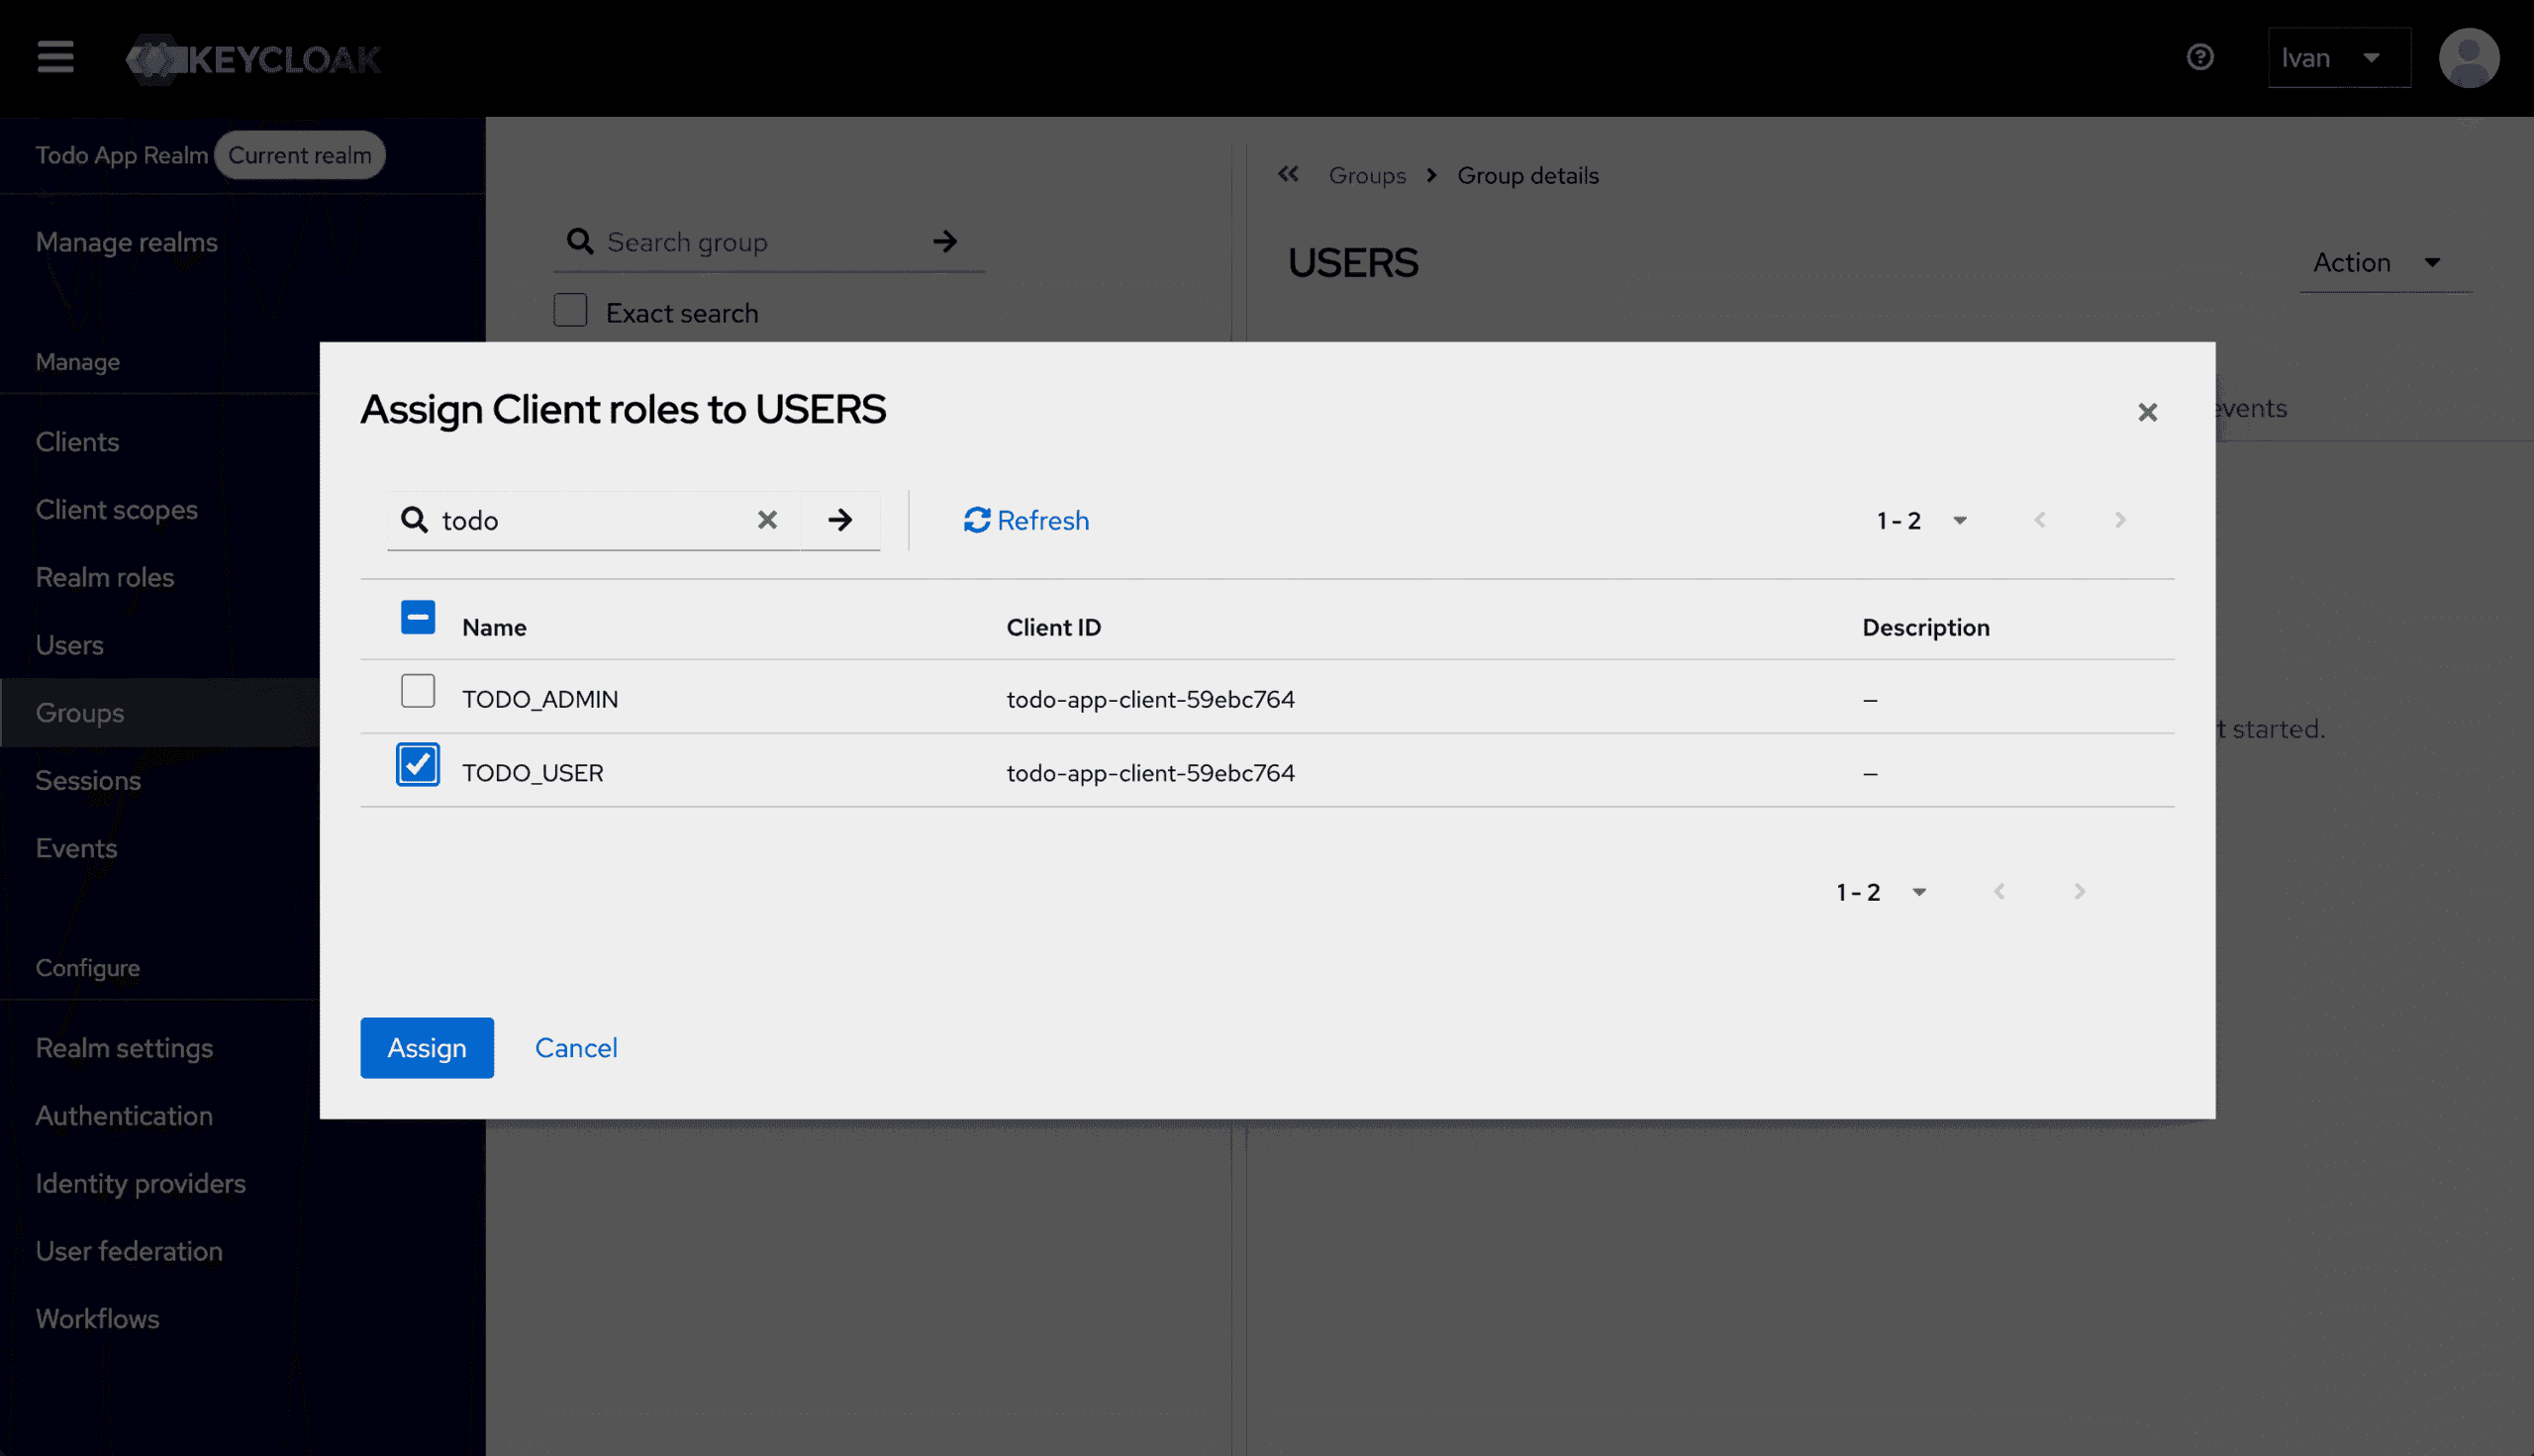
Let’s assign the TODO_USER role to the USERS group. Click the USERS group name to access its details page.
- Select “Role mapping” tab and then, from the “Assign role” dropdown, select “Client Roles”
- On the “Assign Client roles to USERS” page, search for “todo” in the search field, select the
TODO_USERrole, and then click on the “Assign” button.
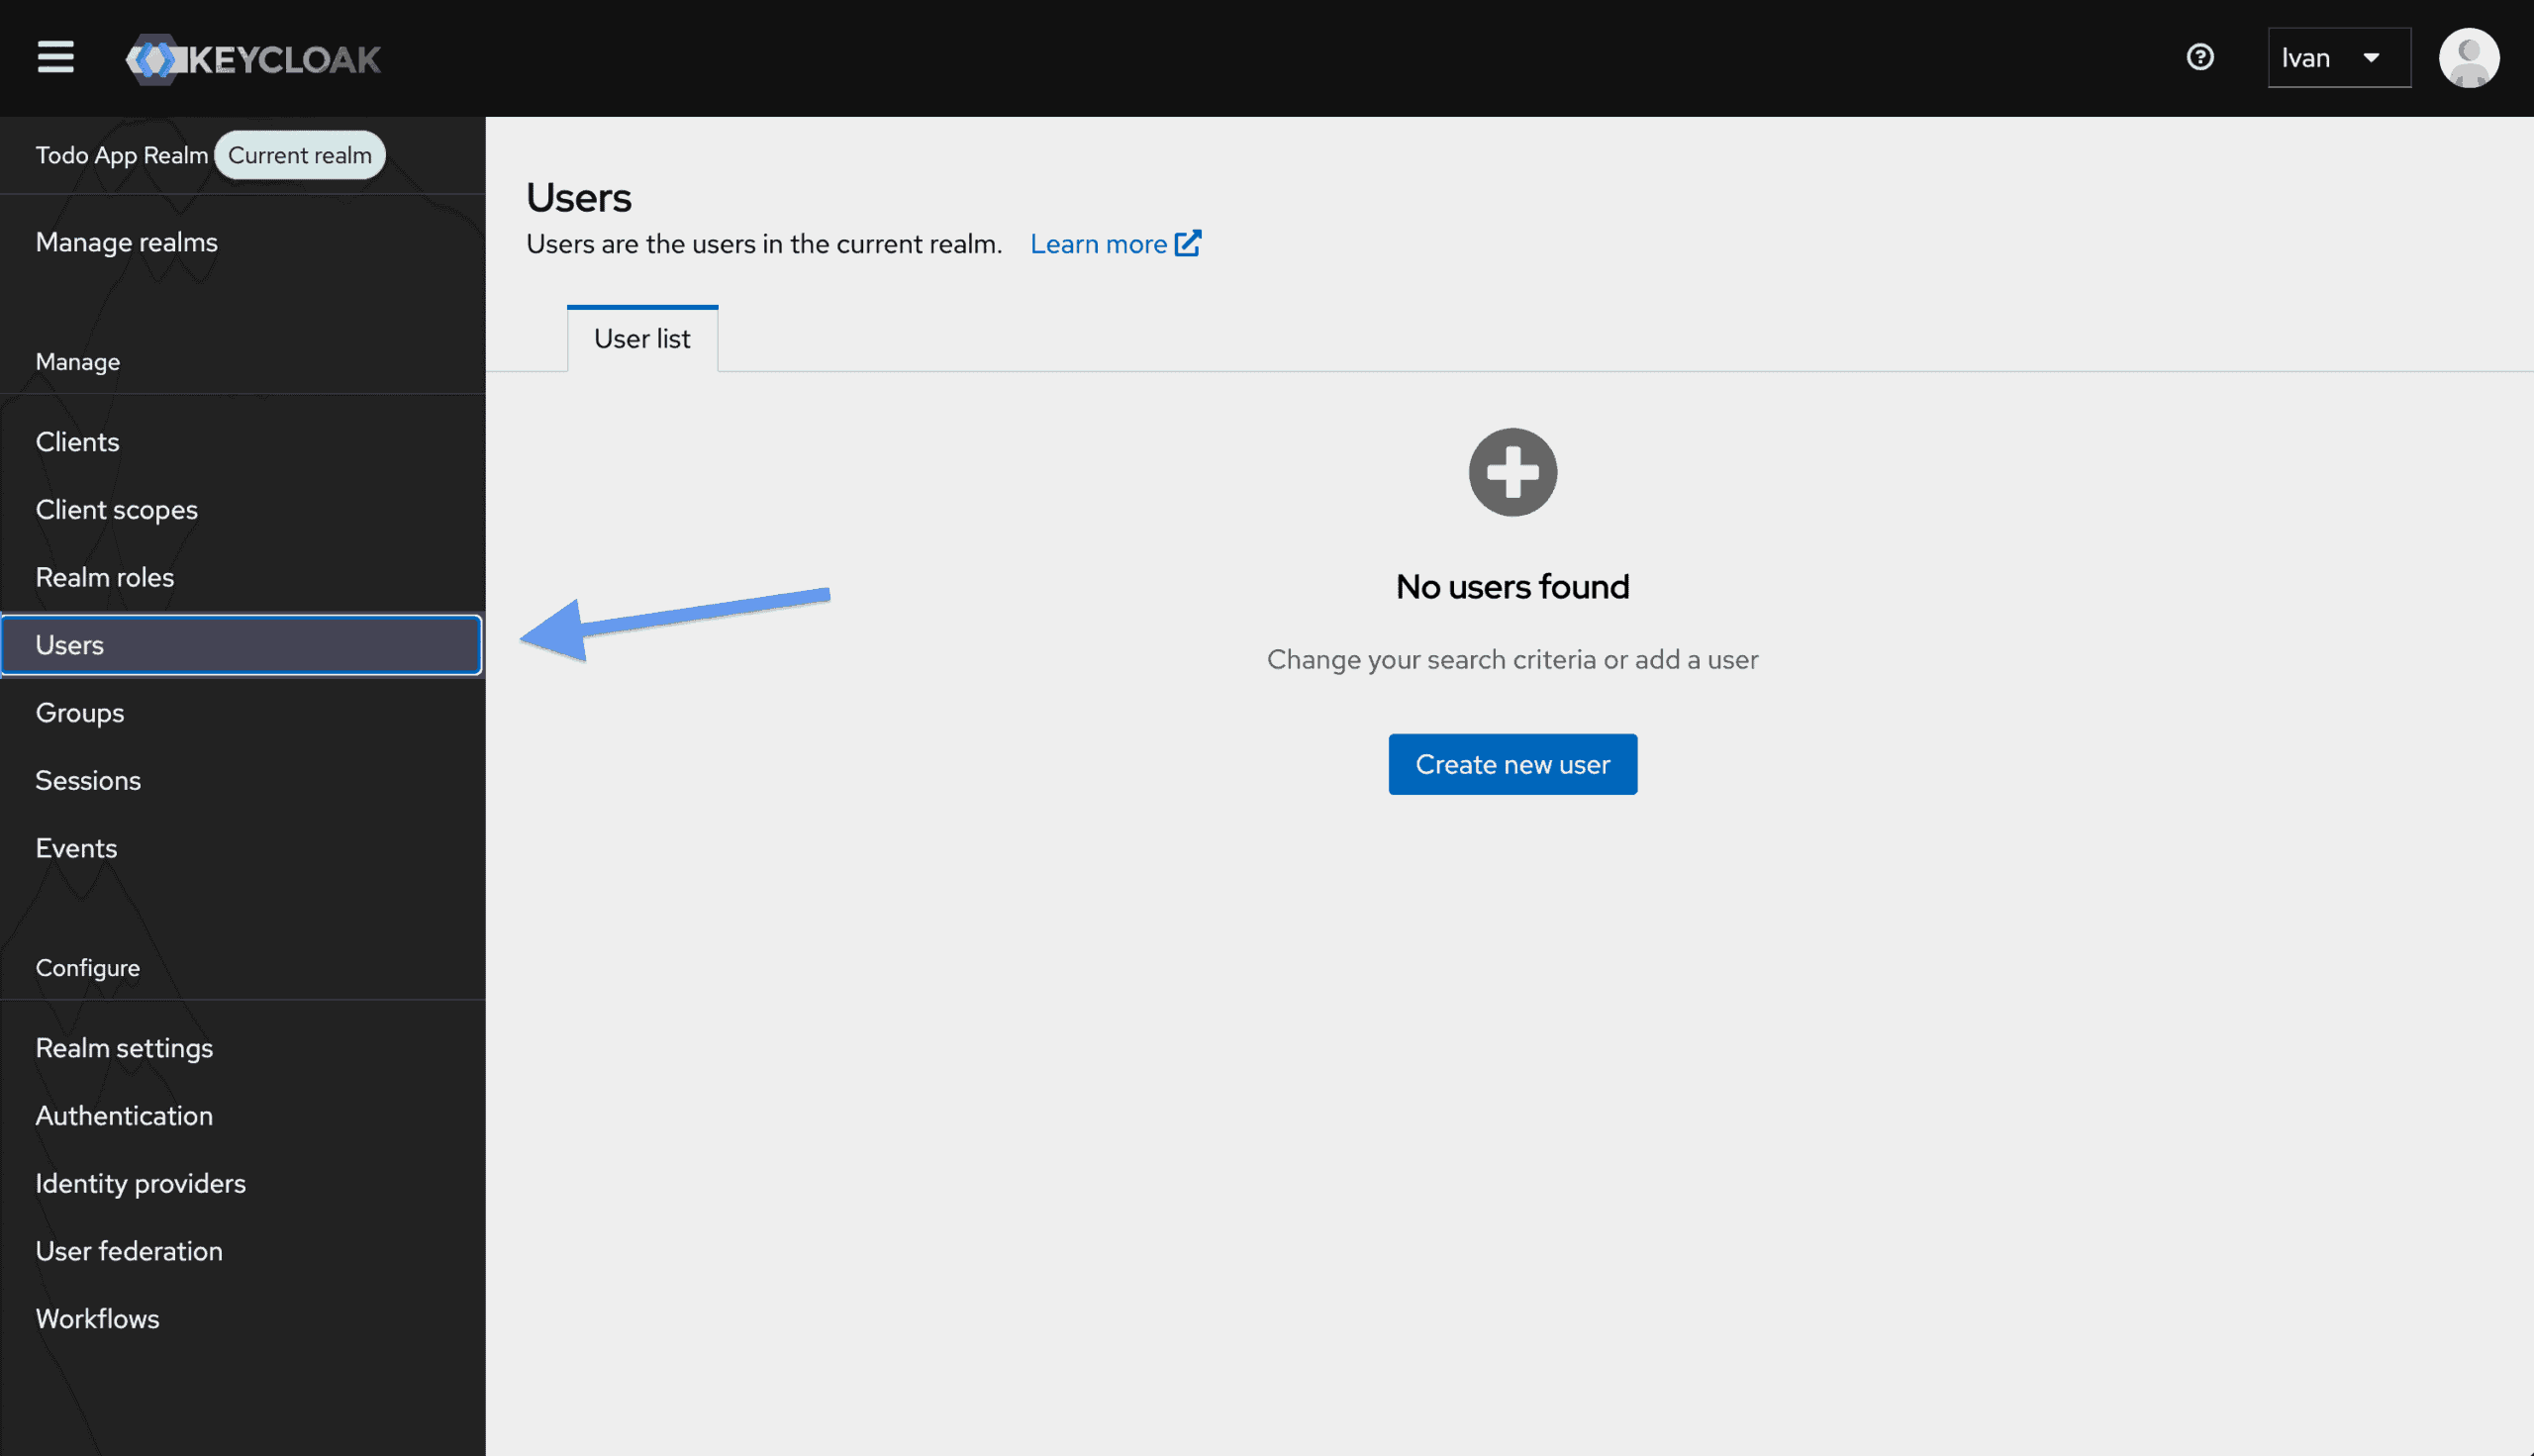
Users
Moving on, let’s create users for our application. Click the “Users” option located in the left sidebar.
Let’s create the admin user first. On the “Users” page, click on the “Create new user” button. The “Create User” form will appear.
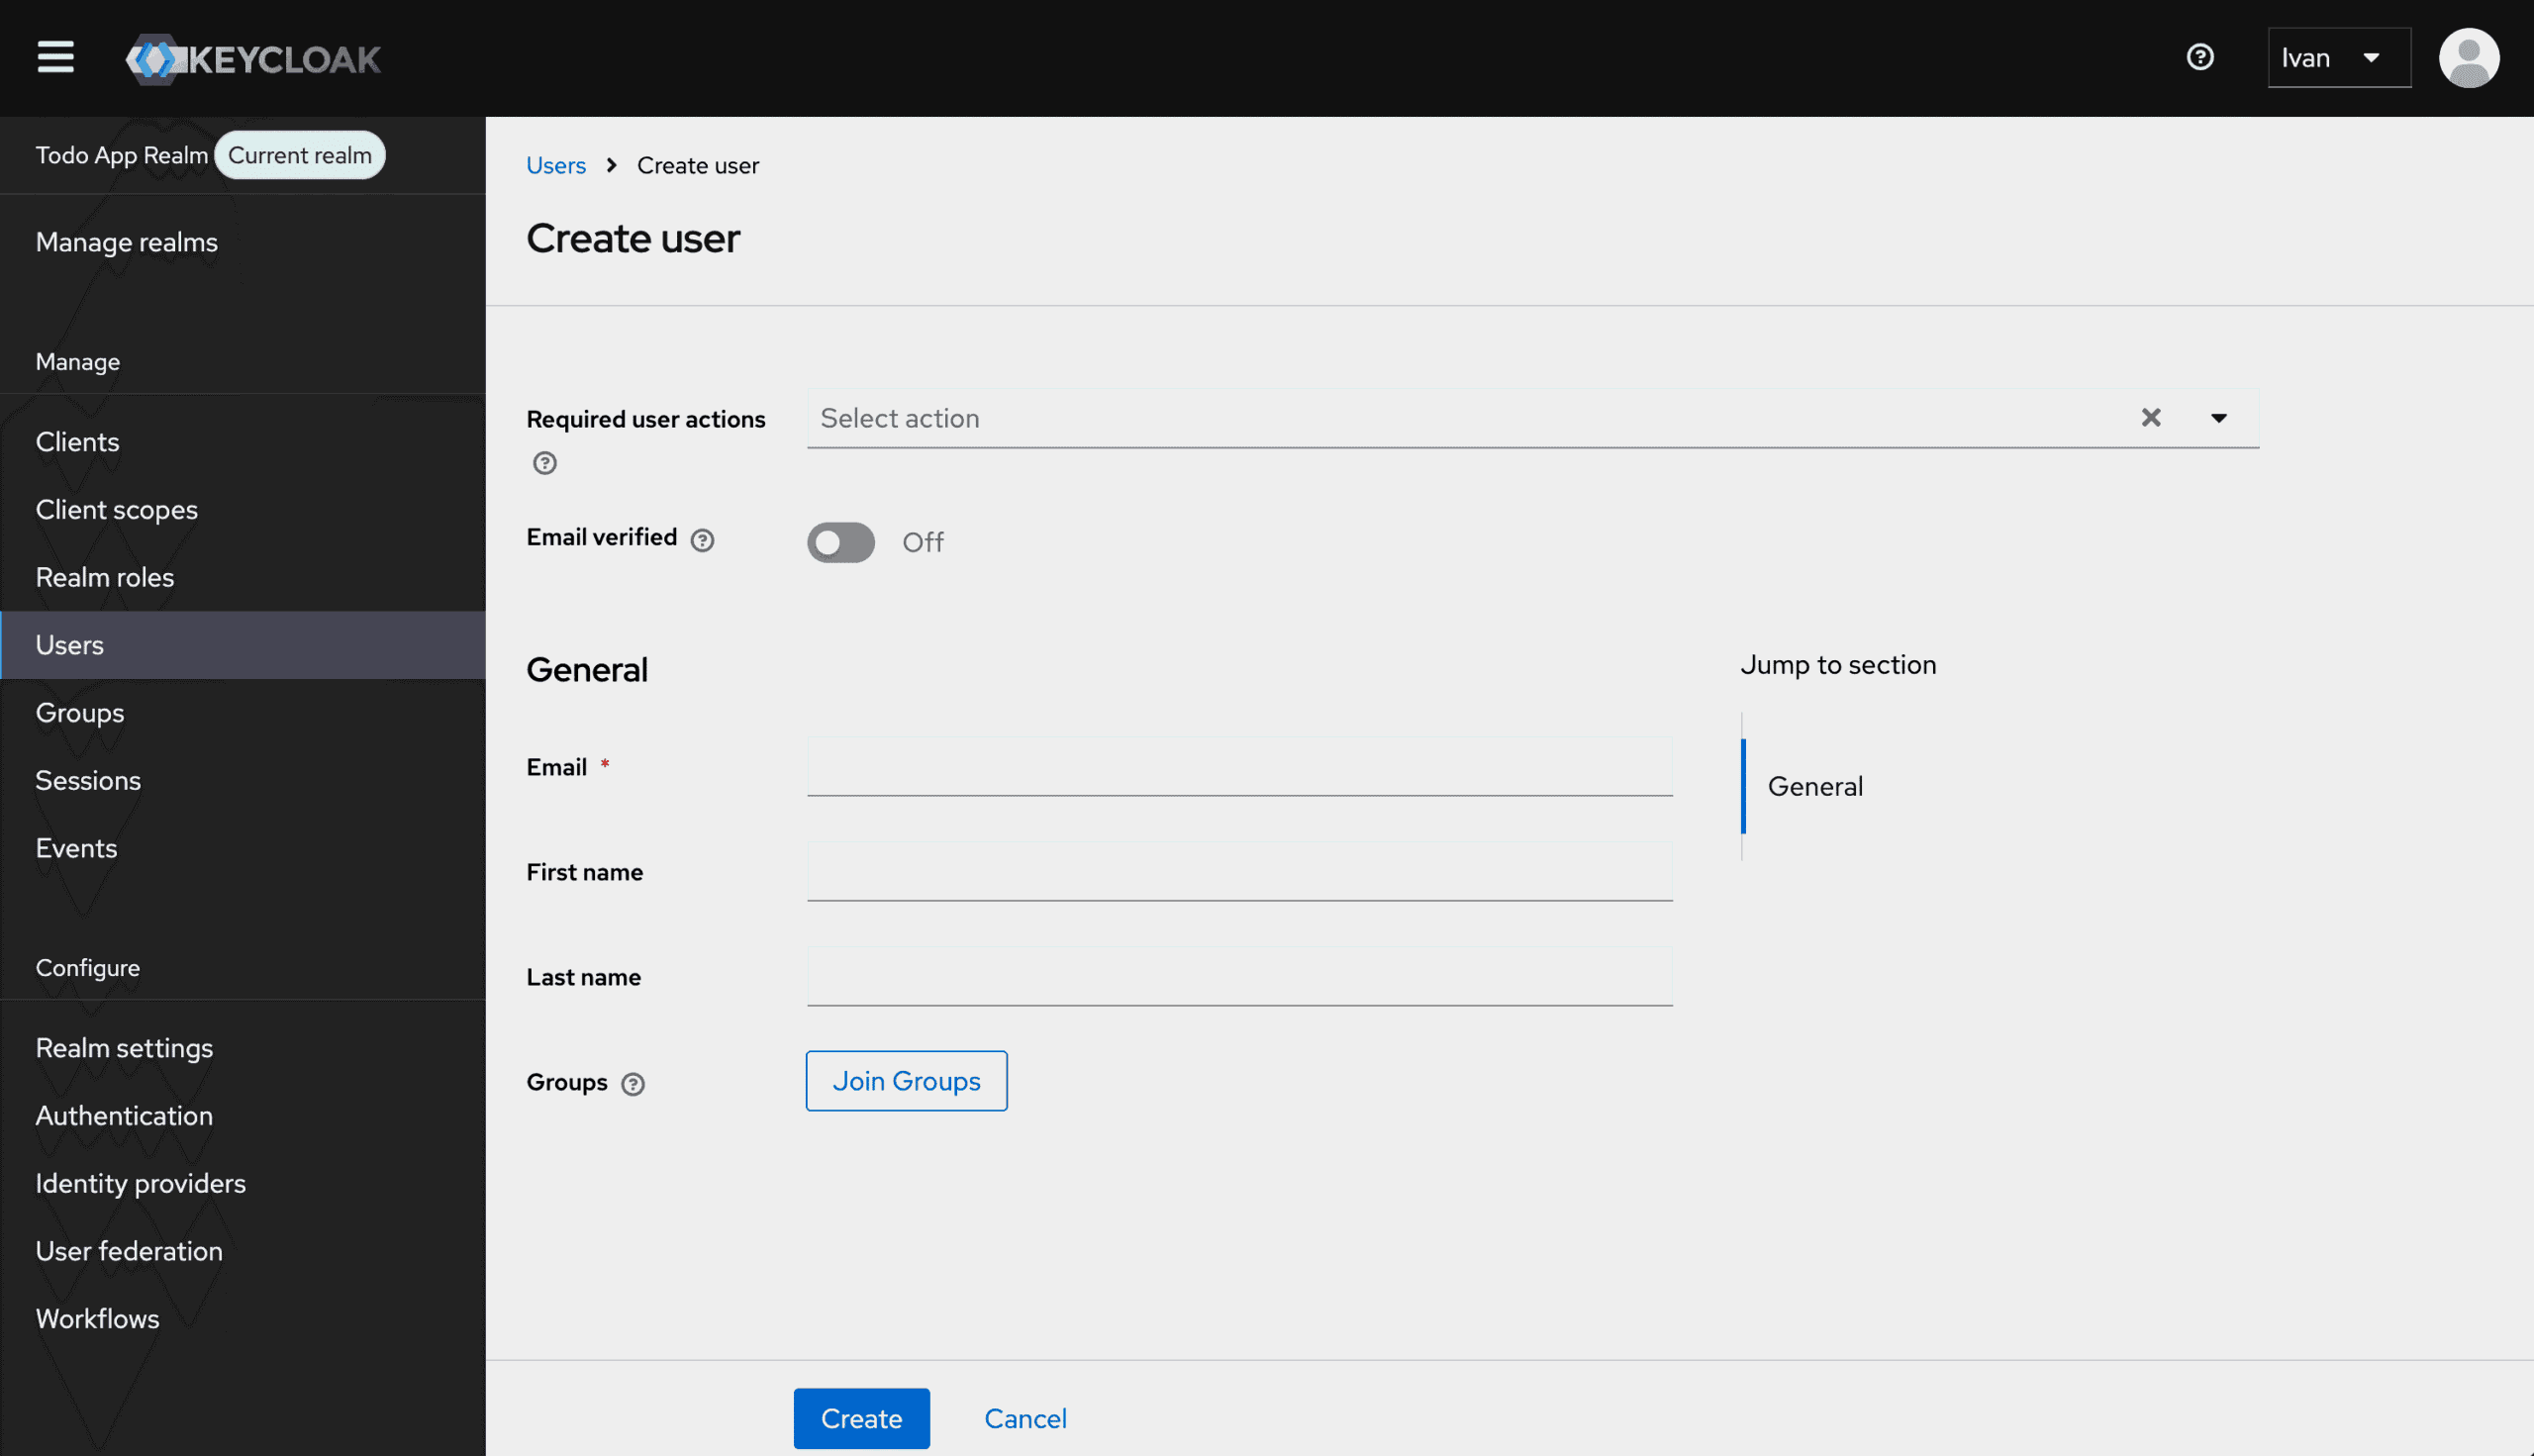
Fill in the form as follows:
- Email:
admin@example.com - First Name:
Admin - Last Name:
Admin - Click on the “Join Groups” button and select the “ADMINS” group to assign it to the user.
- Click on the “Join” button.
- Finally, click on the “Create” button.
- Next, we need to set a password for the admin. Click the “Credentials” tab and then click on the “Set Password” button.
- In the “Set Password” form:
- Provide a strong password for the “Password” field and then repeat it in the “Password Confirmation” field.
- Uncheck the “Temporary” option to make the password permanent.
- Finally, click on the “Save” button and confirm by clicking on the “Save password” button.
- The admin user is created successfully.
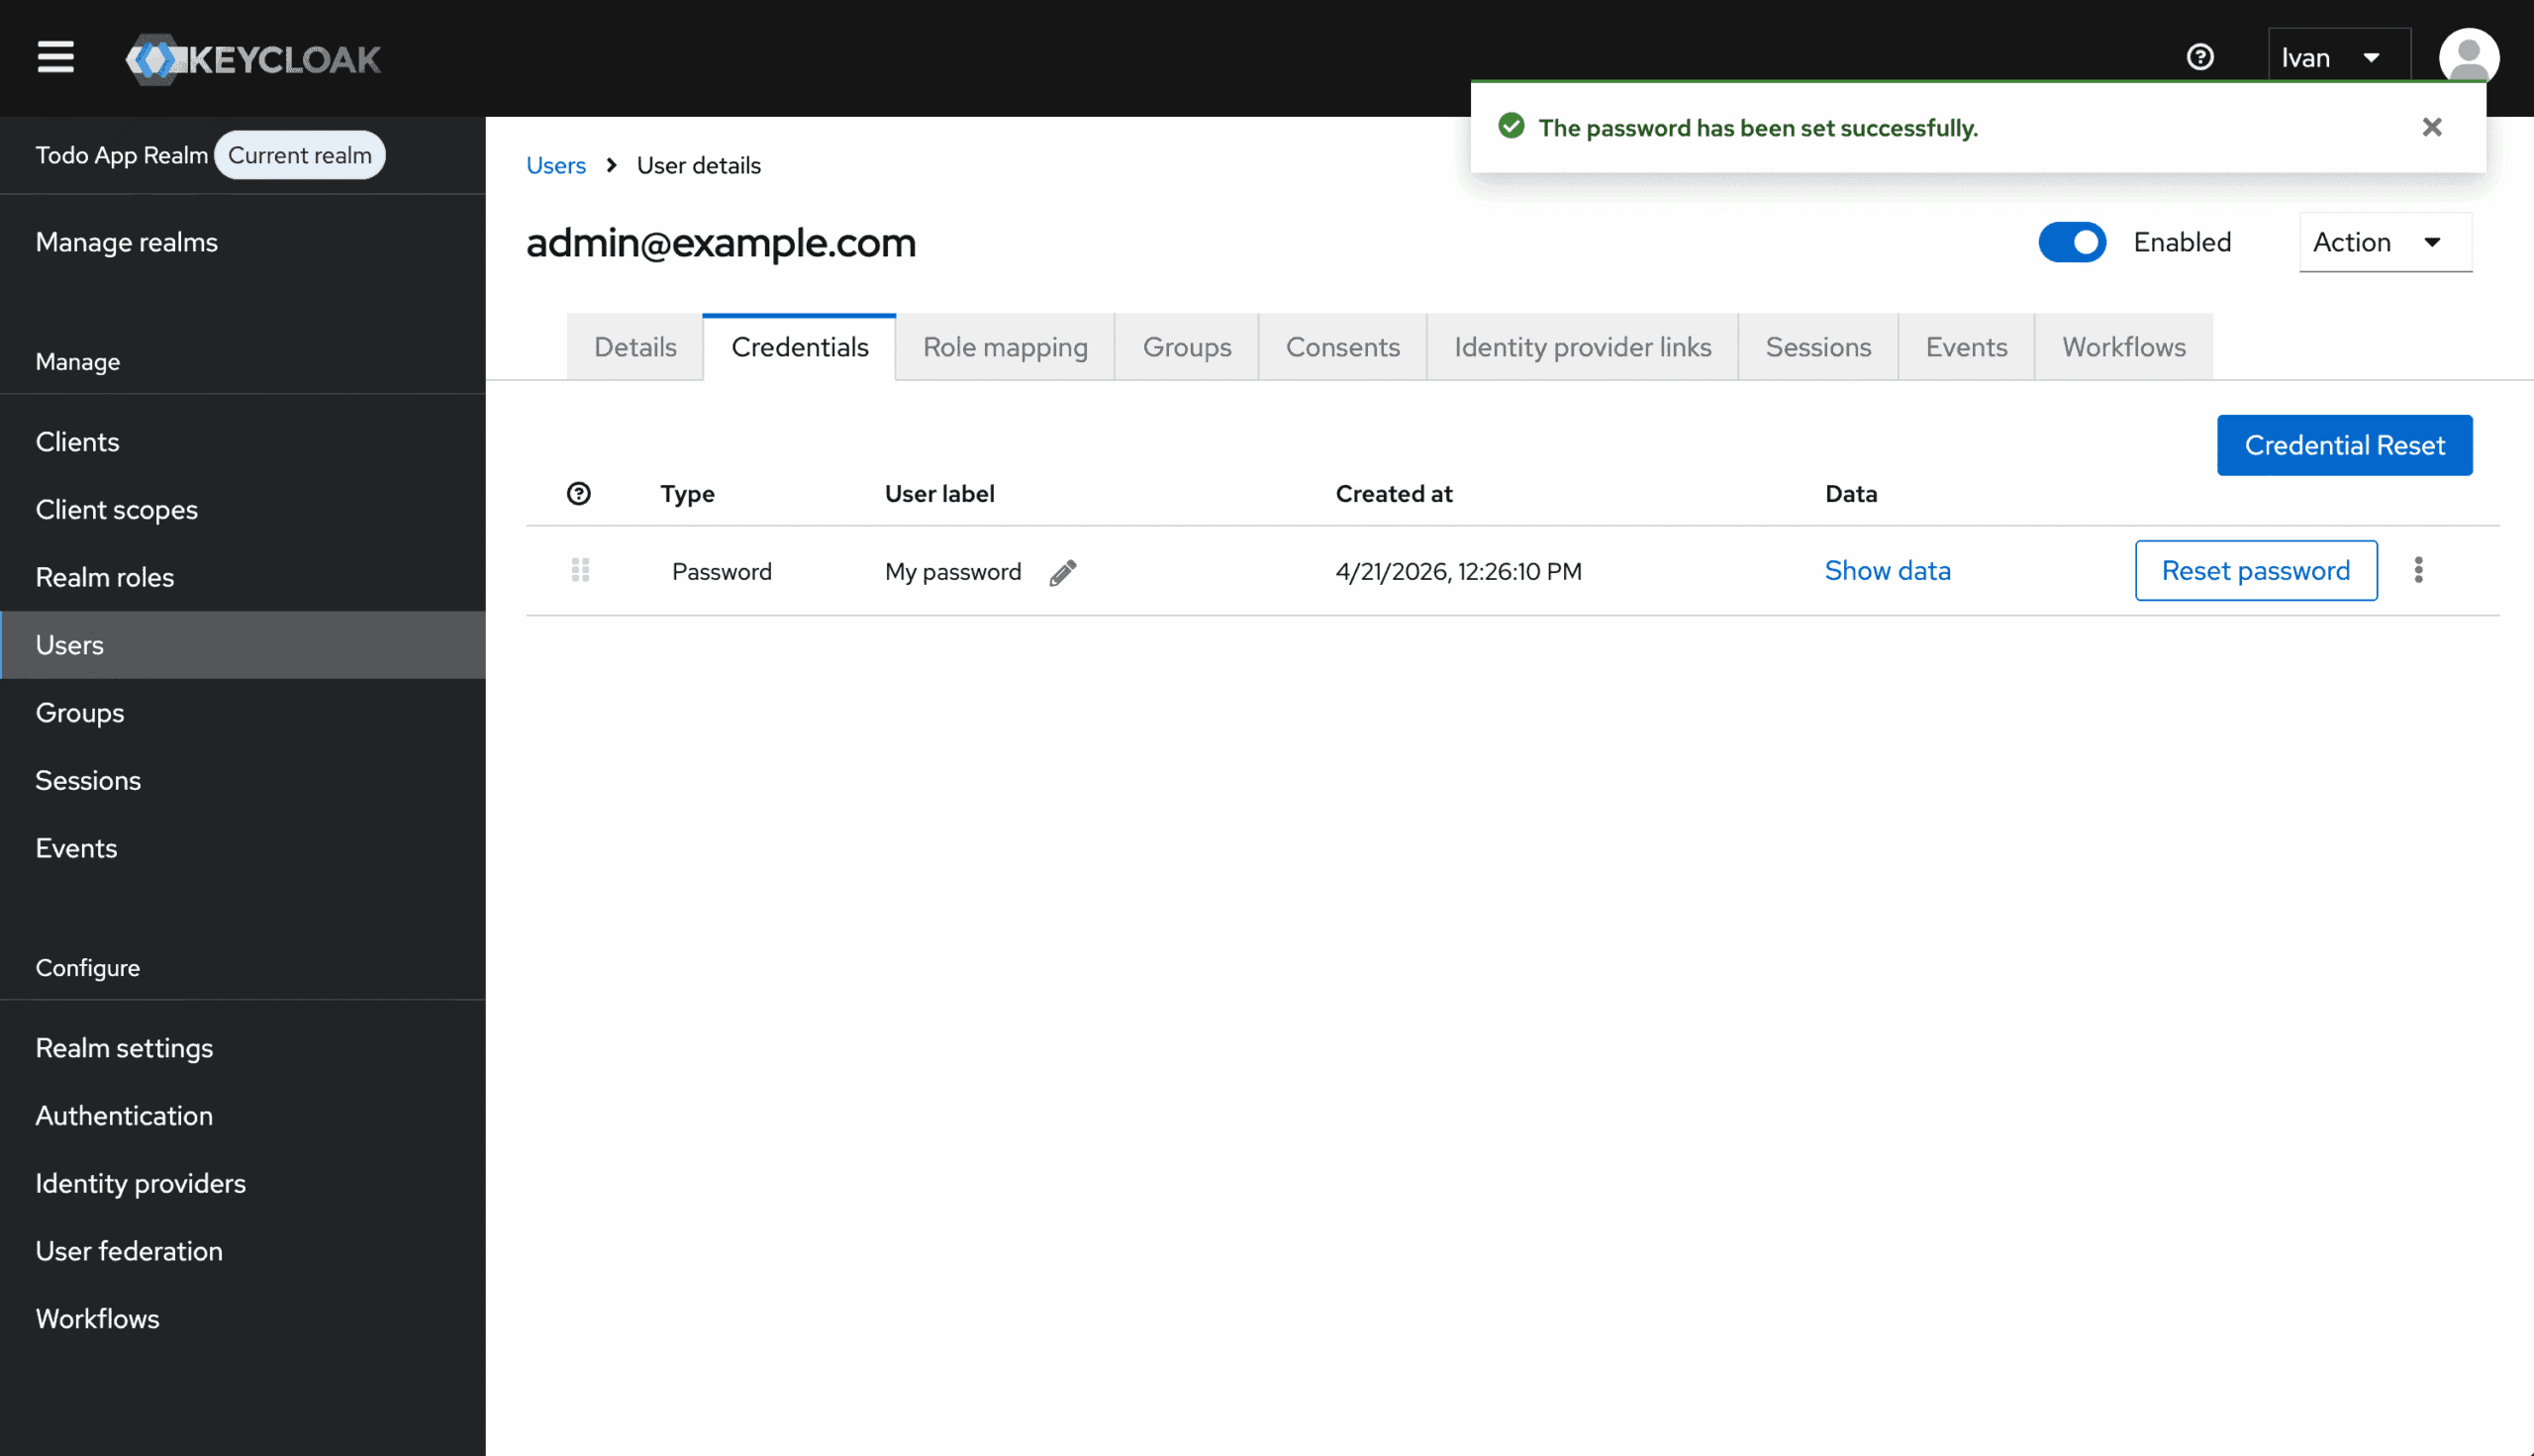
Let’s create the regular user. Click the “Users” option located in the left sidebar, and then on the “Add user” button. The “Create User” form will appear again. Fill in the form as follows:
- Email:
user@example.com - First Name:
User - Last Name:
User - Click on the “Join Groups” button and select the “USERS” group to assign it to the user.
- Click on the “Join” button.
- Finally, click on the “Create” button.
- Next, we need to set a password for the regular user. Click the “Credentials” tab and then click on the “Set Password” button.
- In the “Set Password” form:
- Provide a strong password for the “Password” field and then repeat it in the “Password Confirmation” field.
- Uncheck the “Temporary” option to make the password permanent.
- Finally, click on the “Save” button and confirm by clicking on the “Save password” button.
- The regular user is created successfully. And both admin and regular user should appear in the “User list”.
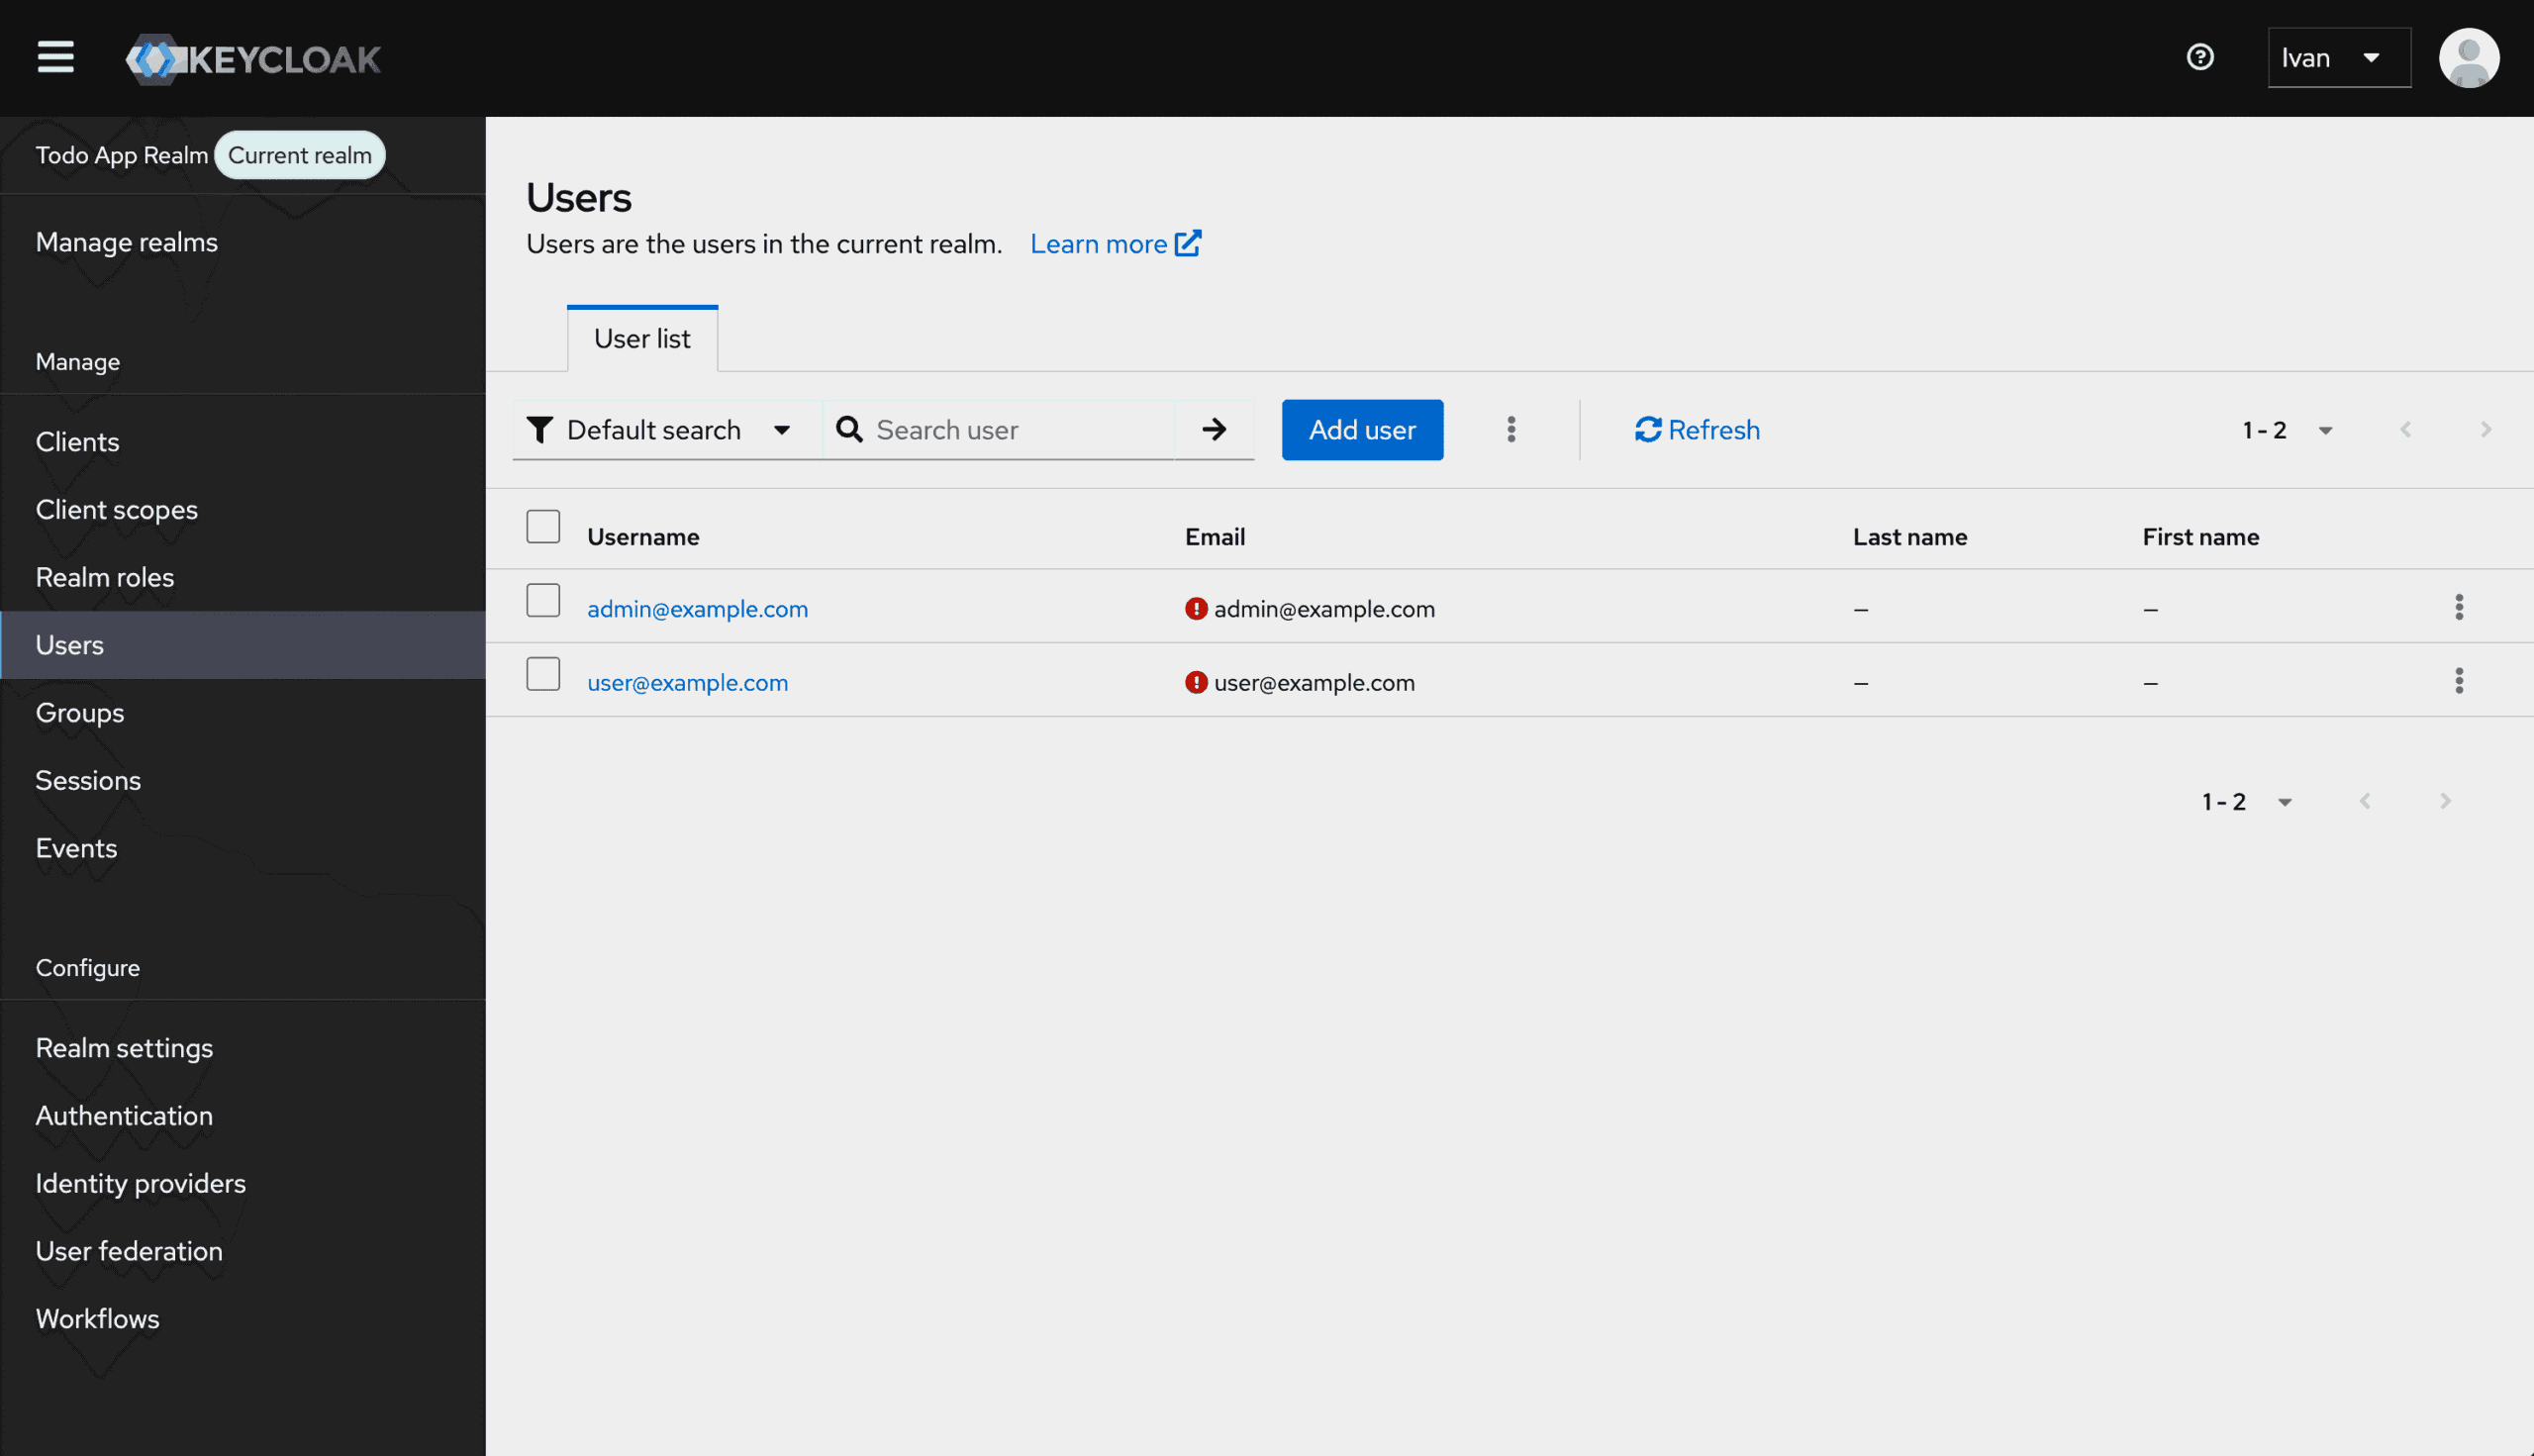
Spring Boot Application
First, clone the repository (if you haven’t already) and, in a terminal, navigate to the project directory.
Setup
Now, we have everything set up in Skycloak and Keycloak. The next step is to configure our Spring Boot application to connect to the Keycloak realm we just created and then test the authentication flow.
The application uses two environment variables to connect to Keycloak:
ISSUER_URL: the Keycloak issuer URL (default,http://localhost:8081/realms/todo-realm)CLIENT_ID: the client ID (default,todo-app-client)
These values are configured in src/main/resources/application.properties using the ${VAR:default} syntax, which means: use the environment variable if set, otherwise fall back to the default. By exporting ISSUER_URL and CLIENT_ID before running the app, we override the defaults and connect to our Skycloak-managed Keycloak instead of the local one.
IMPORTANT: If you don’t have the
ISSUER_URLandCLIENT_IDvalues saved, you can obtain them by accessing the application details page in Skycloak. Go to the “Applications” page by clicking on the “Applications” option located in the left sidebar (“REALM FEATURES” section), then select the “todo-app-client” application. The Issuer URL and Client ID values should be present on the “Connection” tab.
Now, let’s export these variables
export ISSUER_URL=<todo-app-issuer-url>
export CLIENT_ID=<todo-app-client-id>
And run the application.
./mvnw spring-boot:runOnce the application is running, access it in your browser at http://localhost:8080. You should see the home page of the todo application.
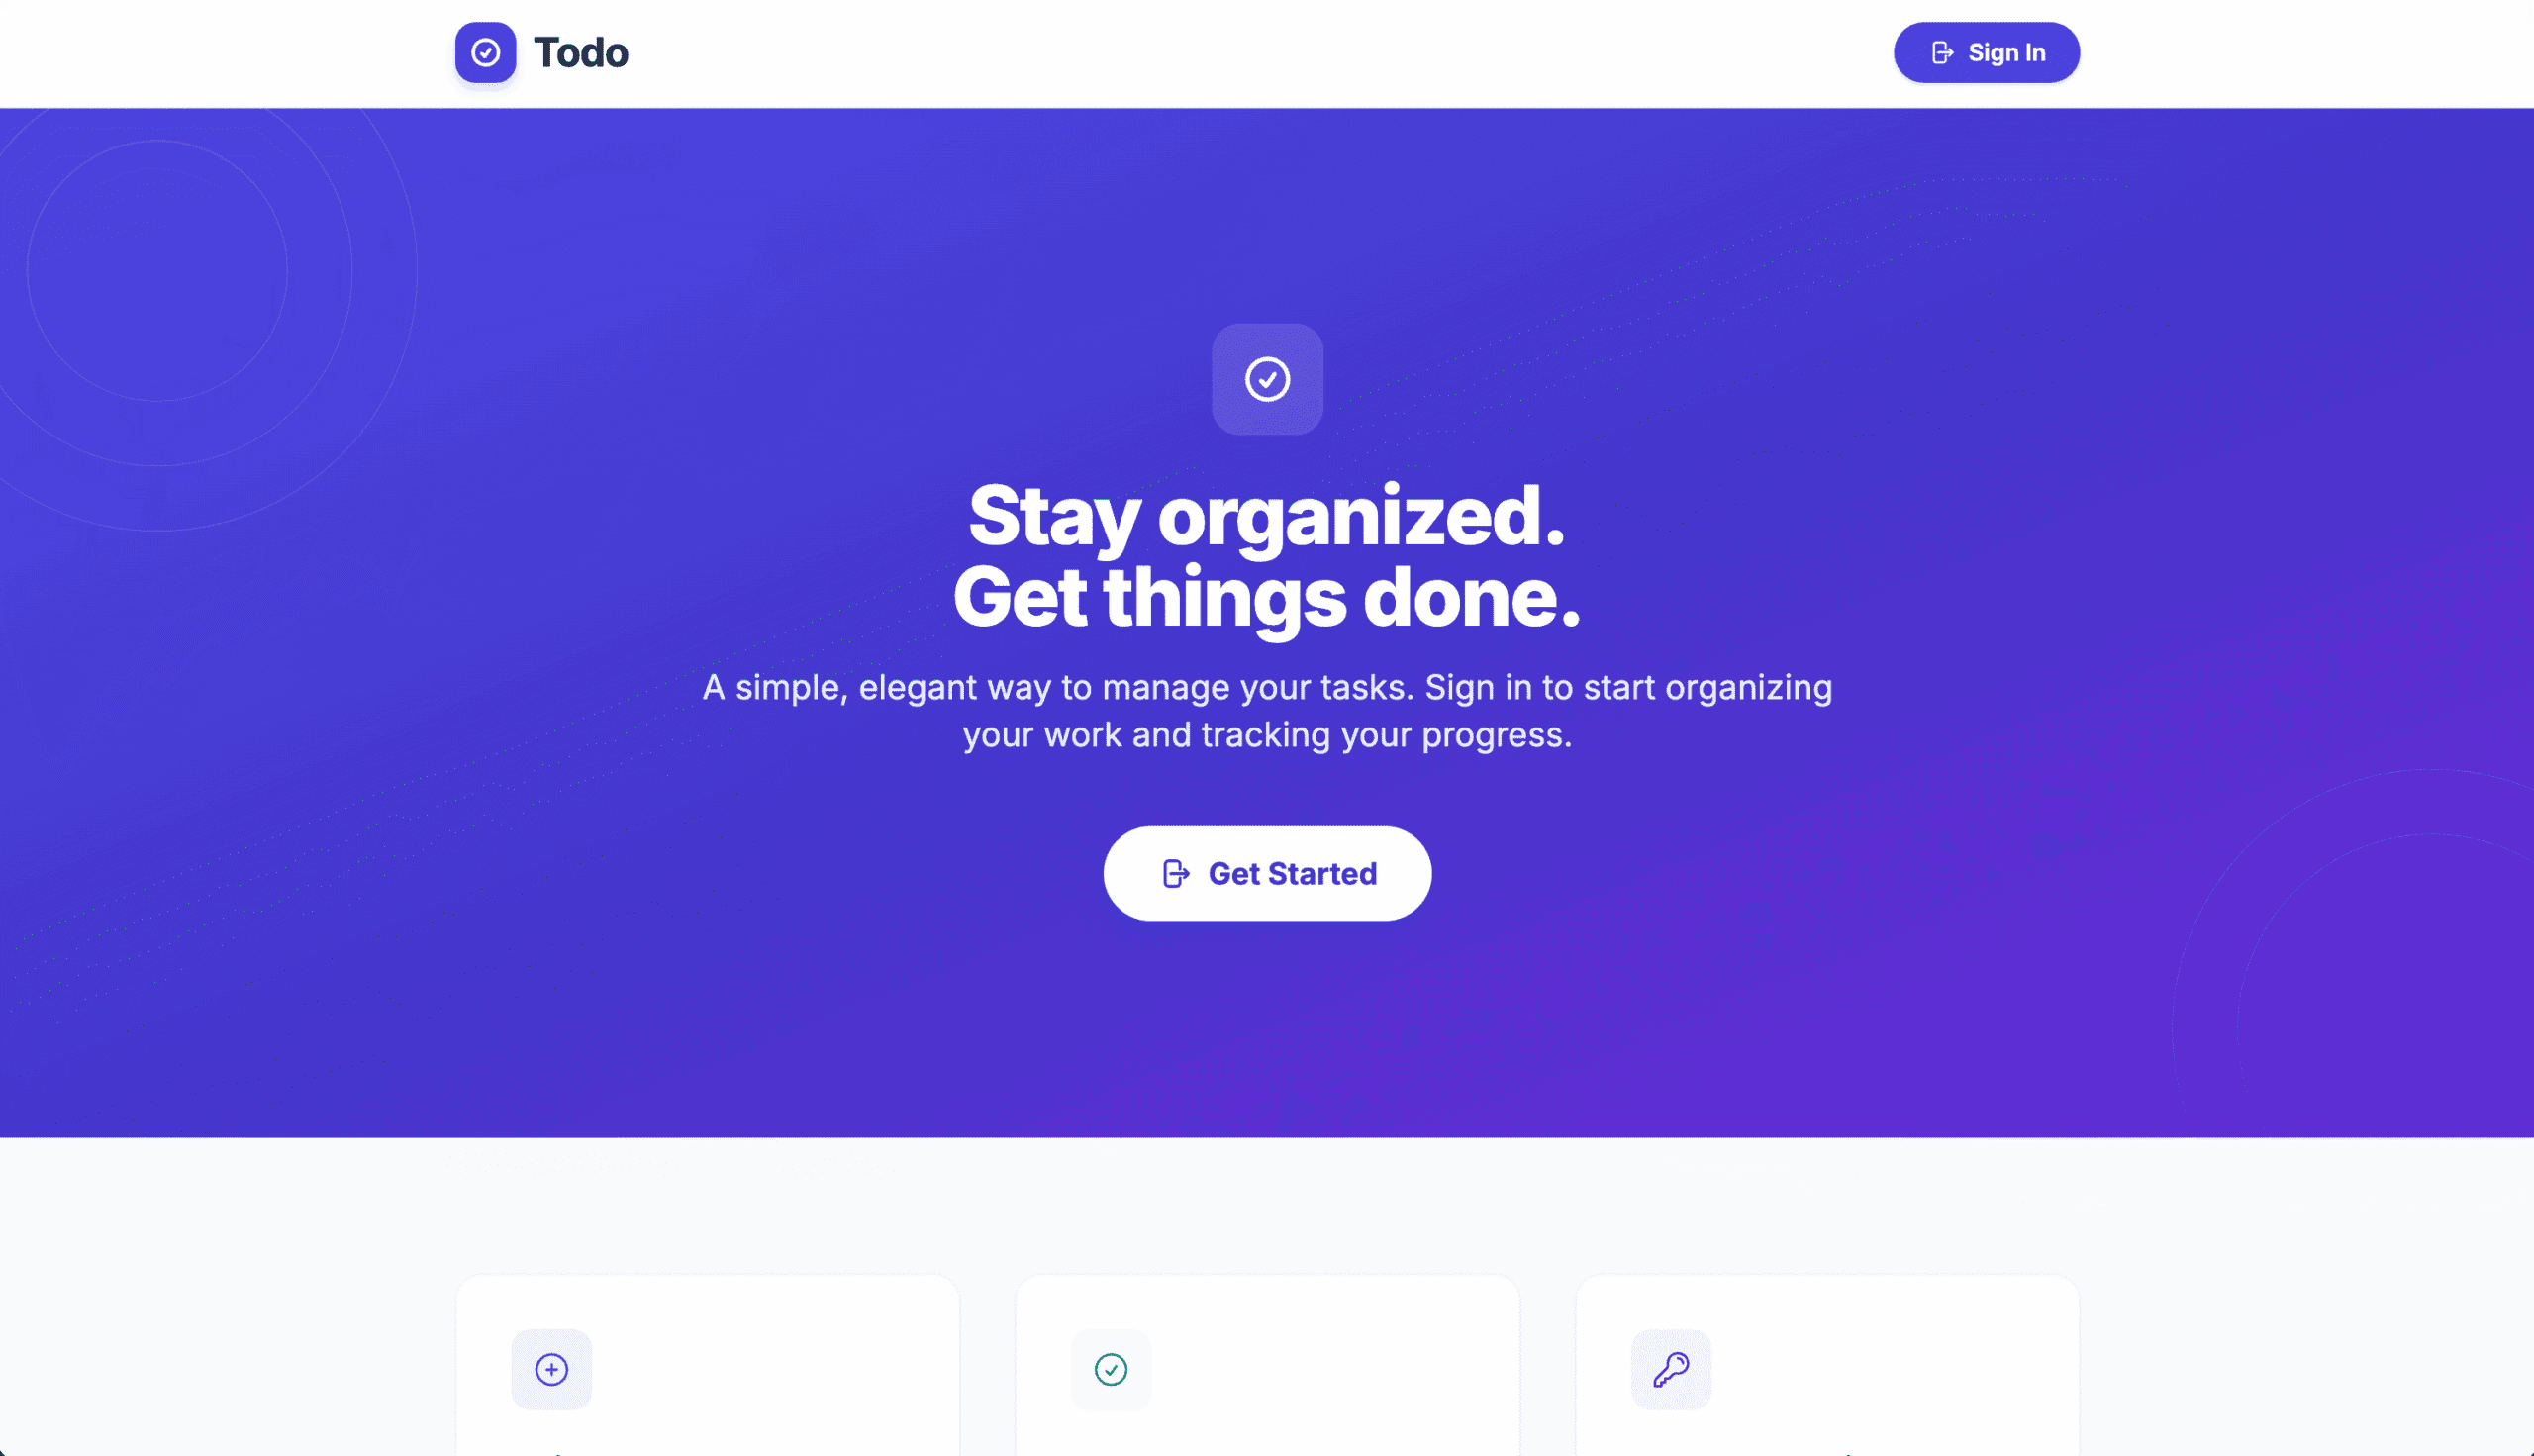
Testing
To test the authentication flow, click on the “Sign In” link located at the top right corner of the page. You should be redirected to the Keycloak login page.
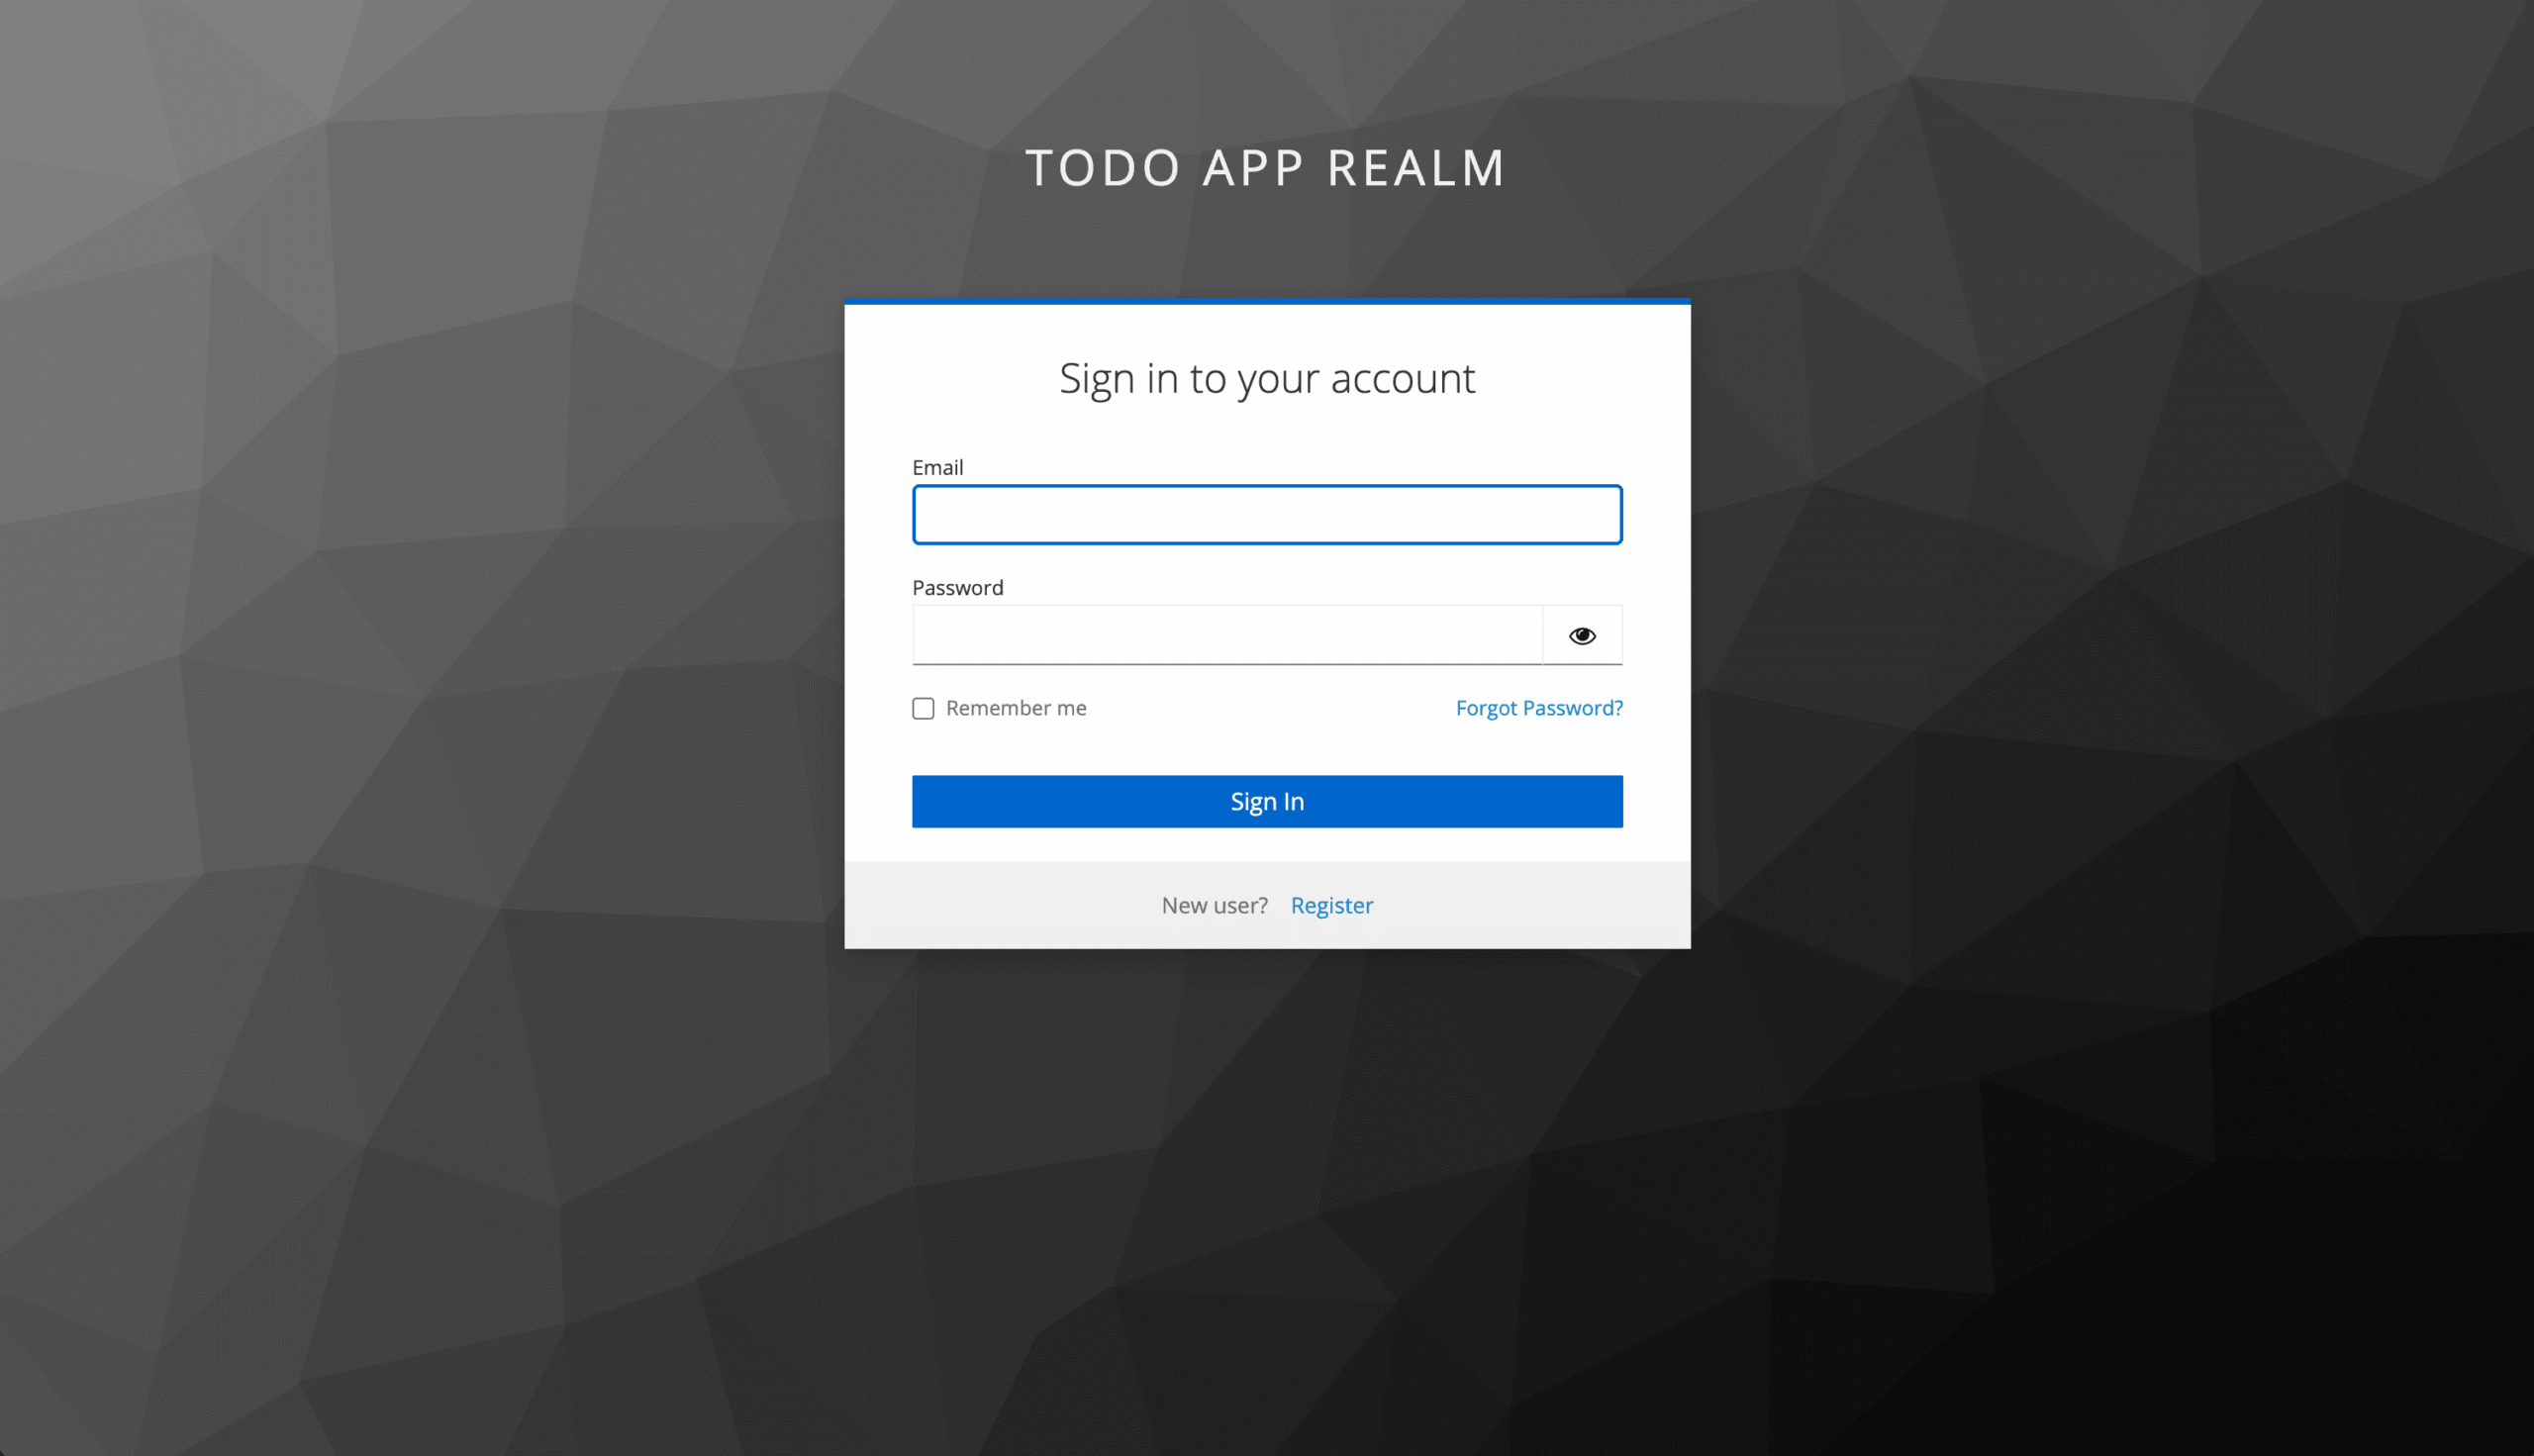
We can test the authentication flow using both the admin and regular user. For instance, let’s log in using the admin credentials.
After providing the email and password of the admin user and clicking on the “Sign In” button, you should be redirected back to the home page of the application, but now you should see a welcome message with the admin’s name and email, and also a message indicating that you are logged in as an admin.
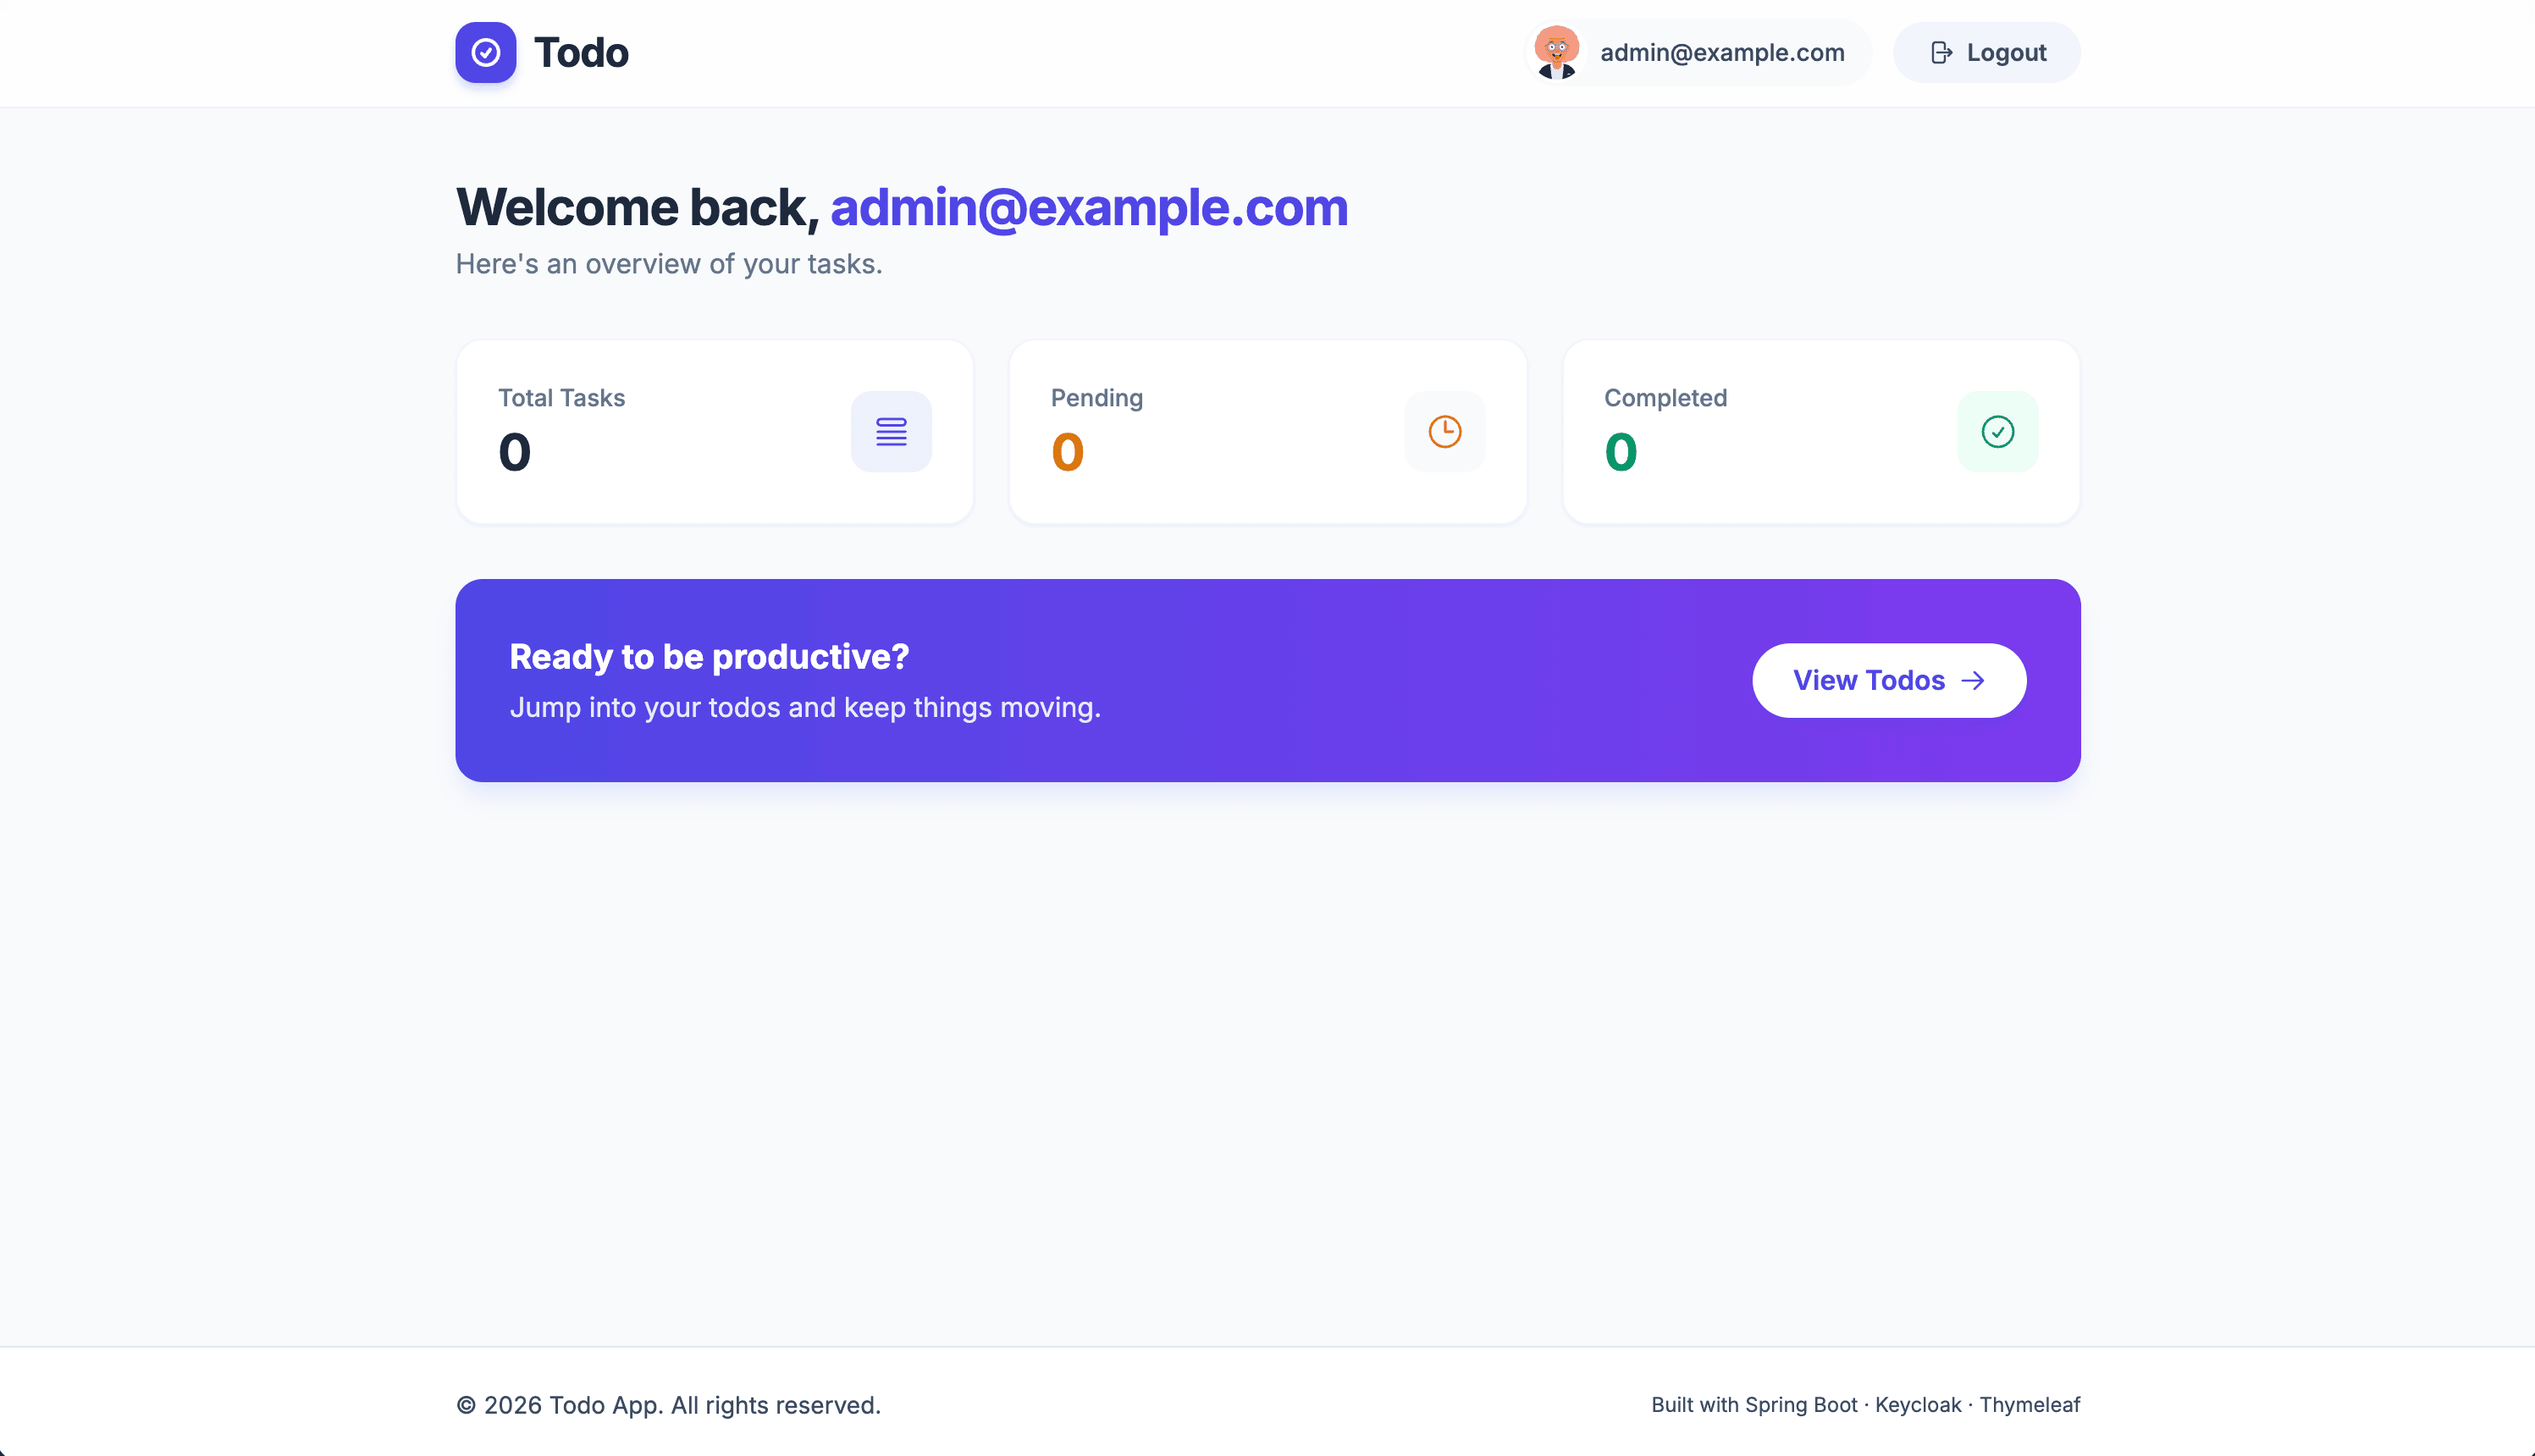
Go ahead and play around with the application using the admin user. You can create, edit, and delete todos, and also see all the todos created by other users.
Troubleshooting
Login fails
Verify:
- Issuer URL is correct
- Client ID matches the configured client
- Realm name is correct
Invalid redirect URI
Ensure the redirect URI matches exactly: http://localhost:8080/*
User cannot access admin features
Verify the user belongs to the ADMINS group. You can also decode the access token with the JWT Token Analyzer to confirm the TODO_ADMIN role is present in the token.
That’s It!
Congratulations! You have successfully connected your Java Spring Boot application secured with Keycloak to Skycloak. You can now manage your Keycloak cluster, realm, users, and all configurations directly from the Skycloak dashboard, and enjoy all the features that Skycloak offers.
Want the same setup for your own app? Spin up a managed Keycloak instance and connect it the same way, or explore the Spring Boot integration docs for more patterns.