Introduction
In this guide, we’ll explore how to implement Python authentication for Identity and Access Management (IAM) using Keycloak—a powerful, open-source identity and access management solution. Whether you’re building a new application or enhancing an existing one, this guide will provide you with practical steps, real-world examples, and best practices to get you started.
Understanding the Basics of IAM and Python Authentication
Before diving into the implementation, it’s essential to understand the fundamentals of Identity and Access Management (IAM) and how Python plays a pivotal role in authentication processes.
What is Identity and Access Management (IAM)?
IAM is a framework of policies and technologies that ensures the right individuals have appropriate access to resources within an organization. It involves authenticating users and authorizing their access based on roles and permissions. Effective IAM helps prevent unauthorized access and safeguards sensitive data.
Role of Python in Authentication
Python, known for its simplicity and versatility, has become a popular choice (even more now with AI being the main ingredient of most modern applications 😉) for developing applications that require robust authentication mechanisms. With extensive libraries and frameworks such as Flask and Django, Python simplifies the integration of authentication protocols like OAuth 2.0 and OpenID Connect.
Setting Up Keycloak for Python Applications
Keycloak is an open-source Identity and Access Management solution that adds authentication to applications and secures services. By integrating Keycloak with your Python application, you can leverage advanced security features without building them from scratch.
Installing Keycloak – Quick & Easy way
The quickest and easiest way to start your Keycloak instance is to use Docker:
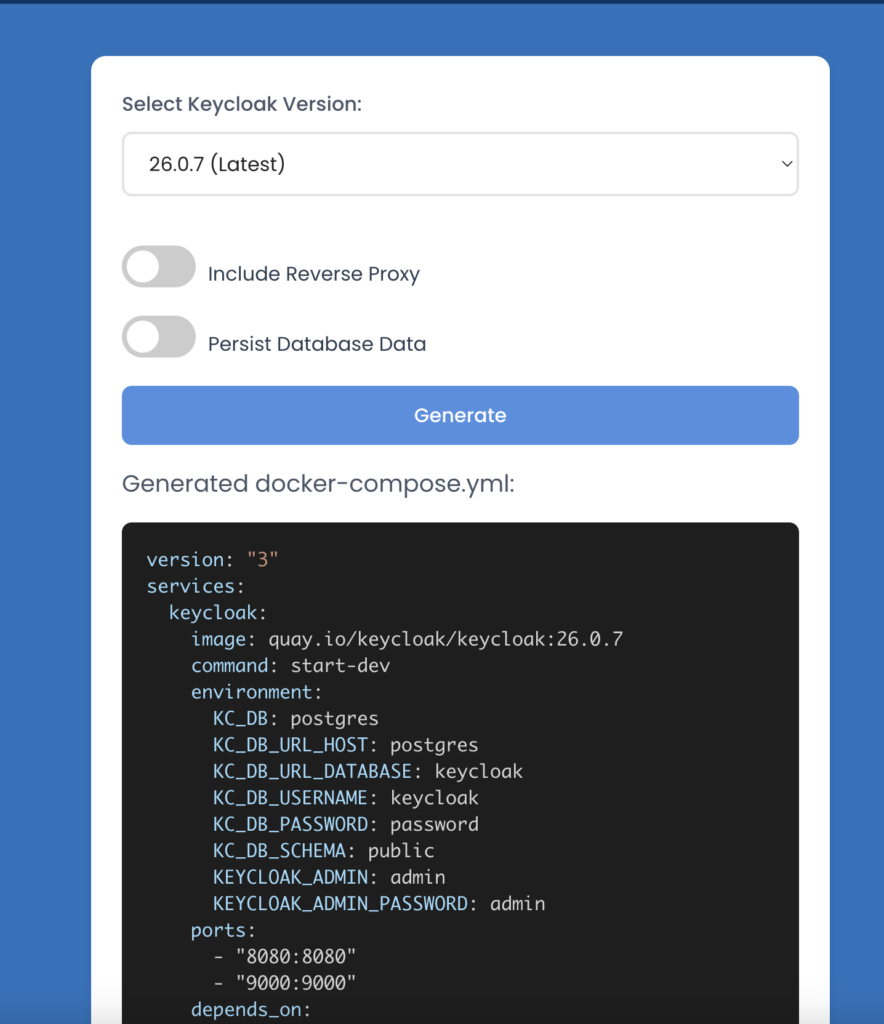
- Download and install Docker. This is not the goal of this blog post, so I will let you figure this one out.
- Make sure to also install or setup Docker-compose
- Generate a docker-compose.yml that will include Keycloak configuration
- Don’t worry, I said Quick & Easy, so go HERE and generate the docker-compose with the version of your choice.
- Put the docker-compose file in the directory of your choice with the optional nginx or haproxy config and run docker-compose up (or docker compose up) to get things started!
You can jump past the dangerous method.
Installing Keycloak – Dangerous & Boring way
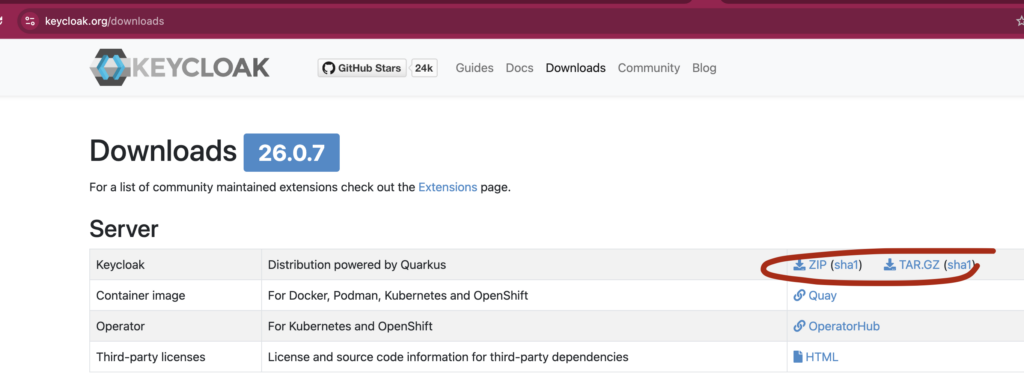
To get started with Keycloak if you want it running locally, download the latest version from the official website: Keycloak.org. After downloading the compressed release, unzip it and get in using a terminal. From there you can run Keycloak using the following command:
$ KEYCLOAK_ADMIN=admin KEYCLOAK_ADMIN_PASSWORD=admin ./bin/kc.sh start-devThis command starts Keycloak and binds it to all network interfaces, making it accessible from other devices on your network. Be aware that the proper Java version needs to be installed prior to running this otherwise you may get these types of error:
Error: LinkageError occurred while loading main class io.quarkus.bootstrap.runner.QuarkusEntryPoint
	java.lang.UnsupportedClassVersionError: io/quarkus/bootstrap/runner/QuarkusEntryPoint has been compiled by a more recent version of the Java Runtime (class file version 61.0), this version of the Java Runtime only recognizes class file versions up to 60.0
Configuring Keycloak Realms and Clients
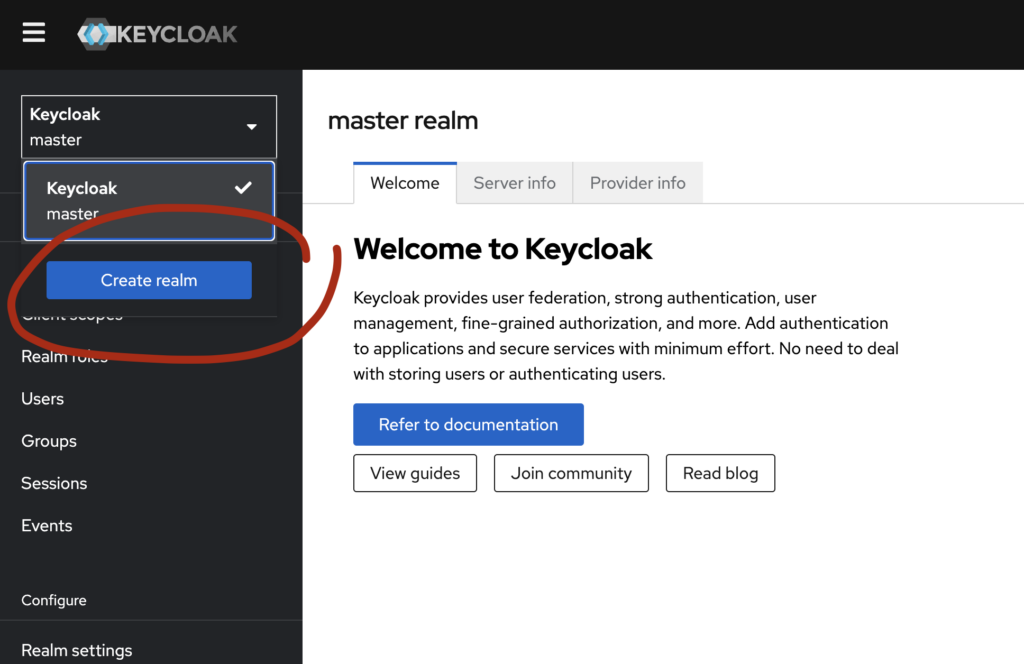
Access the Keycloak admin console at http://localhost:8080 or http://localhost. Log in with the admin credentials (admin/admin) you set during installation. Next, create a new realm and save its name for later (very soon)—think of it as a namespace for your configurations.
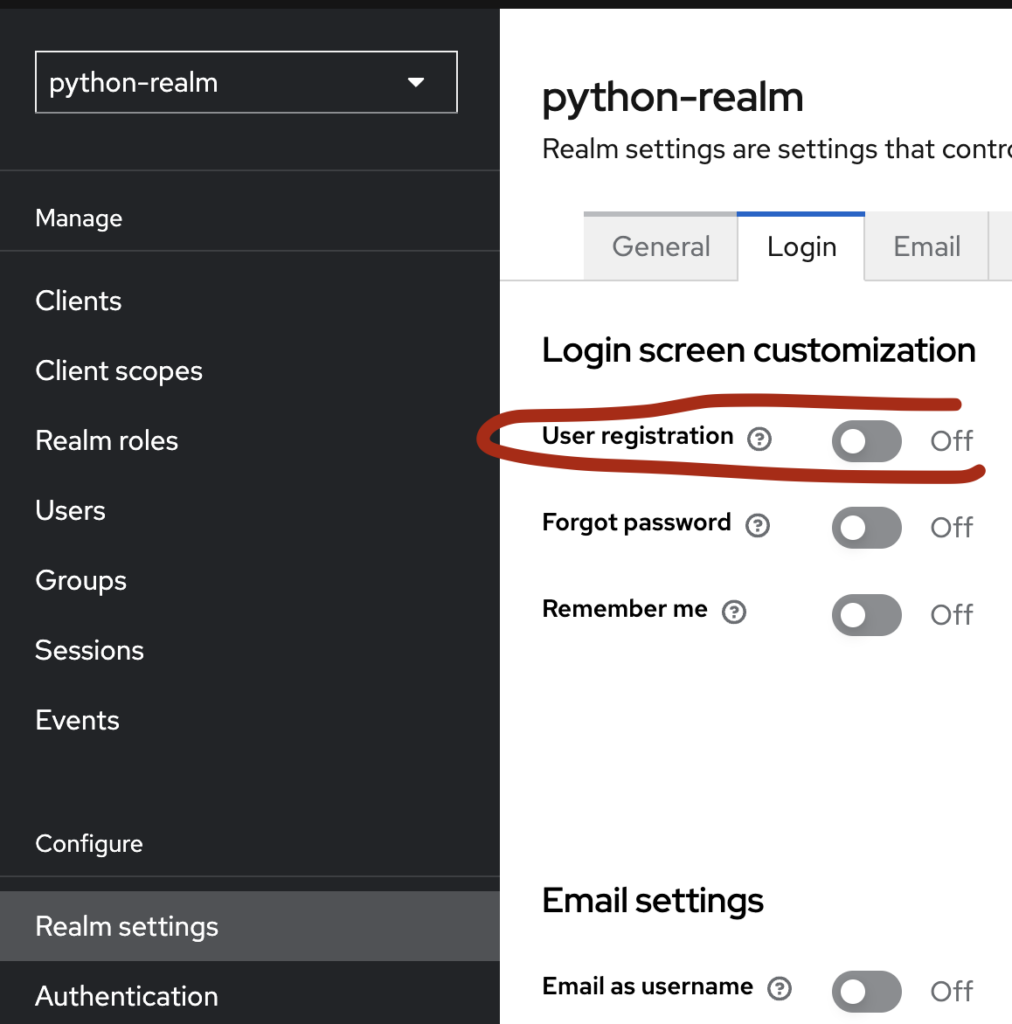
After creating a realm, go to realm settings and navigate to the login tab and activate user registration.
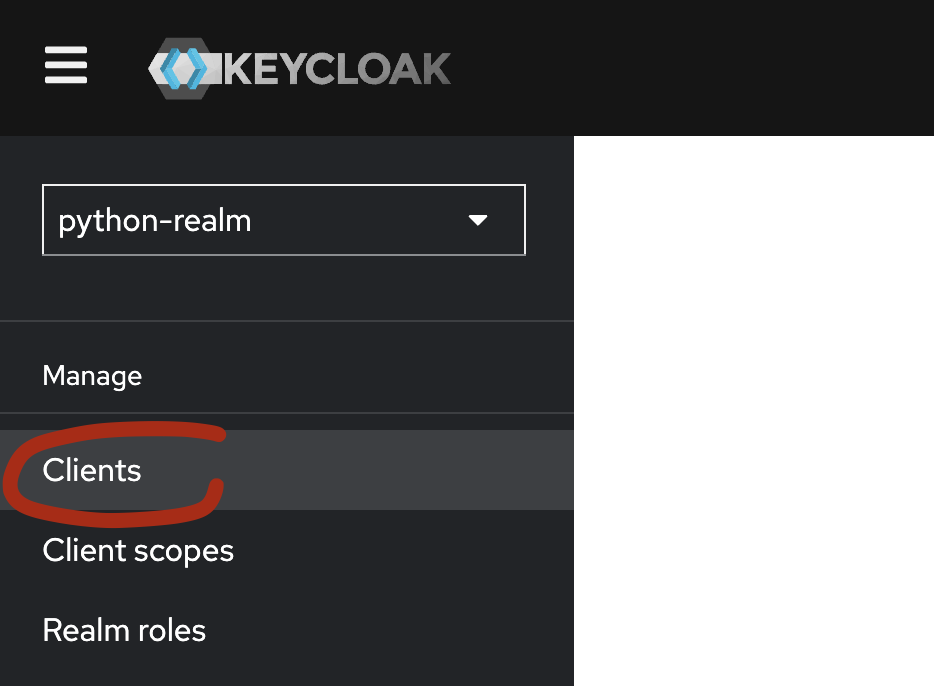
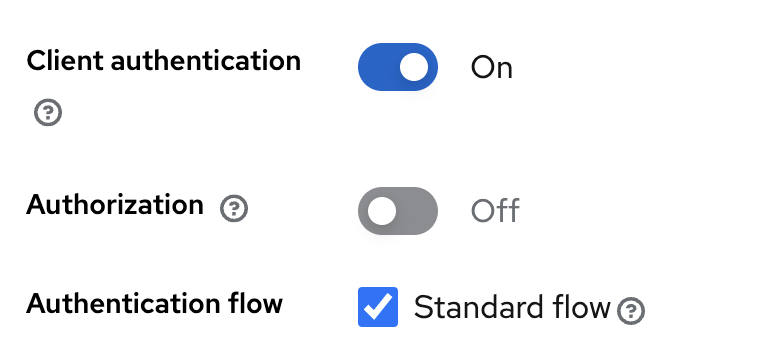
Then navigate on the left menu to Clients to create a new client that will represent your Python application. You can use default settings, but make sure to use:
- OpenID as the client type
- Standard flow for the authentication flow – That will allow the redirect flow for authentication
- On for Client Authentication – This will tell Keycloak we can use a client id with a secret to use it because we are running in a trusted network 😉

Implementing OAuth 2.0 and OpenID Connect
OAuth 2.0 and OpenID Connect are protocols that enable secure authentication and authorization. Implementing these protocols in your Python application enhances security and ensures compliance with industry standards.
Understanding OAuth 2.0
OAuth 2.0 is an authorization framework that allows applications to obtain limited access to user accounts on an HTTP service. It works by delegating user authentication to the service that hosts the user account. Learn more about OAuth 2.0 at oauth.net.
Integrating OpenID Connect with Python
OpenID Connect extends OAuth 2.0 to include authentication. That means we can handle authentication + authorization. now. In Python, libraries like Authlib and python-oauth2 simplify the integration process.
Here’s a basic example using Authlib:
#! /usr/bin/env python3

from flask import Flask, redirect, url_for
from authlib.integrations.flask_client import OAuth
import secrets

app = Flask(__name__)
app.secret_key = 'your-super-secret-key'
oauth = OAuth(app)

keycloak = oauth.register(
    'keycloak',
    client_id='YOUR_CLIENT_ID',
    client_secret='YOUR_CLIENT_SECRET',
    server_metadata_url='http://localhost:8080/realms/YOUR_NEW_REALM/.well-known/openid-configuration',
    client_kwargs={'scope': 'openid profile email'}
)

def generate_nonce():
    return secrets.token_urlsafe(16)

@app.route('/login')
def login():
    redirect_uri = url_for('authorize', _external=True)
    return keycloak.authorize_redirect(redirect_uri, nonce=generate_nonce())

@app.route('/hello')
def hello():
    return "Hello, Secured Python World! I know who I am!"

@app.route('/authorize')
def authorize():
    token = keycloak.authorize_access_token()
    user_info = keycloak.parse_id_token(token, nonce=token.get('nonce'))
    print(user_info)
    return redirect('/hello')

if __name__ == '__main__':
    app.run(debug=False)
This code sets up OAuth 2.0 authentication with Keycloak in a Flask application. Make sure to install the following dependencies:
Flask
Authlib
requests
- You are redirected to Keycloak’s login page
- You can stop stressing and select register to create a une user
- Upon registration, you are considered logged in
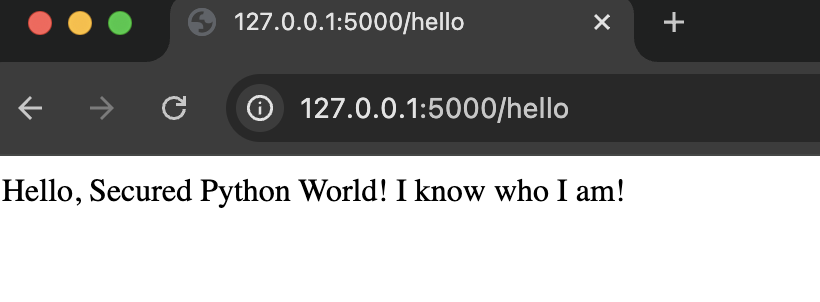
- You should see a Hello message
Common Challenges and Solutions
Implementing authentication can come with challenges. Here are some common issues and their solutions.
Handling Token Expiration
Access tokens have limited lifespans for security reasons. To handle token expiration, implement refresh tokens or prompt users to re-authenticate. Adjust token settings in Keycloak under the Token settings for your realm. With the example we just tried, upon waiting long enough you will be asked to login through Keycloak again when the token expires. For now, you will be redirected to the hello message.
Securing API Endpoints
Ensure that all API endpoints requiring authentication enforce token validation. Use middleware or decorators in your Python application to check for valid tokens before processing requests.
For example, in Flask:
from functools import wraps
from flask import request, abort

def token_required(f):
    @wraps(f)
    def decorated(*args, **kwargs):
        token = request.headers.get('Authorization')
        if not token or not validate_token(token):
            abort(401)
        return f(*args, **kwargs)
    return decorated

@app.route('/secure-data')
@token_required
def secure_data():
    return {'data': 'This is secured data.'}
Best Practices and Real-World Examples
Adopting best practices enhances the security of your application.
Implementing Two-Factor Authentication (2FA)
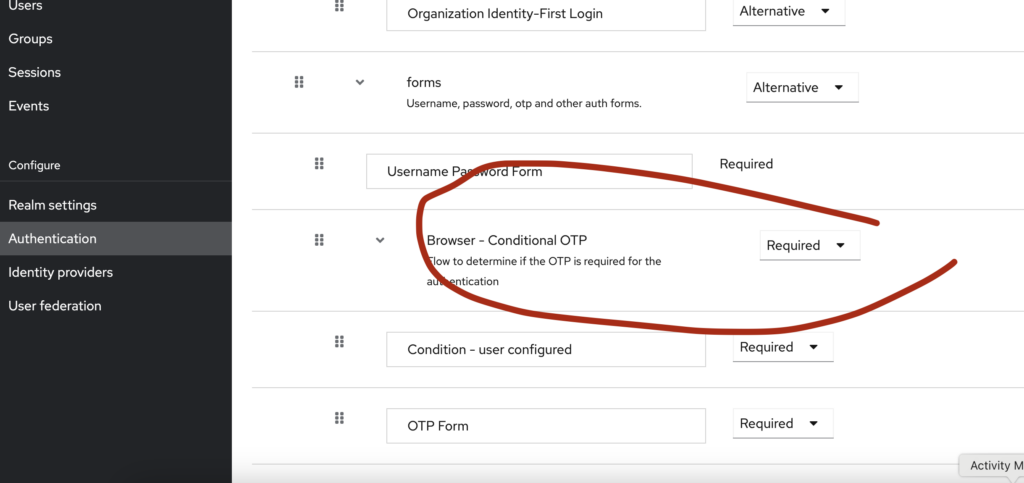
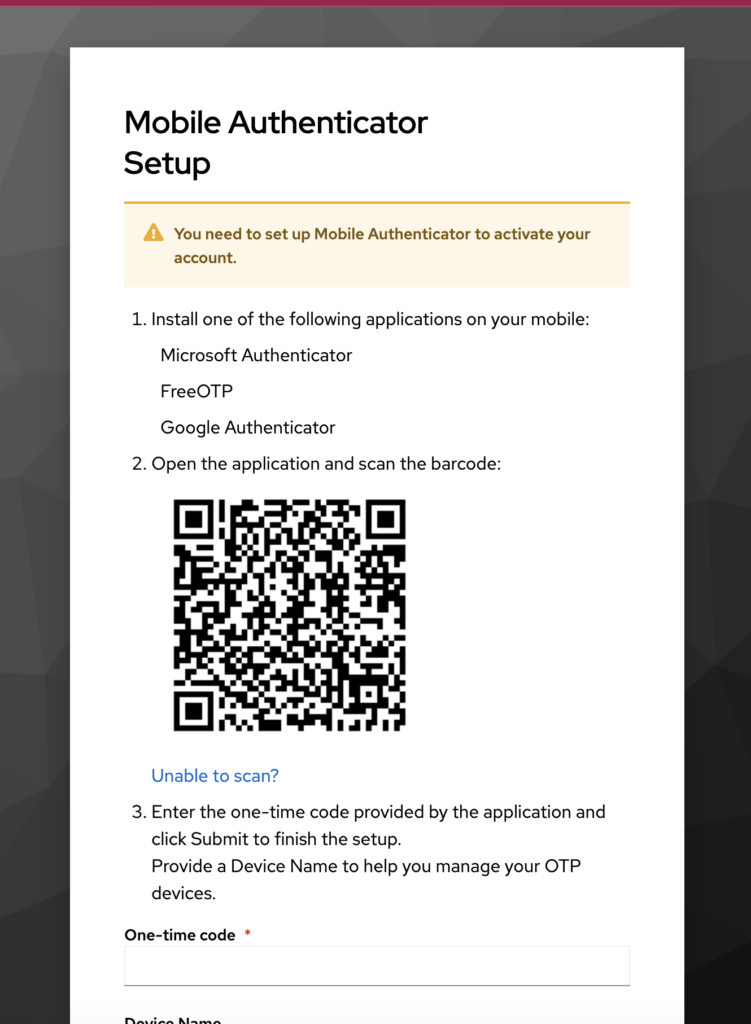
Adding 2FA provides an extra layer of security. Keycloak supports 2FA out of the box. Enable it in the authentication flow settings in Keycloak, and your Python application will prompt users accordingly.
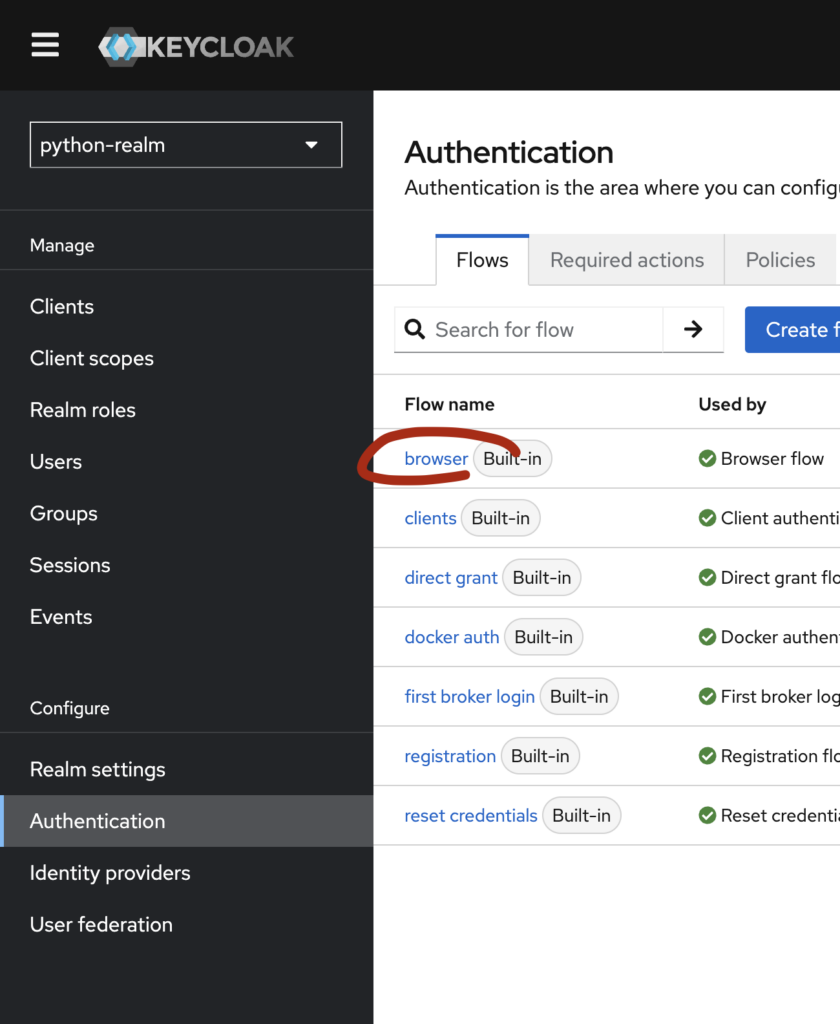
Test it out now! Go to your realm and access Authentication settings, click on the bworser flow and then scroll down to the OTP section. Instead of leaving it to conditional, enforce it by setting it up to Required.
Upon setting this up, when logging back again, you will be prompted to setup and use an additional factor than just your password.
Real-World Example: Securing a Flask Application
Consider a Flask application that manages sensitive data. By integrating Keycloak, you can offload authentication and focus on your application’s core functionality.
Here’s how one company enhanced their security:
- Challenge: Their internal application required secure authentication mechanisms, but as they were growing they kept hardcoding auth information into their code stack.
- Solution: They integrated Keycloak with their Python backend stack to delegate the authentication and authorization mechanism, enabling SSO and other features.
- Result: Improved security and compliance with industry standards and they don’t have to manage authentication themselves anymore!
Conclusion
In this guide, we’ve explored how to get started with Python authentication for IAM using Keycloak. By leveraging Keycloak’s features and Python’s simplicity, you can build secure applications smoothly.
Remember to follow best practices and stay updated with the latest security trends to safeguard your applications. Now, it’s time to put this knowledge into action and enhance your application’s authentication mechanisms! 🔐
