Introduction
When using Keycloak or the managed Keycloak IAM solution Skycloak, it’s often required to restrict client applications to a specific set of users. This feature is not available out of the box in Keycloak. However, it can be implemented using custom extensions, which are freely available with Skycloak.
How it works
The registered client applications (OIDC or SAML-based clients) execute an authentication flow when authenticating with Keycloak. Keycloak allows customizing the authentication flow by creating and activating a new browser flow (or other flows, as applicable for your use case).
In this article, we focus on the case where the browser flow is executed. The idea is to inject a custom Authentication SPI (Service Provider Interface) into the flow that checks the client roles or policies of the user logging in during authentication.
Here, we discuss the approach of checking client roles. If a user has the client role restricted-access, the authentication flow proceeds successfully. Otherwise, an error is displayed in the browser, and the user is prevented from accessing the client application.
Following custom extension available with Skycloak is required for this purpose.

Prior to you implementing this feature, it’s strongly recommended to go through more details about this extension available here. It explains in detail about how to use the extension and has special instructions for identity provider redirect use cases. Identity provider redirects are not covered in this article. In addition, the above link has additional details on security considerations, among others.
Modifying the authentication flow.
Go to your realm and duplicate the Browser Flow through the Authentication menu in the Keycloak Admin Console.
If you’re unsure how to access your Keycloak console, go to the Skycloak console → Clusters, and select Admin Console from the right panel (available with the button under Actions.
Duplicate the default browser flow (for example, name the new flow browser-restricted) and create a flow as follows:
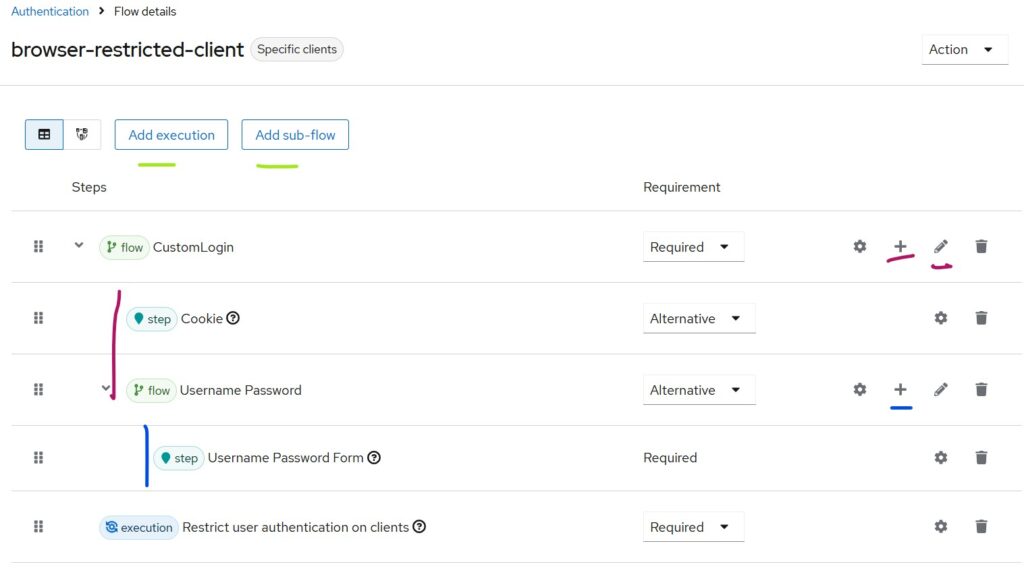
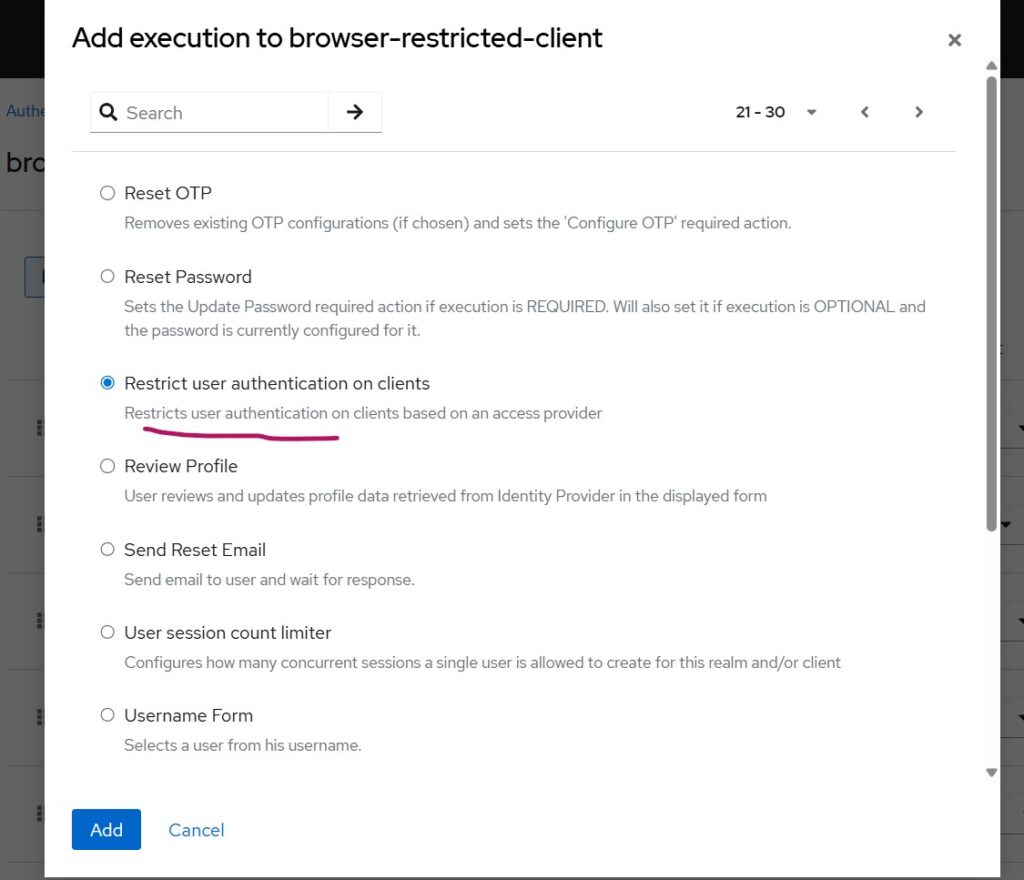
To insert the last entry “Restrict User Authentication on Clients,” use the Add Execution button and add it as shown below.
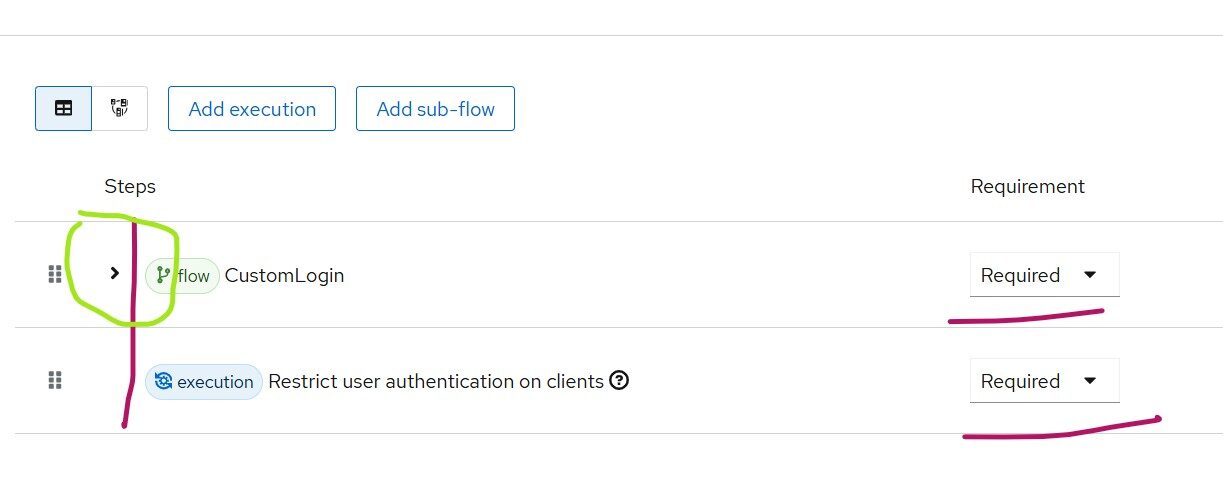
Please be very careful in creating the browser flow. If I collapse Custom Login flow, the diagram looks as below
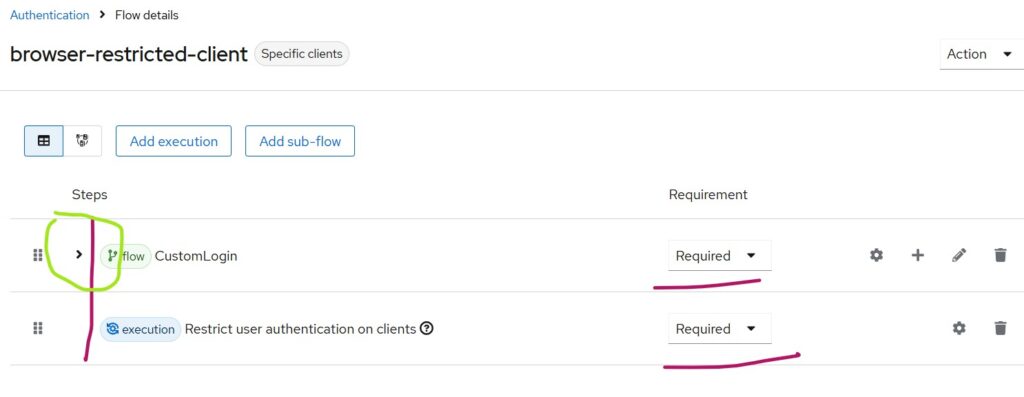
This means both flows are REQUIRED during authentication since they are positioned at the same level (as indicated by the red vertical line).
Thus, whenever the browser-restricted flow executes, both will run.
In the figure marked as Figure 1, under Custom Login, the Cookie and Username Password executions are at the same level and marked as ALTERNATE.
This means that if the user is already authenticated (has a valid cookie), the Username Password flow is skipped. Otherwise, the password flow will be executed.
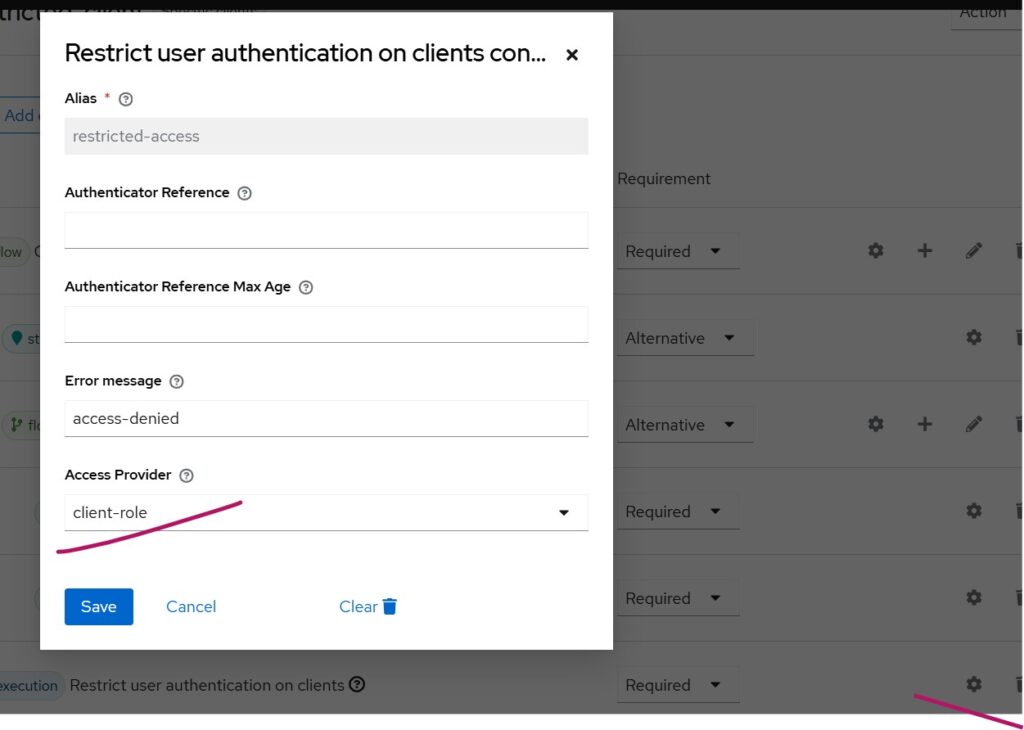
The custom extension, settings window with mandatory fields filled are as follows. Select the gear icon to the right to launch the dialog.
Activating the Browser Flow
Once the browser authentication flow is completed, it’s time to make it active.
You can make it active for all browser-based authentication flows by using Actions → Bind Flow in the top-right corner, or activate it only for specific clients.
Assume you want to make it active only for a specific OIDC client.
To do this:
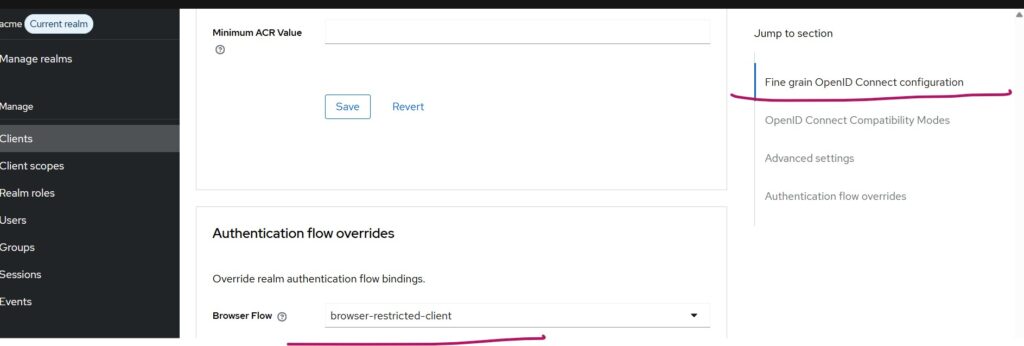
- Select the desired client after selecting the Clients menu in the left pane.
- Go to the Advanced tab.
- Select your customized browser flow and save the changes as shown in the below diagram.
Note: This assumes the client does not use Direct Grant Flow. If it does, you must similarly customize and assign a direct grant flow.
Configuring the client role
Suppose only members of the Finance group should have access to a specific client application.
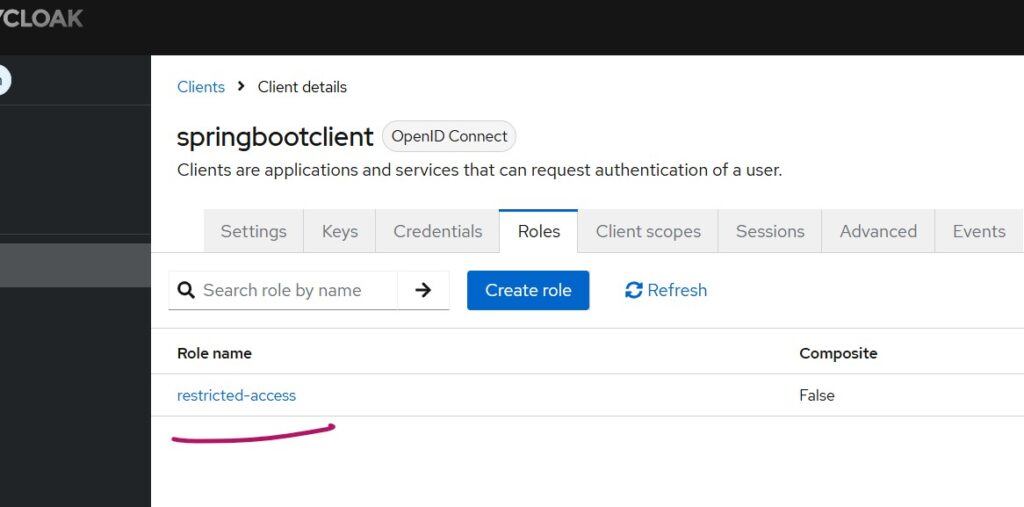
Define a client role named restricted-access for this client and assign the same client role to finance users individually.
If you have a group for finance users, assign the role to the group so all its members inherit it.
Client settings after adding the restricted-access client role should appear as below:
The finance group, where client role is assigned as below

Test the integration
Try accessing the client application as a user who belongs to the Finance group.
Since the user has inherited the restricted-access role, the login will succeed.
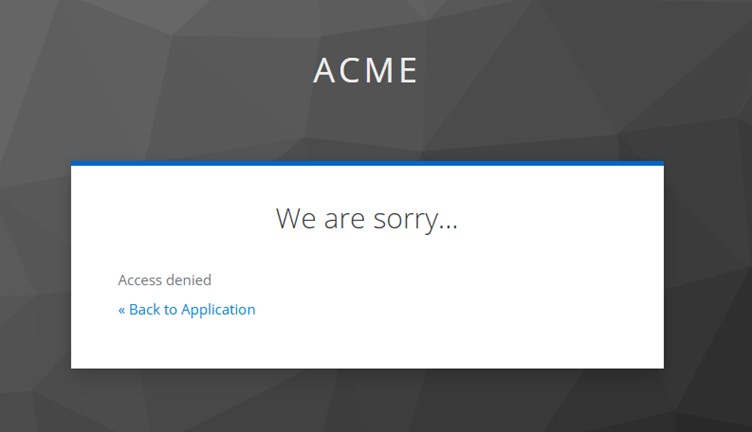
For users without the restricted-access role, the login will be blocked, while accessing the client application and an error message similar to below will come.
Thus, you can assign this role per client and also user or group to control access.
For example, an HR application can be restricted only to HR users and not Finance users.
These scenarios are achievable through custom Keycloak extensions.
If your requirement isn’t met by the provided free extensions, you can reach out to Skycloak Support for further guidance and assistance.
Summary
In this article, we learned how to restrict access to client applications using the Restrict Client Authenticator custom extension and client roles in Skycloak.
If you’re new to Skycloak, visit the Skycloak Getting Started Guide to learn more.

