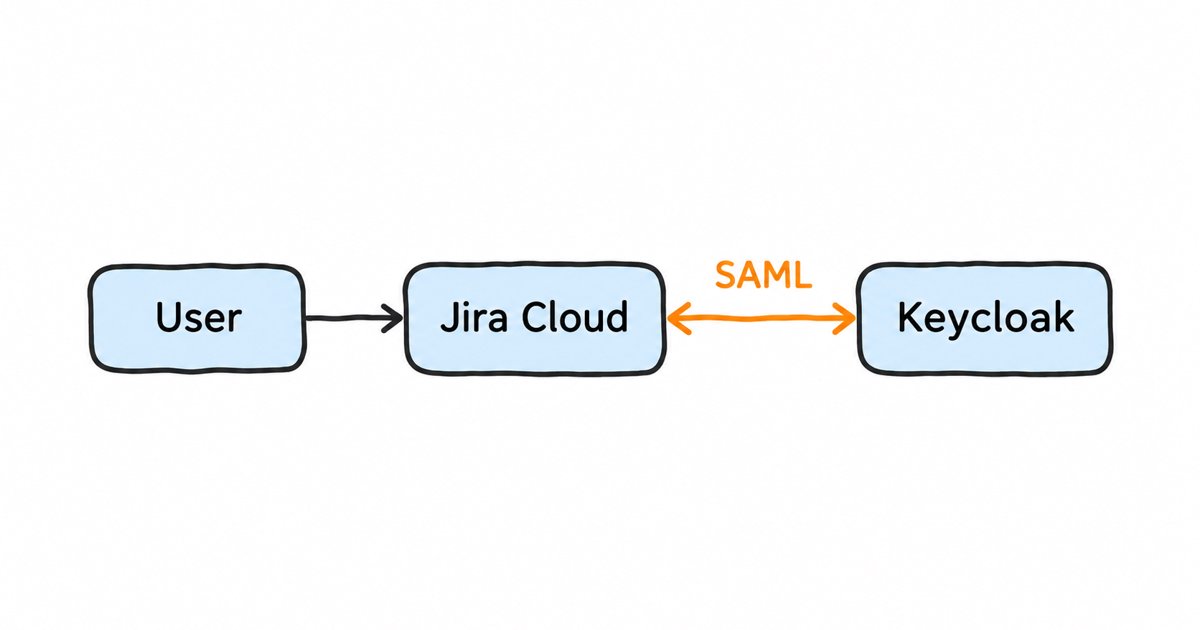
In Atlassian Administration (with Atlassian Guard and a verified domain), add a SAML identity provider to get the SP entity ID and ACS URL, pasting in Keycloak’s entity ID, SSO URL and certificate. In Keycloak, create a SAML client with the entity ID as Client ID and the ACS URL as redirect URI and Master SAML Processing URL, set the NameID to email, and test with one user before you enforce SSO.
Atlassian is the service provider (SP) here and Keycloak is the identity provider (IdP), and we explain the difference between the two separately.
Prerequisites
- Keycloak 26.4.0, the version these steps use (announcement).
- A realm you administer. A test realm is safest.
- A test user in that realm, with an email on your verified domain and access to Jira.
- Atlassian Guard Standard and an organization admin account, plus an identity provider directory linked to your verified domains, as Atlassian’s SAML guide requires. You verify a domain with a DNS TXT record or an HTML file.
- A test authentication policy with your test user in it, as Atlassian recommends. Under Authentication policies, choose Add policy and select your directory, then add the user on the policy’s Members tab.
- A fallback admin whose email is on an unverified domain, because that account does not redirect to SAML.
Atlassian’s guide has you open Security, User security, Identity providers in Atlassian Administration, select your directory and choose Set up SAML single sign-on. The form takes three values from your realm’s metadata document at https://your-keycloak-host/realms/your-realm/protocol/saml/descriptor and gives you two URLs for Keycloak. They look like https://auth.atlassian.com/saml/your-id and https://auth.atlassian.com/login/callback?connection=saml-your-id, so copy yours exactly, including the query string.
| Atlassian field | Other side |
|---|---|
| Identity provider Entity ID | entityID in the metadata |
| Identity provider SSO URL | SingleSignOnService location in the metadata |
| Public x509 Certificate | X509Certificate in the metadata, wrapped in BEGIN and END CERTIFICATE lines |
| Service provider entity URL | Client ID (Step 2) |
| Service provider assertion consumer service URL | Valid redirect URIs and Master SAML Processing URL (Step 3) |
Step 1: Open Clients in the right realm
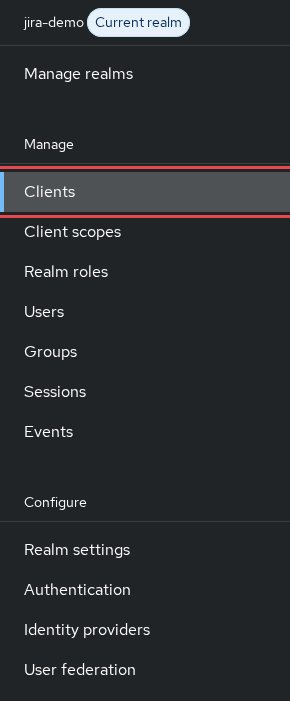
The name labelled Current realm at the top of the left menu is the realm you are editing. If it is wrong, switch to your realm, then choose Clients under Manage.
Step 2: Create the SAML client
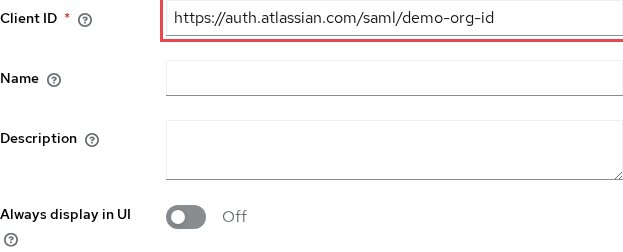
Choose Create client and set Client type to SAML. Paste the service provider entity URL into Client ID, which Keycloak matches to the issuer in each request, then choose Next and Save.
Step 3: Point the client at the ACS URL
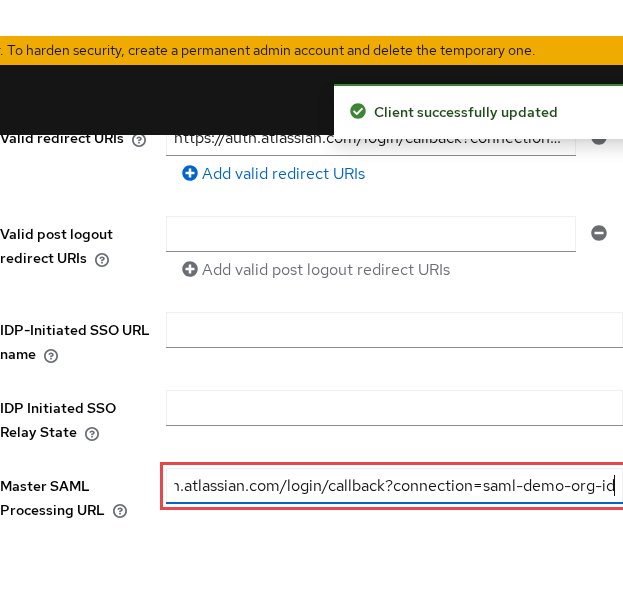
On the Settings tab, paste the assertion consumer service (ACS) URL into Valid redirect URIs and Master SAML Processing URL, and choose Save. Keycloak uses the processing URL as the ACS URL, and it “must be validated by a registered Valid Redirect URI pattern”.
Step 4: Set the NameID to email
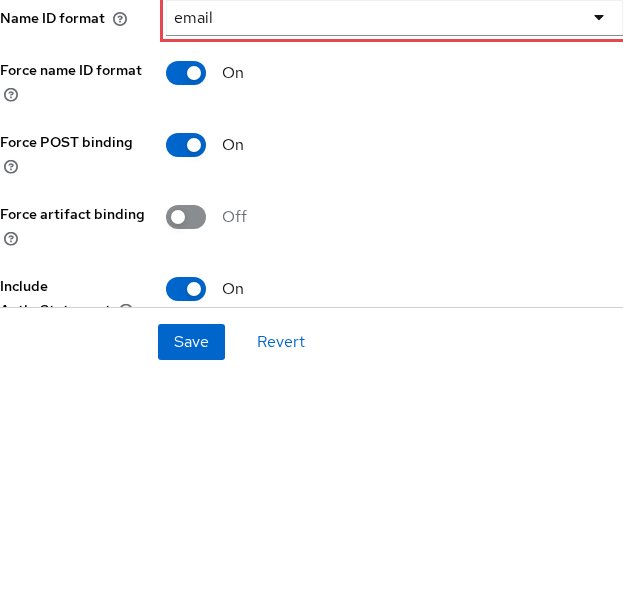
Under SAML capabilities, set Name ID format to email (the user’s email address), turn on Force name ID format (overriding the request) and choose Save. Keycloak defaults to username, but Atlassian requires the user’s email.
Step 5: Turn on Sign assertions
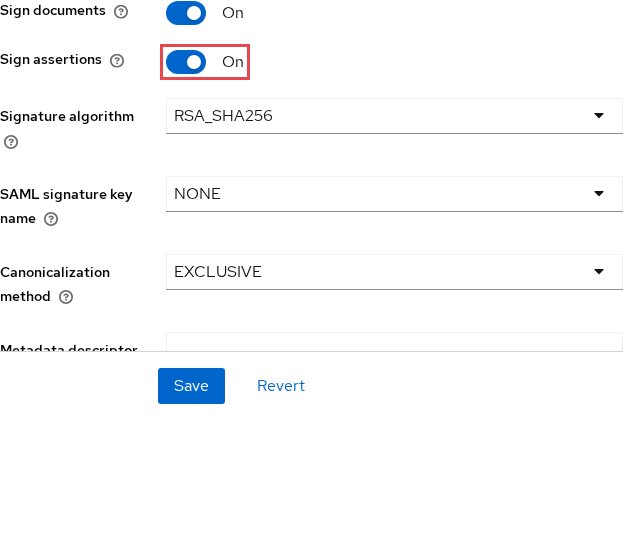
Under Signature and Encryption, leave Sign documents on, turn on Sign assertions, and choose Save. Atlassian’s checklist asks for responses that are “signed and not encrypted”, and an unsigned SAML assertion gives the error “The Assertion of the Response is not signed”.
Step 6: Turn off Client signature required

On the Keys tab, turn off Client signature required and confirm. With it on, Keycloak expects client documents to be signed. It is on by default, and Atlassian’s guide gives you only two URLs to copy, with no signing certificate.
Somewhere to run this that stays patched
Everything above works the same on Skycloak, because it is real upstream Keycloak rather than a fork. What changes is who handles the upgrades, backups and security patches afterwards.
Step 7: Add the user ID mapper
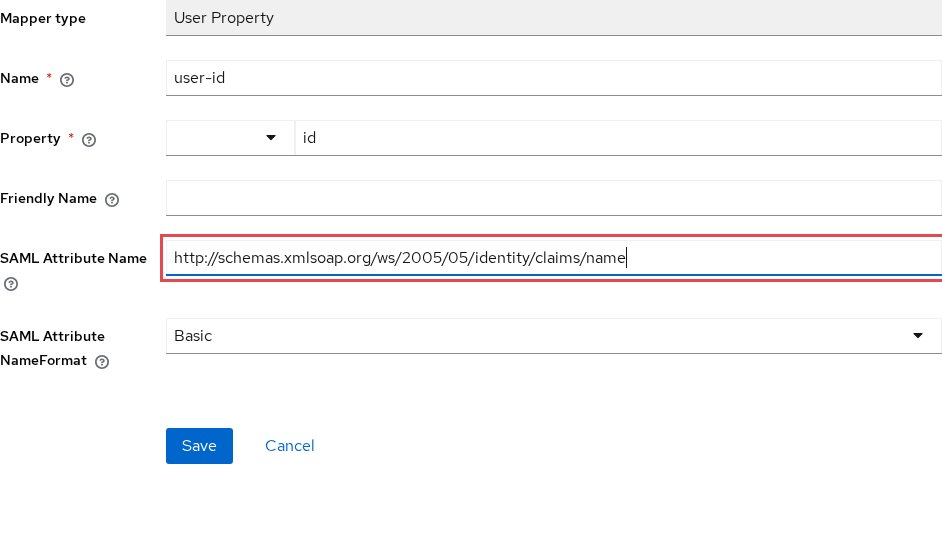
Atlassian requires an “Internal Id for the user that will not change” that “should NOT be the user’s email address”. On the Client scopes tab, open the client’s -dedicated scope and choose Configure a new mapper, then User Property. Name it user-id, type id as the Property, set the SAML Attribute Name to http://schemas.xmlsoap.org/ws/2005/05/identity/claims/name and save.
Step 8: Add the first name mapper
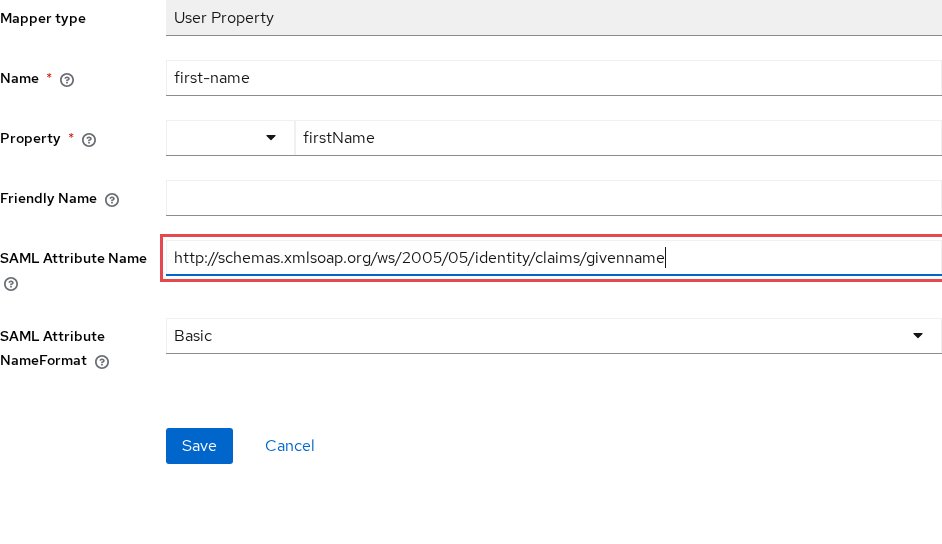
Choose Add mapper, By configuration and User Property. Name it first-name, use firstName as the Property, set the attribute name to http://schemas.xmlsoap.org/ws/2005/05/identity/claims/givenname and save.
Step 9: Add the last name mapper
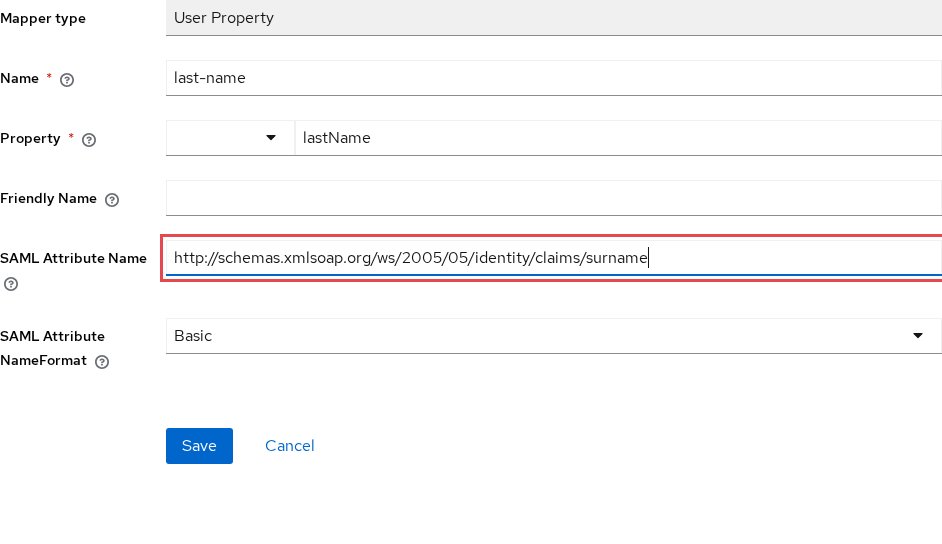
Add one more the same way, named last-name, with lastName as the Property and http://schemas.xmlsoap.org/ws/2005/05/identity/claims/surname as the attribute name.
Step 10: Check the values Atlassian holds

Open Realm settings and choose SAML 2.0 Identity Provider Metadata under Endpoints. Compare its entity ID, SSO location and certificate with what Atlassian holds, and correct any difference.
Test it
In Atlassian, under User security, open Authentication policies, choose Edit on your test policy and choose Enforce single sign-on. Then sign in to Atlassian in a private browser window with your test user’s email. Expect the Keycloak login page, then confirm you are signed in and can open Jira.
Choose Enforce single sign-on on your wider authentication policy only after this works.
Troubleshooting
The Clients menu is missing. The query-clients role “tells the Admin Console that it should render client menus”, so ask an admin for it. On Skycloak, Clients is in the Keycloak admin console, which you open with your Skycloak account.
“xxx is not a valid audience for this Response” or “Invalid redirect uri”. For the first, Atlassian says the SP entity ID “may be incorrect”, and the second message is Keycloak’s when a redirect does not match, so recheck Steps 2 and 3. To read a request’s XML, decode the SAMLRequest.
“We were expecting an email address as the Name Id” or “We were expecting a user ID”. Atlassian’s messages ask you to check that “Name Id is mapped to email address” and “user ID is populated”, so recheck Steps 4 and 7 and that the user has an email.
“Invalid requester” on a Keycloak error page. Keycloak shows this when a required client signature fails validation, so finish Step 6.
FAQ
Does Jira Cloud SAML with Keycloak need Atlassian Guard?
It does. SAML single sign-on needs Atlassian Guard Standard, while domain verification is on all plans.
Can I use Keycloak as an identity provider for Atlassian Cloud?
You can. Atlassian says you can use the identity provider of your choice, with some capabilities limited to selected providers.
Does Keycloak SAML create Jira users automatically?
It can, through just-in-time provisioning, which needs your domains linked to the directory and SSO enforced on a default policy. Without that, “you can provision users with SCIM”.
Next steps
Confirm that one Jira user can sign in through Keycloak before you enforce SSO for the domain, then read on:
- Using SCIM 2.0 with Skycloak, on the SCIM server extension, separate from this SAML setup.
- Keycloak SAML security: vulnerabilities and hardening, for hardening the setup.
- Using Skycloak as a SAML identity provider, for other services.
If you would rather not run Keycloak yourself, you can try managed Keycloak hosting on Skycloak.