
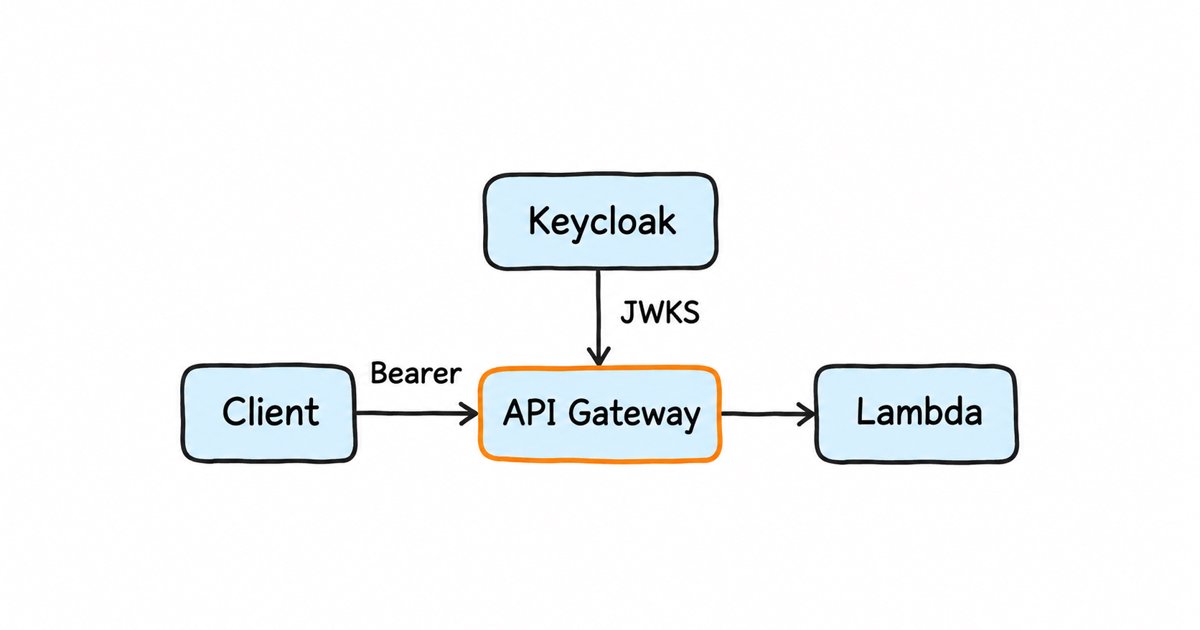
Secure AWS API Gateway with Keycloak Using a JWT Authorizer. Secure AWS API Gateway with Keycloak using an HTTP API JWT authorizer: set the issuer, add an audience mapper, map roles to scopes, and test it with curl.
AWS API Gateway HTTP APIs validate Keycloak access tokens natively with a JWT authorizer: set the issuer to the realm URL, add an audience that matches a claim in the token, and attach the authorizer to routes. In Keycloak, add an audience mapper so the aud claim matches, and on REST APIs, use a Lambda authorizer instead.
This guide is for engineers who already run Keycloak and want API Gateway to reject bad tokens before any Lambda function runs, without adopting Cognito. The test at the end confirms the setup against your own realm.
Key takeaways
- API Gateway’s JWT authorizer checks the signature,
iss,audorclient_id,exp,nbf,iatand, when a route asks for it,scope.- Keycloak’s Audience Resolve mapper adds the client ID of any client with a role in the token, so a token holding
accountroles can carryaud: account. Add an Audience mapper for your API and keepaccountoff the authorizer’s audience list.- By default, Keycloak puts roles in
realm_accessandresource_access, so create a client scope per permission and restrict it to a role.- API Gateway can cache a public key for up to two hours, so keep an old Keycloak key available for at least that long when you rotate.
- AWS’s comparison table marks the JWT authorizer as unavailable for REST APIs and says you can validate JWTs there with a Lambda authorizer.
What does API Gateway check on a Keycloak token?
For each request to a protected route, API Gateway reads the token from the identity source, decodes it, verifies its signature with a public key from the issuer’s jwks_uri (the URL of the issuer’s public signing keys), and then validates the claims. AWS’s workflow denies the request if any step fails, which means your function is never invoked for a bad token. Because the authorizer never calls Keycloak about an individual token, a revoked token keeps working until it expires. For background, see our posts on token introspection and local validation and Keycloak token validation for APIs.
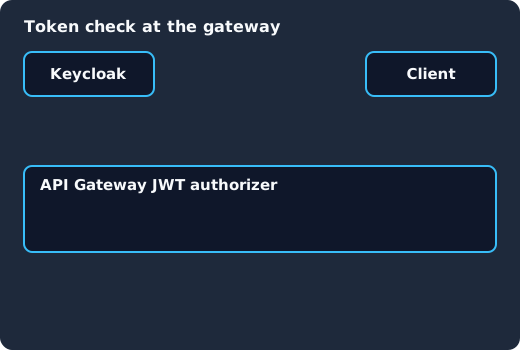
Keycloak’s token endpoint gives the client an access token (1), and the client sends it to API Gateway prefixed with Bearer (2). The JWT authorizer verifies the signature with a key from Keycloak’s JWKS and checks iss, aud, exp and scope (3). If every check passes Lambda runs, and otherwise the request is denied and Lambda never runs (4).
One limit is worth checking first. AWS’s workflow says, “Currently, only RSA-based algorithms are supported” (JWT authorizer guide). Keycloak’s source sets DEFAULT_SIGNATURE_ALGORITHM = Algorithm.RS256 (Constants.java), so a default realm works, but a realm or client you moved to an elliptic curve algorithm such as ES256 will not.
Prerequisites
- A Keycloak realm whose discovery and JWKS endpoints API Gateway can reach over the network.
- A Keycloak client for Terraform with a service account, which the provider’s setup guide suggests giving the
realm-adminrole ofrealm-managementto manage a whole realm. - An AWS account with credentials configured for the AWS provider, and a Lambda function to protect, such as the one in Step 5.
- Terraform, curl and jq on your machine.
Step 1: Copy the exact issuer from the realm
The token’s iss claim must match the authorizer’s issuer, and OpenID Connect Discovery requires the issuer in the metadata to be identical to the issuer URL. This post uses https://keycloak.example.com/realms/demo as its example issuer, with https and no trailing slash, and you should copy your own from the realm’s well-known configuration endpoint instead of typing it:
curl -s https://keycloak.example.com/realms/demo/.well-known/openid-configuration \
  | jq -r '.issuer, .jwks_uri'
Keycloak’s hostname guide says that setting the hostname option explicitly avoids tokens being issued by a fraudulent issuer, and that with --hostname-strict=false Keycloak builds its URLs from the request’s host headers. In that mode, a token fetched through another address can carry a different issuer from the one on your gateway.
Step 2: Add an audience mapper in Keycloak
The aud claim names who a token is for, and RFC 7519, section 4.1.3 says: “If the principal processing the claim does not identify itself with a value in the “aud” claim when this claim is present, then the JWT MUST be rejected.” API Gateway requires aud to match one of the configured audience entries, and it looks at client_id only when aud is absent.
Keycloak’s built-in roles client scope has an Audience Resolve mapper, which adds the client ID of every client with a role in the token, and a new realm adds roles of the account client to its default roles. A token can therefore arrive as aud: account, and the authorizer rejects it with a header like this one from AWS’s troubleshooting page:
www-authenticate: Bearer scope="" error="invalid_token" error_description="the token does not have a valid audience"Please don’t fix this by adding account to the authorizer’s audience list, because a token issued to another client in the realm that also holds an account role would carry the same audience. Add a hardcoded audience instead:
- Open the client that requests tokens, go to its dedicated client scope, and choose Configure a new mapper, then Audience.
- Set Included Custom Audience to a name for your API, such as
orders-api, as Keycloak’s guide to configuring the token audience describes. - Keep the mapper on the access token only, which the same guide gives as its default.
RFC 8707 tells clients to use an API’s base URI as its resource value, and if you prefer that style, Keycloak accepts any custom value, including a URL. See also our post on the Keycloak MCP server 401.
AWS notes that nothing standard separates JWT access tokens from ID tokens, and an ID token’s aud must contain the client ID of the application it was issued to. So avoid using a frontend’s client ID as your authorizer audience, and require scopes on your routes as AWS recommends.
Step 3: Map Keycloak roles to the scope claim
A route’s authorization scopes are matched against the token’s scope or scp claim, and the token needs at least one of them. Keycloak adds realm roles to realm_access and client roles to resource_access by default, so connect the two with a client scope restricted by role:
- Create a client scope named after the permission, such as
orders.write, with Include in token scope on. - In that scope’s Scope tab, add the role
orders-writeras a role scope mapping. - Link the scope to your client as Optional, so the client asks for it with the
scopeparameter.
Keycloak’s guide to client scope permissions explains why this works: “when a client scope has role scope mappings defined, the user must be a member of at least one of the roles,” and if the user is not permitted, “The client scope will not appear in the scope value in the token.” You can preview the outcome in the client’s Evaluate tab. If a claim you expect is missing there, see our guide to a custom attribute not in the token.
Step 4: Create the authorizer in the console
In the AWS console, open your HTTP API, choose Authorization, and create an authorizer of type JWT. Its fields correspond to the API’s authorizer configuration:
| Field | Value for Keycloak | Why |
|---|---|---|
| Name | keycloak |
Your label for the authorizer |
| Identity source | $request.header.Authorization |
The token may be sent alone or prefixed with Bearer |
| Issuer URL | https://keycloak.example.com/realms/demo |
Must match iss exactly |
| Audience | orders-api |
Must match aud; up to 50 entries per authorizer |
Then attach the authorizer to each route and add its authorization scopes, such as orders.read for GET /orders. Each route can list up to 10 scopes.
Somewhere to run this that stays patched
Everything above works the same on Skycloak, because it is real upstream Keycloak rather than a fork. What changes is who handles the upgrades, backups and security patches afterwards.
Step 5: Ship it with Terraform
This configuration declares both sides, using the keycloak/keycloak provider and the AWS provider’s authorizer and route resources. It assumes the realm and the Lambda function already exist. It grants the test client only the reader role, so the test can show a scope being refused.
terraform {
  required_providers {
    aws      = { source = "hashicorp/aws" }
    keycloak = { source = "keycloak/keycloak", version = ">= 5.10.0" }
  }
}

variable "realm" { type = string }           # demo
variable "issuer" { type = string }          # https://keycloak.example.com/realms/demo
variable "lambda_name" { type = string }

data "keycloak_realm" "this" {
  realm = var.realm
}

data "aws_lambda_function" "orders" {
  function_name = var.lambda_name
}

# Keycloak: a test client with the API's audience
resource "keycloak_openid_client" "orders_cli" {
  realm_id                 = data.keycloak_realm.this.id
  client_id                = "orders-cli"
  access_type              = "CONFIDENTIAL"
  service_accounts_enabled = true
}

resource "keycloak_openid_audience_protocol_mapper" "orders_api" {
  realm_id                 = data.keycloak_realm.this.id
  client_id                = keycloak_openid_client.orders_cli.id
  name                     = "orders-api-audience"
  included_custom_audience = "orders-api"
  add_to_access_token      = true
  add_to_id_token          = false
}

# Keycloak: one role and one role-restricted client scope per permission
resource "keycloak_role" "orders" {
  for_each = { read = "orders-reader", write = "orders-writer" }
  realm_id = data.keycloak_realm.this.id
  name     = each.value
}

resource "keycloak_openid_client_scope" "orders" {
  for_each               = keycloak_role.orders
  realm_id               = data.keycloak_realm.this.id
  name                   = "orders.${each.key}"
  include_in_token_scope = true
}

resource "keycloak_generic_role_mapper" "orders" {
  for_each        = keycloak_role.orders
  realm_id        = data.keycloak_realm.this.id
  client_scope_id = keycloak_openid_client_scope.orders[each.key].id
  role_id         = each.value.id
}

resource "keycloak_openid_client_optional_scopes" "orders_cli" {
  realm_id  = data.keycloak_realm.this.id
  client_id = keycloak_openid_client.orders_cli.id
  optional_scopes = [
    "address", "phone", "offline_access", "microprofile-jwt", "organization",
    keycloak_openid_client_scope.orders["read"].name,
    keycloak_openid_client_scope.orders["write"].name,
  ]
}

resource "keycloak_openid_client_service_account_realm_role" "reader" {
  realm_id                = data.keycloak_realm.this.id
  service_account_user_id = keycloak_openid_client.orders_cli.service_account_user_id
  role                    = keycloak_role.orders["read"].name
}

# AWS: the HTTP API, the authorizer and two protected routes
resource "aws_apigatewayv2_api" "orders" {
  name          = "orders"
  protocol_type = "HTTP"
}

resource "aws_apigatewayv2_authorizer" "keycloak" {
  api_id           = aws_apigatewayv2_api.orders.id
  name             = "keycloak"
  authorizer_type  = "JWT"
  identity_sources = ["$request.header.Authorization"]

  jwt_configuration {
    issuer   = var.issuer
    audience = ["orders-api"]
  }
}

resource "aws_apigatewayv2_integration" "orders" {
  api_id                 = aws_apigatewayv2_api.orders.id
  integration_type       = "AWS_PROXY"
  integration_uri        = data.aws_lambda_function.orders.invoke_arn
  payload_format_version = "2.0"
}

resource "aws_apigatewayv2_route" "orders" {
  for_each = {
    "GET /orders"  = "orders.read"
    "POST /orders" = "orders.write"
  }
  api_id               = aws_apigatewayv2_api.orders.id
  route_key            = each.key
  target               = "integrations/${aws_apigatewayv2_integration.orders.id}"
  authorization_type   = "JWT"
  authorizer_id        = aws_apigatewayv2_authorizer.keycloak.id
  authorization_scopes = [each.value]
}

resource "aws_apigatewayv2_stage" "default" {
  api_id      = aws_apigatewayv2_api.orders.id
  name        = "$default"
  auto_deploy = true
}

resource "aws_lambda_permission" "gateway" {
  action        = "lambda:InvokeFunction"
  function_name = data.aws_lambda_function.orders.function_name
  principal     = "apigateway.amazonaws.com"
  source_arn    = "${aws_apigatewayv2_api.orders.execution_arn}/*/*"
}

output "api_url" {
  value = aws_apigatewayv2_stage.default.invoke_url
}

output "orders_cli_secret" {
  value     = keycloak_openid_client.orders_cli.client_secret
  sensitive = true
}
The Keycloak provider can read its connection from environment variables, so set them for the client from the prerequisites, then apply:
export KEYCLOAK_URL=https://keycloak.example.com
export KEYCLOAK_REALM=demo
export KEYCLOAK_CLIENT_ID=terraform
export KEYCLOAK_CLIENT_SECRET="$(cat your-secret-file)"
export AWS_REGION=us-east-1

terraform init
terraform apply \
  -var realm=demo \
  -var issuer=https://keycloak.example.com/realms/demo \
  -var lambda_name=orders
The provider’s docs call the optional scopes resource authoritative, so compare its list with what the client has today before you apply it. For more on the Keycloak side, see our guide to advanced Keycloak Terraform patterns.
Your function can read the validated claims without parsing the token. API Gateway passes them to the integration, and with payload format 2.0 they sit under requestContext.authorizer.jwt:
export const handler = async (event) => {
  const { claims, scopes } = event.requestContext.authorizer.jwt;

  return {
    statusCode: 200,
    body: JSON.stringify({ subject: claims.sub, client: claims.azp, scopes }),
  };
};
AWS’s example event shows flat string values, so log one real event before you parse a nested claim such as realm_access.
Test it
Request a token that asks for both scopes. The configuration gives the service account orders-reader and not orders-writer, and Keycloak leaves a role-restricted scope out of the token when the roles do not overlap, so only orders.read should appear:
KC=https://keycloak.example.com/realms/demo
API=$(terraform output -raw api_url)
SECRET=$(terraform output -raw orders_cli_secret)

TOKEN=$(curl -s "$KC/protocol/openid-connect/token" \
  -d grant_type=client_credentials \
  -d client_id=orders-cli \
  -d client_secret="$SECRET" \
  -d scope="orders.read orders.write" | jq -r .access_token)

jq -R 'split(".")[1] | gsub("-";"+") | gsub("_";"/") | @base64d | fromjson | {iss, aud, scope}' <<< "$TOKEN"
Check that iss equals your issuer, that aud contains orders-api, and that scope contains orders.read but not orders.write. Our JWT decoder is another place to look at a test token. Then call the routes:
curl -i "$API/orders"                                          # no token
curl -i "$API/orders" -H "Authorization: Bearer $TOKEN"        # valid token and scope
curl -i -X POST "$API/orders" -H "Authorization: Bearer $TOKEN" # scope missing
curl -i "$API/orders" -H "Authorization: Bearer ${TOKEN}x"     # broken signature
Only the second call should reach your function. AWS documents a 401 with a www-authenticate header for token failures, and that header is the first thing to read. AWS’s guide says only that a request without a required scope is denied and does not name a status code, so note the status your API returns for the third call. To finish, grant the service account orders-writer, fetch a new token and confirm that the POST succeeds.
Troubleshooting
If a call fails, decode the token and compare it with the authorizer, as AWS suggests:
| What you see | Likely cause | Fix |
|---|---|---|
the token does not have a valid audience |
aud lacks your API |
Add the Audience mapper and fetch a new token |
| An issuer error | Trailing slash, http, or a different hostname |
Copy issuer from the discovery document |
Every token fails, and alg is not RSA-based |
Realm or client signs with another algorithm | Use an RSA algorithm such as RS256 |
| The route denies a valid token | Scope missing from the scope claim |
Check the role, the optional scope link and the scope parameter |
How does key rotation work with the gateway’s cache?
AWS’s JWT authorizer guide says, “API Gateway caches the public key for up to two hours on a best-effort basis,” and asks you to “allow a grace period when you rotate keys, during which both the old and new keys are valid.” Keycloak has one active key pair and can keep passive keys that still verify earlier signatures. To rotate, add a new key with a higher priority so new tokens use it, and keep the old key until its tokens have expired and the two-hour window has passed. A compromised key can stay cached for the same two hours, so plan for that window in your incident response.
What about REST APIs?
AWS’s comparison table marks the JWT authorizer as unavailable for REST APIs and says you can validate JWTs there with a Lambda authorizer. This compact REQUEST authorizer uses the jose library and pins the signing algorithm:
import { createRemoteJWKSet, jwtVerify } from "jose";

const issuer = process.env.KEYCLOAK_ISSUER;
const jwks = createRemoteJWKSet(new URL(`${issuer}/protocol/openid-connect/certs`));
const requiredScope = { GET: "orders.read", POST: "orders.write" };

const policy = (principalId, effect, resource) => ({
  principalId,
  policyDocument: {
    Version: "2012-10-17",
    Statement: [{ Action: "execute-api:Invoke", Effect: effect, Resource: resource }],
  },
});

export const handler = async (event) => {
  const header = event.headers?.Authorization ?? event.headers?.authorization ?? "";
  try {
    const { payload } = await jwtVerify(header.replace(/^Bearer /, ""), jwks, {
      issuer,
      audience: "orders-api",
      algorithms: ["RS256"],
    });
    const scopes = String(payload.scope ?? "").split(" ");
    const allowed = scopes.includes(requiredScope[event.httpMethod]);
    return policy(payload.sub, allowed ? "Allow" : "Deny", event.methodArn);
  } catch {
    return policy("anonymous", "Deny", event.methodArn);
  }
};
Set KEYCLOAK_ISSUER to the exact issuer from Step 1, create an authorizer of type Lambda with Request as the event payload, and set its cache TTL to zero, because a cached policy must apply to all methods across the API and this one names a single method. See also our review of CVE-2026-5430. HTTP APIs can use a Lambda authorizer too.
If you run your own gateway instead, see our Keycloak and Kong walkthrough.
Do you need Cognito for API Gateway?
You do not need Cognito. It is one issuer that works with the JWT authorizer, and AWS lists it as an option you can use with one, but the authorizer itself follows OIDC and OAuth 2.0 and works from the configured issuer and its jwks_uri. A Keycloak realm that publishes those works the same way, so choosing an identity provider and choosing a gateway are separate decisions. If you are weighing that choice, read whether Cognito is still the right fit as you scale and our list of Cognito alternatives for developers.
Next steps
Deploy the Terraform block against a test realm, run the curl test, and move on to your real routes once only the second call succeeds. If you want the realm side run for you, take a look at our managed Keycloak hosting.