Cluster Management
The Cluster Management feature is the heart of Skycloak, allowing you to create and manage your Keycloak clusters efficiently. From here, you can view your clusters along with the amount of realms and users, access the Keycloak console, view logs, and request advanced features.

The cluster dashboard provides a comprehensive view of all your Keycloak instances, showing their status, location, version, size, and creation date.
Managing Clusters
Creating a New Cluster
- Navigate to the Clusters page
- Click “Create a Cluster” button
- Configure your cluster using the creation wizard:

The wizard guides you through all the configuration options:
- Identity Platform: Choose between Keycloak or TideCloak
- Cluster Name: Give your cluster a descriptive name
- Keycloak Version: Select from the latest stable versions
-
Cluster Size: Choose the right size for your environment:
- Small (DEV) - 1 site: Ideal for development environments
- Medium (STAGING) - 2 sites: Perfect for staging environments
- Large (PROD) - 3 sites: Recommended for production environments
- Location: Select your preferred region (US East Coast, Canada, Europe, Australia). Trial workspaces are provisioned in the US. Non-US regions are available on Developer plan and above, on request. Skycloak clusters run across multiple cloud providers — AWS, Azure, Google Cloud, Akamai, OVH, and Scaleway — depending on the region you choose.
Every cluster is fully managed by Skycloak — there is no mode to choose, and you never provide admin credentials.
- Click “Create Cluster” to start the provisioning process
Your cluster will be in “Creating” state for a few minutes, and you’ll receive an email notification when it’s ready. If it takes longer than 5 minutes, please contact us.
Cluster Detail Page
Click on any cluster from your clusters list to access the comprehensive cluster detail page. This page provides everything you need to manage your cluster in one place.
Quick Upgrade from Detail Page
The Version card in the Quick Stats section shows your current version and, if an upgrade is available, displays a green upgrade button right next to it. Click the button to start the upgrade immediately without navigating to the Edit page.
Admin Credentials & Console Access
The cluster detail page provides quick access to the Keycloak Admin Console through Admin Console SSO. Click “Open Admin Console” to sign in automatically with your Skycloak account, no separate admin username or password to create, copy, share, or rotate.
Skycloak does not issue a separate Keycloak admin username and password for your cluster. The platform manages your instance on your behalf through a dedicated, internal service account, and people reach the Admin Console through Admin Console SSO using their Skycloak login. If you ever need emergency direct access (for example while SSO is being reconfigured), contact support and we can arrange temporary access.
Admin Console SSO
Admin Console SSO lets you access the Keycloak Admin Console directly using your Skycloak account, with no separate admin password to manage.
How it works:
- When SSO is enabled, clicking “Open Admin Console” authenticates you through Skycloak’s identity provider
- New clusters have SSO enabled by default
- There are no credentials to copy, share, or rotate, your Skycloak login is all you need
- Your Skycloak account’s email address must be verified to sign in through Admin Console SSO
Enabling or disabling SSO:
- Navigate to your cluster’s detail page
- On the Overview page, find the Admin Console SSO toggle in the Admin Console Access card
- Toggle SSO on or off:
- Enabling SSO: Takes effect immediately, you can access the admin console with your Skycloak account
- Disabling SSO: A confirmation dialog appears. With SSO off there is no direct Admin Console login, so contact support if you need emergency access
The SSO toggle is also available on the Edit page for convenience. On the New Cluster page, SSO is shown as enabled by default (it can be changed after creation).
Note: The cluster must be in “Available” status to change SSO settings. Toggling SSO does not restart your cluster, the change is applied instantly.
Automating your Keycloak
There are two ways to reach your cluster’s Keycloak, depending on who (or what) is connecting:
- Humans open the Keycloak Admin Console through Admin Console SSO (described above), signing in with their Skycloak account.
- Machines (Terraform, CI/CD pipelines, provisioning scripts, MCP servers, and AI agents) authenticate with a per-cluster automation client using the OAuth2 client credentials grant.
Each cluster has a dedicated confidential automation client in the master realm, named skycloak-automation-<cluster-id>. It exists so your tooling can manage realms, clients, users, and roles inside your Keycloak without any human admin username or password.
Where to get the credentials:
-
Dashboard: open the cluster’s detail page. The automation client’s
client_id,client_secret, and token URL are shown in the Admin Console Access card. -
Public API: call
GET /clusters/{id}/credentials(requires theclusters:credentials:readscope). The response includes theclient_id,client_secret, andtoken_urlyour tooling needs.
Get an access token (client credentials):
curl -X POST \
  "https://your-cluster.app.skycloak.io/realms/master/protocol/openid-connect/token" \
  -d "grant_type=client_credentials" \
  -d "client_id=skycloak-automation-<cluster-id>" \
  -d "client_secret=$SKYCLOAK_AUTOMATION_SECRET"
The token URL returned by the credentials endpoint points at the same master-realm token endpoint shown above. Use the resulting access_token as a bearer token against your cluster’s Keycloak Admin REST API.
Terraform: the keycloak provider (terraform-provider-keycloak) authenticates with the automation client directly. Configure it with the client credentials grant:
provider "keycloak" {
  client_id     = "skycloak-automation-<cluster-id>"
  client_secret = var.skycloak_automation_secret
  url           = "https://your-cluster.app.skycloak.io"
}
The provider obtains and refreshes tokens for you using the client credentials grant, so no admin username or password is needed.
The automation client is separate from two other credentials you may already use:
- It is not your Admin Console SSO login (that is for human access to the Admin Console).
- It is not your Skycloak Public API key (that manages clusters, realms, and other Skycloak resources, not the contents of your Keycloak).
Treat the automation client secret like a password. Store it in a secrets manager, never commit it to version control, and never expose it in client-side code.
Detail Page Navigation
Once you’re inside a cluster, the sidebar organizes everything into an Overview page plus three groups:
Overview
- Admin Console SSO toggle, enable or disable SSO directly from this page
- Admin Console access via SSO (Open Admin Console button)
- Cluster configuration (type, size, version)
- Upgrade history timeline showing all past version upgrades
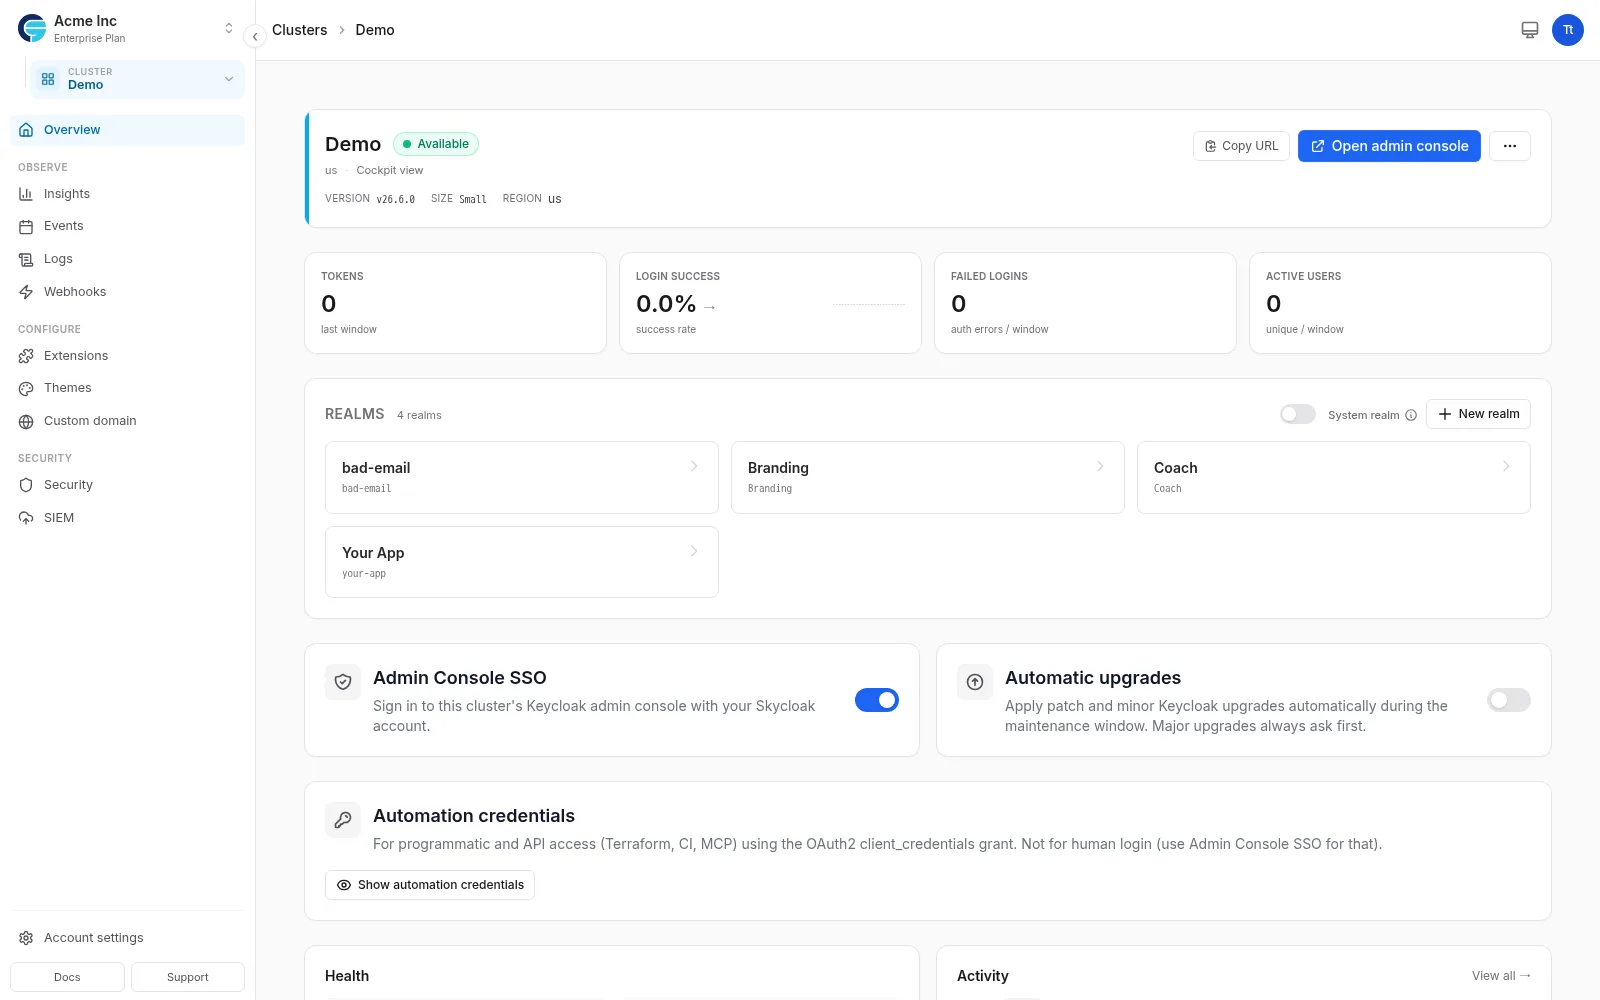
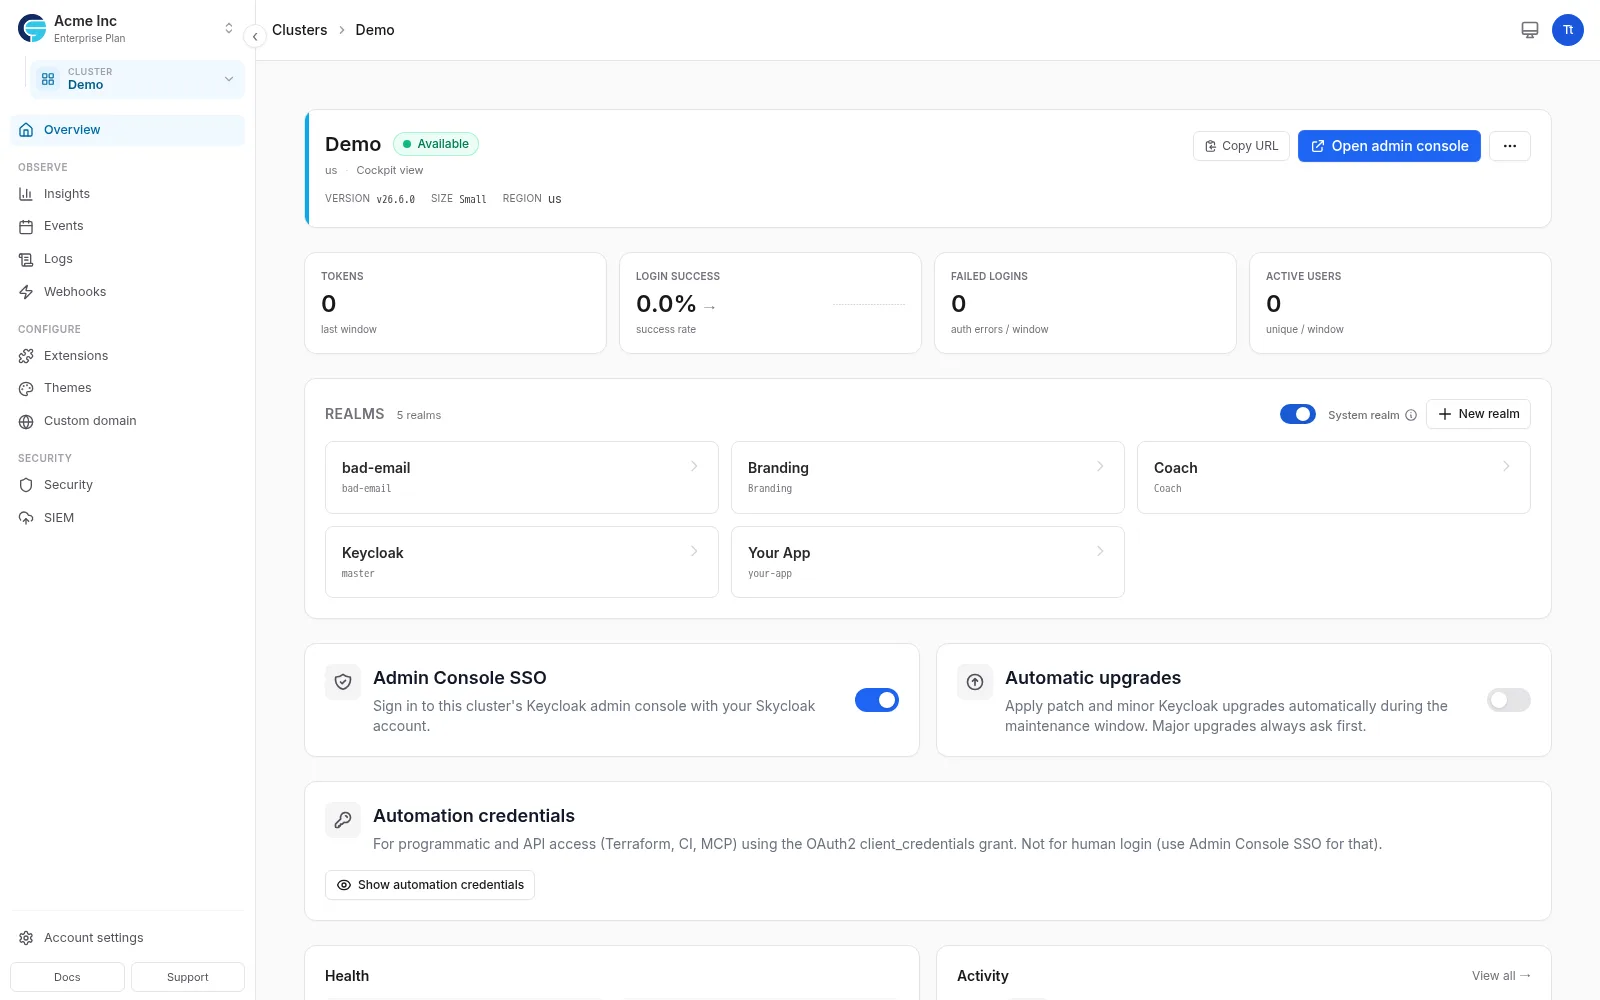
- The realms grid, view and manage all realms in your cluster, including a System realm toggle to reveal Keycloak’s built-in
masterrealm, which is hidden by default - An Edit cluster link to the Edit page for name, size, version, HTTP relative path, and other configuration changes
Observe
- Insights: authentication metrics and performance data
- Events: user and admin event history
- Logs: real-time cluster logs
- Webhooks: event delivery configuration
Configure
- Extensions: view and manage cluster extensions
- Themes: customize the look and feel of your login pages, apply themes from the theme library
- Custom domain: set up and manage custom domains for this cluster
Security
- Security: configure security settings, firewalls, and access controls
- SIEM: forward events to external security platforms
Accessing the Keycloak Console
Access your Keycloak Admin Console through Admin Console SSO:
- Click on any cluster to open its detail page
- Click the “Open Admin Console” button
- You are automatically signed in with your Skycloak account, no separate credentials needed
If SSO is disabled there is no separate admin login; re-enable SSO or contact support for emergency access.
Accessing Cluster Logs
- Navigate to cluster detail page
- Click “View Logs” in the Quick Links section, or navigate to the Logs page
- View real-time logs and filter by cluster
Requesting Additional Features
From the cluster detail page, you can access:
- Advanced security features (Security group)
- Custom domain setup (Configure group)
- Custom theme implementation (Configure group)
- Extensions management (Configure group)
For specialized configurations not available in the dashboard, contact our support team.
Cluster Size Recommendations
When choosing a cluster size, consider your environment type and availability requirements:
Small Clusters (1 Site) - DEV Environment
- Best for: Development, testing, prototyping
- Characteristics: Single availability zone, no redundancy
-
Use cases:
- Development teams building applications
- Testing new Keycloak features
- Proof of concepts
- CI/CD pipeline testing
- Availability: ~99.5% uptime (may have downtime during maintenance)
Medium Clusters (2 Sites) - STAGING Environment
- Best for: Staging, pre-production testing, UAT
- Characteristics: Multi-zone deployment, basic high availability
-
Use cases:
- Pre-production testing that mirrors production
- User acceptance testing (UAT)
- Performance testing
- Integration testing with production-like setup
- Availability: ~99.9% uptime (survives single zone failures)
Large Clusters (3 Sites) - PRODUCTION Environment
- Best for: Production workloads requiring high availability
- Characteristics: Full multi-zone redundancy, maximum resilience
-
Use cases:
- Customer-facing production applications
- Mission-critical authentication services
- Enterprise applications
- Applications requiring 24/7 availability
- Availability: ~99.99% uptime (survives multiple zone failures)
Cluster Operations
Updating a Cluster
Version Upgrades
Skycloak enforces sequential version upgrades — you must upgrade one version at a time for safer, more predictable updates. This prevents issues that can arise from skipping versions, especially across major releases with database schema migrations.
Upgrade from the Edit Page:
- Navigate to the cluster Edit page
- The Keycloak Version section shows a visual timeline of all available versions

- Your current version is marked with a blue “Current” badge
- The next available version has a green “Upgrade” button
- Future versions are collapsed by default — click “Show more versions” to see the full upgrade path
- Click “Upgrade” to start the upgrade
Quick Upgrade from the Cluster List or Detail Page:
You can also upgrade directly from the clusters list or the cluster detail page without opening the Edit page:
- Clusters List: A green upgrade badge appears next to the version showing the next available version
- Cluster Detail Page: The Version card shows an upgrade button when a new version is available
Important Version Upgrade Notes:
- Upgrades are sequential only — you must upgrade one version at a time
- Downgrading to a lower version is not possible due to database schema compatibility
- Major version upgrades (e.g., 25.x → 26.x) show a warning and require confirmation via a checkbox, as they include database schema migrations that cannot be easily reversed
- Use our Keycloak Upgrade Assistant GPT to help plan your version upgrade path
Auto-upgrade & Maintenance Windows
Prefer to stay current without lifting a finger? Enable Auto-upgrade on the cluster Edit page: patch and minor versions are applied automatically when there are no breaking changes, always inside your maintenance window. Major upgrades still ask for your confirmation.
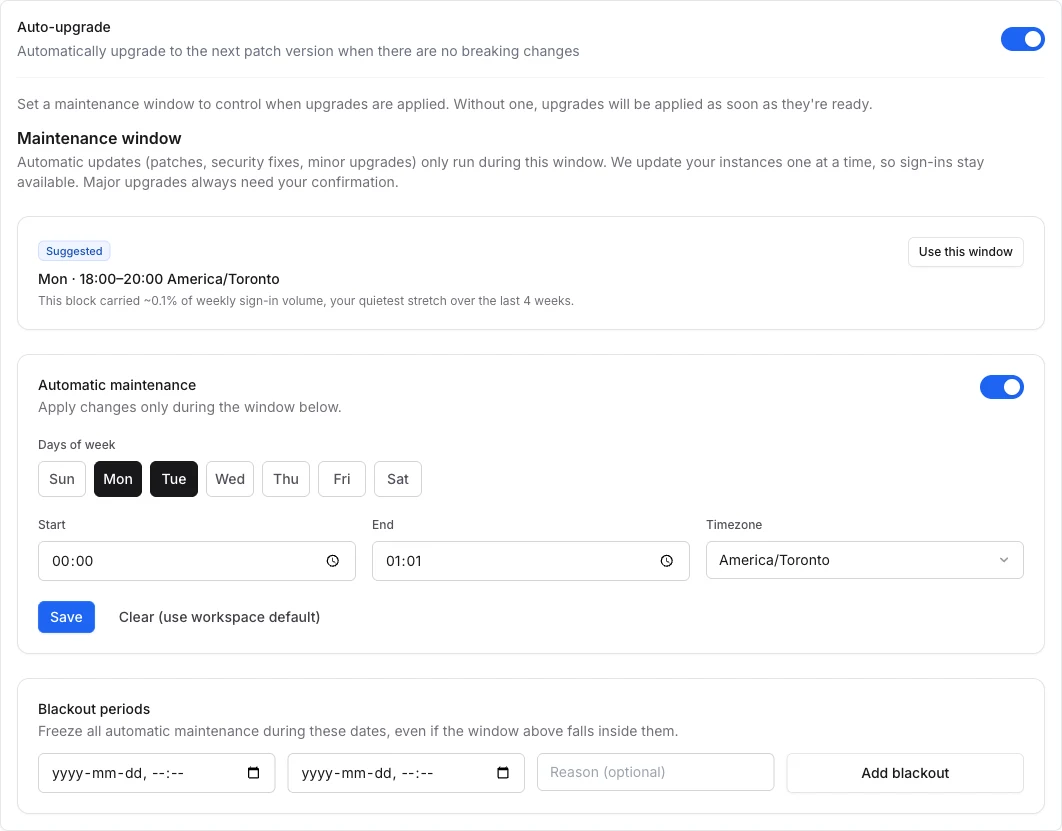
Set a maintenance window to control when automatic updates run. Skycloak suggests your quietest window based on the last four weeks of sign-in activity, updates instances one at a time so sign-ins stay available, and lets you define blackout periods for dates that must never see changes. Changes you make (resizes, extension installs, manual upgrades) apply immediately; changes we make wait for the window.
Your effective window, the next scheduled run, and the auto-upgrade state are always visible on the cluster overview:

Upgrade Progress & Cancellation
During an upgrade, the cluster detail page shows a progress card with:
- The current upgrade phase (Scaling Down, Updating, Scaling Up)
- Elapsed time since the upgrade started
- A Cancel Upgrade button to revert to the previous version
If an upgrade takes longer than 10 minutes, the cluster owner receives an email alert.
Warning: Cancelling a major version upgrade during the Updating or Scaling Up phase is risky — database migrations may have already been applied and reverting the binary could leave the cluster in a failed state.
Upgrade History
The cluster detail page (Overview page) shows a timeline of all past upgrades, including:
- Version transitions (from → to)
- Status (completed, cancelled, failed)
- Timestamps and duration
- Major upgrade indicators
Other Cluster Updates
- Access cluster from dashboard or details page
- Click “Edit” button
- Change cluster name, size, or other configuration options
- Click “Update” button
- Non-disruptive changes are applied within a few minutes and you will receive an email notification.
For changes that require restarting your Keycloak instance (for example size or version changes), the update is staged rather than applied immediately: the cluster shows a pending-changes indicator, and you choose when to apply it with Apply now. This lets you schedule brief disruptions for a convenient time instead of having them happen mid-edit.
Deleting a Cluster
- Access cluster dashboard or details page
- Click the checkbox to give your consent to delete the cluster
- Enter the name of the cluster to confirm deletion
- Click “Schedule Deletion” button
Note: This will schedule the deletion of the cluster and you will receive an email notification when it’s done. For data protection purposes, we will keep your cluster’s data for 7 days before deleting it. You will be notified and warned days before deletion. Once deleted, any users from that cluster will be deleted along with the cluster.
You can also cancel the deletion of the cluster if you change your mind at any time before it’s deleted.
Advanced Keycloak Configuration
For users on Launch, Business, or Enterprise plans, Skycloak provides advanced Keycloak feature management. This allows you to enable or disable specific Keycloak features to customize your cluster’s behavior for advanced use cases.
Understanding Feature States
Keycloak features can exist in different states:
- Supported (Default Enabled): These features are production-ready and enabled by default in Keycloak. They work out-of-the-box and provide essential functionality that most users need.
- Supported (Default Disabled): Production-ready features that are disabled by default but can be safely enabled for production use.
- Preview: Features still in development that are not production-ready. While functional, preview features may have incomplete functionality, bugs, or breaking changes in future versions. Use with caution in production environments.
- Explicitly Enabled: Features that you have manually enabled for your cluster.
- Explicitly Disabled: Features that you have manually disabled for your cluster.
Accessing Feature Management
- Navigate to your cluster’s edit page
- Scroll down to find the “Advanced Keycloak Configuration” section
- Click to expand the collapsible section
- Browse features organized by category: Administration, Core Features, Integrations, Preview Features, Protocol Support, and Security
Supported Features (Production-Ready)
The following features are production-ready and can be safely used:
Default Enabled:
- Authorization Services: Fine-grained authorization support for complex permission scenarios
- WebAuthn: Modern FIDO2-based authentication support
- Client Policies (v22.0+): Define and enforce policies for client configurations
- Kerberos: Enterprise authentication integration
- CIBA: Client Initiated Backchannel Authentication for mobile-first flows
- Step-up Authentication (v23.0+): Enhanced authentication for sensitive operations
- Device Flow: OAuth 2.0 Device Authorization Grant
- DPoP (v23.0+): Demonstrating Proof of Possession for enhanced OAuth 2.0 security
- Organizations (v26.0+): Multi-tenant organization management
- Persistent User Sessions (v25.0+): Store sessions in database for improved reliability
- Recovery Codes: Backup codes for account recovery
- Passkeys (v22.0+): Passwordless authentication with passkeys
- Update Email: Allow users to update their email address with verification
- Standard Token Exchange (v24.0+): OAuth 2.0 Token Exchange standard implementation
- Login Theme: Login theme with version selection (v1 legacy, v2 default)
Default Disabled (Can Be Enabled):
- Docker Protocol: Container registry authentication support
- PAR (v22.0+): Pushed Authorization Requests for enhanced security
- Impersonation: Allow administrators to impersonate users for debugging (Dangerous: Security implications)
- OID4VC (v25.0+): OpenID for Verifiable Credential Issuance (preview)
Preview Features (Not Production-Ready)
Warning: Preview features are stable but their APIs may still evolve. Test thoroughly before using in production environments.
- Token Exchange: Exchange access tokens for different clients or realms (Dangerous: Security implications)
- Scripts: Write custom authenticators using JavaScript (Dangerous: Allows arbitrary code execution)
- Client Secret Rotation: Automatic rotation of client secrets
- Federated Client Authentication (v26.5+): Authenticate OpenID Connect clients through external identity providers instead of client secrets
- Kubernetes Service Accounts (v26.5+): Use Kubernetes service account tokens as credentials for clients, avoiding static secrets
- JWT Authorization Grant (v26.5+): JWT Profile for OAuth 2.0 Authorization Grant (RFC 7523)
- Workflows (v26.5+): Automate administrative tasks and processes within a realm
Important Notes:
- Token Exchange has been in preview since Keycloak v4 and remains preview-only across all versions (20.x - 26.x)
- Preview features marked as “Dangerous” have security implications and should be thoroughly tested
- Features introduced in v26.5+ require clusters running Keycloak 26.5.0 or later
Managing Features
- Viewing Features: All available features are displayed with their current state
- Enabling Features: Click the checkbox next to a feature to enable it
- Disabling Features: Click again to disable a feature (it will show as “Disabled”)
- Applying Changes: Click “Apply Features” to save your configuration
- Cluster Restart: Your cluster will automatically restart to apply the new feature configuration
Important: Changing features will restart your cluster, which may cause a brief interruption in service. Plan feature changes during maintenance windows.
Feature Versions
Some Keycloak features have multiple versions available with different capabilities. When a feature supports multiple versions, you’ll see a version dropdown selector next to the feature toggle.
Features with Multiple Versions
| Feature | Versions | Default | Notes |
|---|---|---|---|
login |
v1, v2 | v2 | V1 is the deprecated legacy theme |
How Version Selection Works
- Default Version: When you enable a feature without selecting a version, Keycloak uses the default version
- Non-Default Version: Select a different version from the dropdown to use that specific version
- Version Persistence: Your version selection is saved and applied when the cluster rebuilds
Token Exchange with Impersonation
To enable token exchange impersonation via a service account:
- Enable the
token-exchangefeature - Configure your service account with the appropriate permissions
- Contact support if you need Admin Fine-Grained Authorization V1 configured (required for impersonation — V2, which is the default, does not support it)
Reference: Keycloak FGAP Documentation
Feature Compatibility
Features have different version availability:
- No minimum version: Available since Keycloak v20.0 or earlier
- Version-specific: Check version requirement (e.g., “v26.0+” means Keycloak 26.0.0 and later)
- Features marked “Incompatible” are not available in your current cluster version
- Upgrade your cluster version if needed to access certain features
Version Availability Examples:
- Token Exchange: Available since v20.0 (but remains preview)
- Organizations: Requires v26.0 or later
- Federated Client Authentication: Requires v26.5 or later
- Kubernetes Service Accounts: Requires v26.5 or later
When to Use Feature Management
Feature management is particularly useful for:
- Advanced Authentication: Enable DPoP, Passkeys, or Step-up Authentication for enhanced security
- Organization Management (v26.0+): Enable Organizations for multi-tenant architectures
- Secretless Authentication (v26.5+): Enable Federated Client Authentication or Kubernetes Service Accounts to eliminate client secrets
- Session Reliability (v25.0+): Enable Persistent User Sessions for improved session management
- Development Testing: Enable preview features to test upcoming capabilities (non-production only)
- Protocol Support: Enable Docker, CIBA, PAR, or Device Flow for specific protocol needs
Production Recommendation: Only enable Supported features in production environments. Preview features should be thoroughly tested in development/staging before considering production use.
Best Practices
- Start with Defaults: Default supported features provide a solid foundation for most use cases
- Use Supported Features in Production: Only enable preview features in development/staging environments
- Enable Gradually: Add features one at a time to understand their impact
- Test Thoroughly: Verify your applications work correctly after enabling new features
- Document Changes: Keep track of which features you’ve enabled and why
- Plan Restarts: Feature changes require cluster restarts - plan during maintenance windows
- Review Preview Features: Monitor preview feature status across Keycloak versions - some remain preview for years
- Be Cautious with “Dangerous” Features: Token exchange and scripts have security implications
Getting Help
If you need assistance with feature selection or configuration:
- Contact our support team through the dashboard
- Consult our integration guides for specific feature implementation
- Check the Keycloak documentation for detailed feature descriptions
Note: Feature management is available on Launch, Business, and Enterprise plans. Trial users can preview the feature interface but cannot make changes until upgrading.
Custom Environment Variables
You can set arbitrary environment variables on your Keycloak pod from the cluster’s Edit page. This is useful when a custom theme needs runtime configuration (for example a Keycloakify theme reading ${env.AMPLITUDE_API_KEY:} from theme.properties) or when you want to drive feature flags read at startup.
Accessing Environment Variables
- Navigate to Clusters in the sidebar
- Select your cluster and click Edit Cluster
- Open the Advanced Keycloak Configuration section
- Scroll to Environment variables at the bottom of the section
Adding and Removing Variables
- Add variable: click the Add variable button, type the name and value
- Edit a value: click the row’s value field
- Hide / reveal a value: toggle the eye icon next to each value
- Remove: click the trash icon
- Save: click Save Changes at the bottom of the Edit page. Environment variable changes ride the same save as everything else — the operator picks them up, the pod restarts, and your variables are live
You can set up to 50 entries. Each value is capped at 4 KB.
Naming Rules
Variable names must:
- Use uppercase letters, digits, and underscores only (
^[A-Z_][A-Z0-9_]*$) - Be 64 characters or less
- Not start with a digit
The following name prefixes and exact names are reserved for Keycloak, the Keycloak operator, the JVM, Kubernetes, and Skycloak’s own scaffolding. They cannot be overridden:
- Prefixes:
KC_,KEYCLOAK_,KEYCLOAKIFY,JAVA_,JBOSS_,JGROUPS_,SPI_,DB_,POSTGRES_,KAFKA_,OTEL_,SKYCLOAK_,KUBERNETES_ - Exact names:
PATH,HOME,HOSTNAME,USER,PWD,TZ,LANG
Submitting a reserved name returns a 400 with a clear error.
Restart Behavior
Saving environment variable changes triggers the same Keycloak pod rollout as a feature change or HTTP-relative-path change. The operator reconciles the updated CR and rolls the StatefulSet; existing sessions remain valid through the rollover.
Auditing
Every change is recorded in Audit Logs under the cluster resource. The list of variable names is captured for review, but values are stored as [REDACTED] — environment variables are unstructured user input that routinely contains API keys, so the audit feed never persists them.
Limitations
- Plain string values only. Kubernetes
secretKeyRefindirection is not yet supported. If you need a secret stored in a Kubernetes Secret, contact support. - Variables are scoped to the entire Keycloak cluster, not per realm.
- Changes require a cluster restart (driven automatically).
Reading Variables from a Theme
Keycloak themes can read environment variables in theme.properties using the ${env.VAR_NAME:default} syntax:
parent=keycloak
AMPLITUDE_API_KEY=${env.AMPLITUDE_API_KEY:}
APP_ENV=${env.APP_ENV:production}
This is how Keycloakify-built themes consume runtime config without hardcoding values at build time.
Note: Custom environment variables are available on Business and Enterprise plans. Trial, Developer, and Launch users see the panel but cannot save changes until upgrading.